
One of the garden plants we were cutting back was a Eucalyptus caesia. This species of eucalypt is grown as a decorative garden plant, with silvery leaves, drooping foliage, and beautiful bright red flowers. In its natural habitat it grows in arid areas as a sparse spindly small tree or mallee. There are two main forms in cultivation: the really weeping version and a more upright version. The one we were cutting back was the more upright. The wood is very dense, even outside of its normal habitat.
 |
| An example of the version with with a more weeping habit. Pic thanks to Wikipedia. |
While up the ladder with the saw, the bent pieces of wood around about were talking to me. There's a couple of spoons in there, the tree was whispering to me...
When I made the first spoon from this tree, using a similar bent piece, I did not think would work. So I didn't take any pics along the way. That was a dopey move, as the spoon worked out beautifully!
 |
| This was the first spoon... or is it a mini-ladle? |
So it was time to have another go, using another one of the crooks.
This time, I was going to take pics throughout the process... well, I mostly remembered.
 |
| Two crooks to give up two spoons, hopefully. |
 |
| Love that right angle bend! The aim was to split it down the guts to get a spoon. |
 |
| Hewing with the hatchet completed. Now for some knife work. |
After the preliminary knife work, the next step was to start hollowing the bowl, using a small gouge.
 |
| Starting the bowl with a small gouge. This work is all done on the knee. |
 |
| Enough of the gouge for now... time to change to the hook knife. |
 |
| The hook knife does a great job of enlarging the bowl. |
 |
| With the bowl shaping completed for now, it is back to the Sloyd knife for the shaping of the spoon. |
 |
| After a bit of knife work, the spoon is shaped ready for drying. When dry it will then be further shaped using the knives, rasps and then sandpaper. |
When the wood is green, it is softer and easier to work. When the wood has been dried, it is much harder and so not as easy to work.
A bit of theory about green verses dry wood.
Wood in the living tree is totally saturated with water. It is found in the wall of the cell and it fills the voids in the cells themselves. When the plant is no longer alive, the moisture content of the wood tries to reach an equilibrium with the moisture content of the air around it, so the wood starts to dry out. The "free water" in the cell cavity tends to disappear before the water in the cell walls does. As the cells dry out, they shrink - some woods more than others. This is what causes "checking" or cracks in the wood - when it dries out too quickly, and the resulting stresses tear the cells apart. Various timber species behave differently, but as a general rule of thumb the slower the rate of drying and the smaller the section of timber, the less likely it is to split as it dries and shrinks. This is why Australian hardwood sawmills keep their log stockpiles under sprinklers while waiting to break them down through the saws - keeping them damp helps to reduce the de-grade of the logs caused by heavy checking.
 |
| Checking still visible,though greatly reduced, on the ends of these hardwood logs in a stockpile. |
Once milled into smaller dimensions, these sticks are then dried in the air in stacks and/or are dried in kilns (in order to push the moisture content lower than the ambient moisture content of the air.) Whether being air dried or kiln dried, the timber is piled in stacks which allow the even circulation of air around them, to ensure an even rate of moisture loss.
 |
| Sawn timber "stripped out" in stacks.The air circulation gaps on each side and face of every stick helps promote even drying. |
Working wood while it is still green has been used for millennia by people and communities all around the world. Differing moisture contents in components is used to ensure joints tighten over time, like in Windsor Chairs. This knowledge was accumulated and used for many centuries.
Most modern furniture and construction timbers are dried before use - often kiln dried.
In regards to our spoon, working the wood while green makes it easier to carve. Reducing the dimensions of the material almost to the finished article, ready for drying (as in the photo below), will help reduce the chances of checking as it dries.
 |
| Most of the shaping done. Time to dry it. |
Drying the green spoon.
Given the importance of drying slowly to help reduce checking, there are several ways to do this. I understand that the Swedes used to rub boiled potato into the spoon and leave it in a warm place by the fire for a night or two to dry the spoon. Burying the spoon in green sawdust/shavings will help it dry slowly over a period of time as the sawdust/shavings dry. Putting the spoon in a plastic bag and removing it for a few hours each day will also help with a slow controlled reduction of moisture content over time. Then there is the microwave...
The advantage of the microwave is that it can dry the wood in a matter of minutes rather than days - but it can also cook the wood so much that it splits it. So you must be careful. Different wood species will not all behave the same in the microwave. While in the USA, I dried a Black Birch spoon in three bursts of 90 seconds with about 10 minutes between each burst. The first Euc.Caesia spoon I made took about 10 bursts of 10 seconds. When I did an initial 20 second burst on the second spoon I nearly destroyed it. As a consequence it still bears some small cracking. This very hard wood needs to be dried gently in the microwave. It was a good lesson for me... no bursts over 10 seconds with this particular wood. It's all part of my continuing experiment with a range of woods.
 |
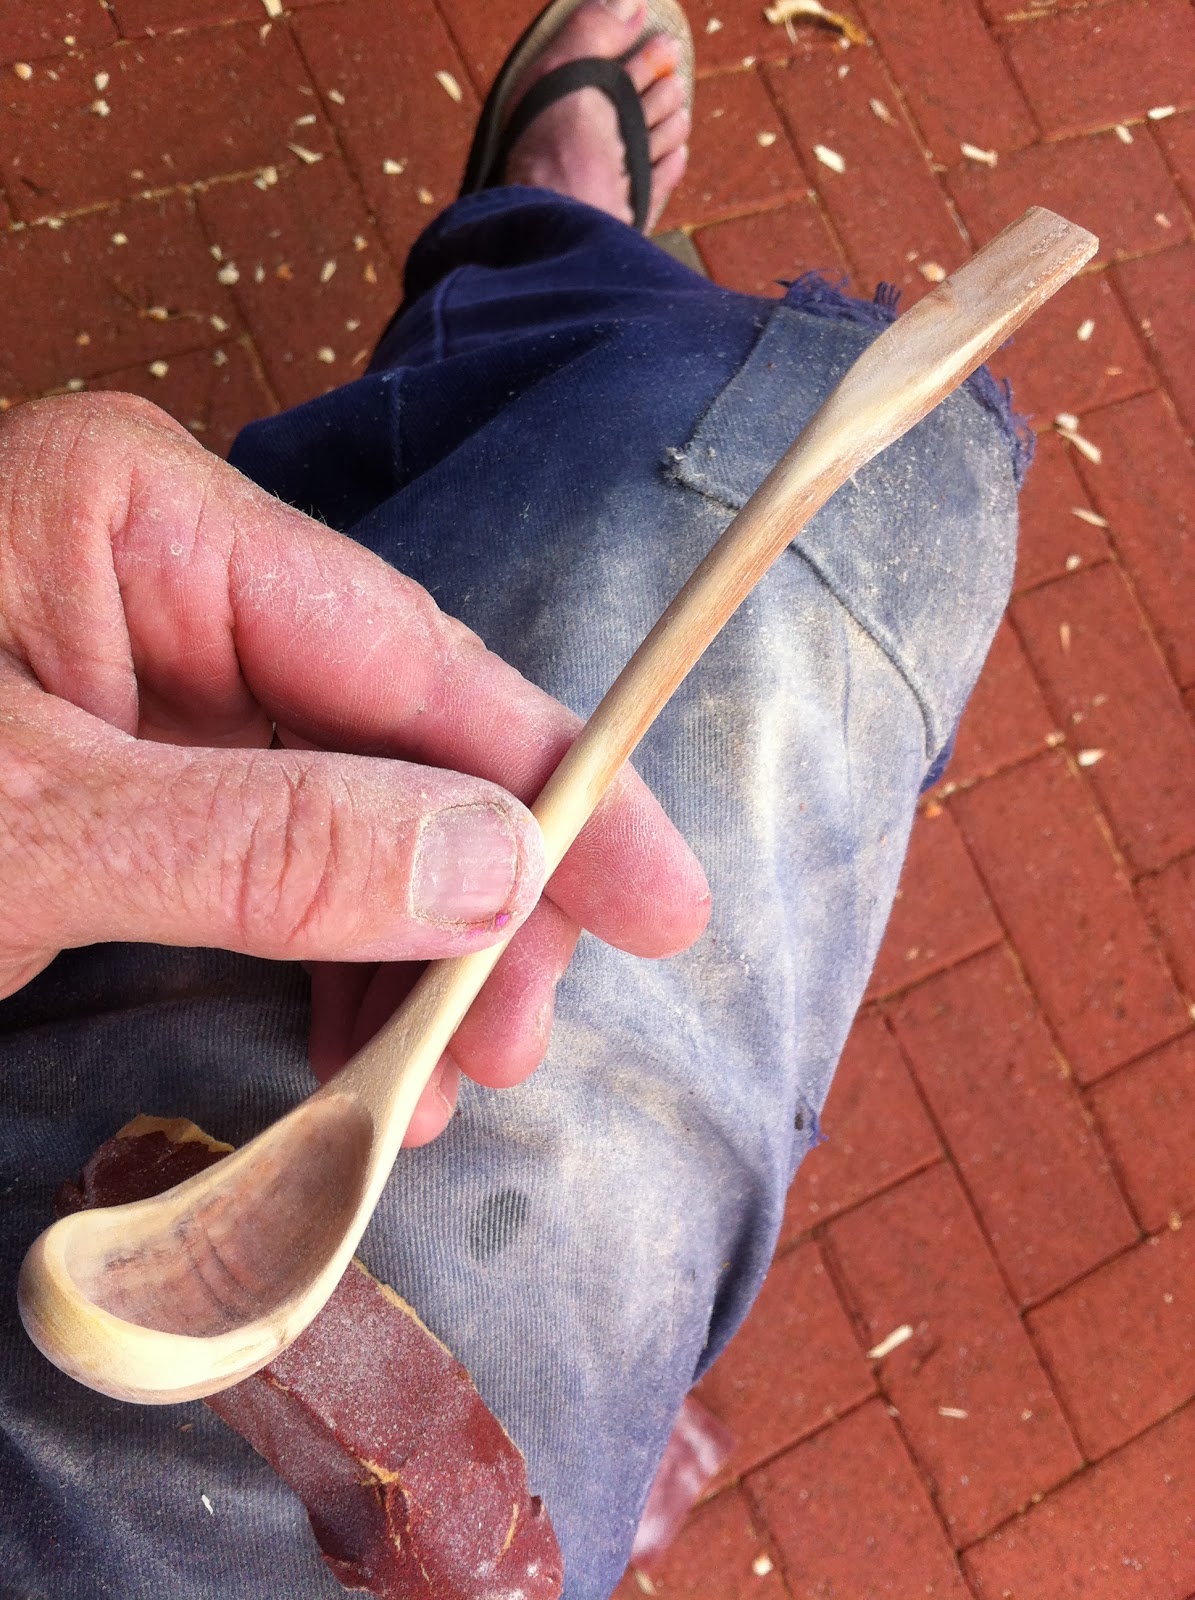
| The slight sideways curve in the handle emerged during the drying process. It reflects tension in the wood. |
How do you know the wood is dry? With these small bits, the general rule of thumb is to place it on your cheek when it has cooled. If it feels cold, it is still green, as moisture is evaporating from it. When it no longer feels cool on the cheek, it is probably dry enough.
The final shaping of the spoon.
With the wood dried, it could now be successfully filed and sanded to the final shape, texture and finish. I started with a half round file or fine rasp, The next stage was to sand the spoon surfaces all over to remove any marks left by the filing, to even out any bumps and unevenness, and to ensure there are nice smooth flowing curves and shapes in the handle, bowl and the transitions.
 |
| Sanding and Filing Dust. A sure sign that the wood is dry. |
With some woods, the initial knife work before drying will require hardly any additional post-drying work with rasp of abrasive paper. Some tougher woods, like the Eucalyptus Caesia being used to make this spoon, cannot readily be shaped by knife alone to a good enough finish to avoid filing and sanding.
 |
| Lookin' good. |
 |
| Completed spoon, ready for oiling. |
Applying a finish to the spoon.
A food safe oil finish is best. For these spoons I soaked them in a mix of Orange Oil and Pure Gum Turpentine, in a ratio of 3:1. The latter is a solvent which helps the Orange Oil to penetrate more deeply. After the soaking, any residual excess oil was ragged off. The resulting finish protects the wood,, gives it a nice clean matt finish, and makes it look like a million dollars. Nice.
 |
| Two beautiful spoons made from two crooks of Eucalyptus Caesia. |
The spoon on the left in the pic above was the first spoon I made, when I didn't think it would work. The second spoon, on the right, is the one whose making process I have documented in this story.
Too good to use? Nah...Both of them would be ideal for taking olives from a jar!


