The big jarrah cabinet I am making will bear a number of features borrowed from a couple of antiques which share the same room the finished cabinet will reside in. It's a nice way of making the 3 pieces of furniture sit together nicely. One of these features will be the front edge profile of the top section, the verticals and the shelves. I am seeking to create a close match to the tall antique sideboard in the room. The profile is like a pair of parallel lines, almost like a pair of reeds along each edge of the face.
 |
| The edge profile on the tall antique sideboard. This is what I aim to match. |
Creating an edge profile like this would have been traditionally done with either a specially shaped plane iron, in a wooden moulding plane - or it would have been done with a Scratch Stock. These are sometimes also referred to as Beading Tools.
Scratch Stocks are essentially just shaped scrapers, set in a wooden holder which determines the dimensions of the profile and helps to keep the profile consistent. They are easy to make and easy to use. While it is ground technically as a "scraper" and used as such, from here on we will refer to the metal part as a cutter. It will just make more sense to the readers I suspect...
A home made scratch stock.
In the past, I have always made my own scratch stocks whens I have needed them. Using a piece of sawblade, ground and filed to the required profile, housed in a wooden holder. The holder gives something to hang onto and sets the depth of cut and the distance from the edge. The pic below shows the stock, fence, and protruding profiled cutter.
 |
| Home made scratch stock for cutting the bead along an edge. |
The scratch stock pictured above was used for cutting the bead along the side of rebated meeting stiles on a pair of doors. I did a post about the making of a pair of
Rebated Doors a couple of years ago. The two pics below come from that post.
 |
| A home made scratch stock being used to cut the bead profile on a rebated door. |
 |
| The finished bead on the edge of the door. |
Using a Veritas scratch stock.
I recently acquired the wooden version Veritas "Beading Tool". I also obtained their very fancy metal one ... but I seem to prefer the wooden version. The fence on the metal one feels a bit flimsy. This wooden Veritas tool is the one I used to cut the edge profile on the shelf front edges of the jarrah cabinet I am building.
 |
| A pile of shelves and verticals, still to be cut to length and width. Ply tongues visible. |
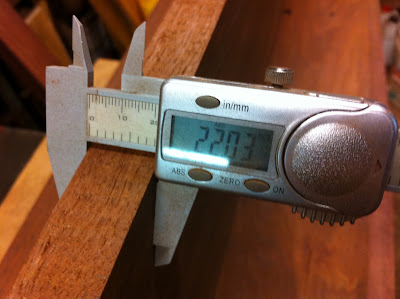
1. Material preparation. The boards were flattened and machined to 25mm, the meeting edges jointed, then a router was used to cut a 1/2" x1/4" slot along those meeting edges. 1/4" thick plywood tongues were prepared at just under 1" in width, and the boards glued and cramped up. The tongues help make the joints very strong. When the glue was dry, the cramps were removed and the boards machined down to 22mm (7/8") thick. This was a common dimension in older furniture, and looks very nice compared to the dreaded 19mm (3/4") which is so common in modern furniture.
 |
| OK, so we're three hundredths of a millimetre oversized. No drama. |
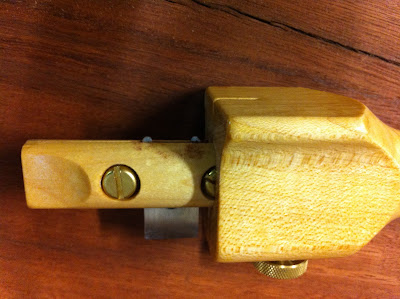
2. Making the cutter. I started with a blank cutter - one of the ones I bought from Lee Valley/Veritas. I bought a range of pre-shaped cutters too, but for this job I would need to shape my own from a blank. Sorry, I forgot to take a pic of the marking out and shaping process of the cutter. I then set the cutter in the wooden scratch stock by careful measurement, and tightened the holding screws.
 |
| The tool inverted. Those little "teeth" are spaced just right and the right distance from the fence. |
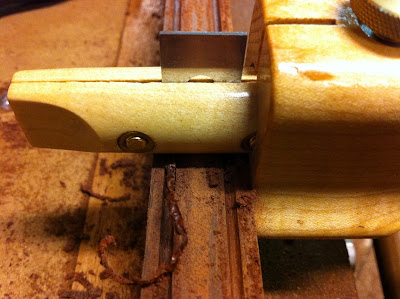
3. Creating the profile. The boards were held on edge in the vice along the front of the bench. Keeping a constant pressure with the fence against the edge (face) of the board, the tool is dragged or pushed along the length of the board, starting at a low angle and gradually tipping the tool towards the vertical with each pass.
 |
| The tool in action - shown minus my left hand on the protruding end of the tool's stock. |
I found the tool works best for me with the right hand on the handle/fence side doing most of the fore-and-aft driving, and the left hand holding the skinny end of the stock while pulling the fence against the edge (face). It is both pushed and pulled, depending on the quest for the best cut in the variable grain.
 |
| The forming of the edge profile here almost complete. |
 |
| Yep... that's just what I'm looking for. One down, lots more to go... |
 |
| A clearer (though unfocused) view of the edge profile. |
So there you have it. The scratch stock. It is a pretty handy tool, and can be made to create whatever profile is required. On tough hardwoods like the recycled jarrah I am using, they work a treat.
Commercial versions. However, if you are a tool junkie, you might like to have a look at the commercial scratch stocks/bead cutters available on the market. There are the
Veritas ones, like the wooden model I used above. Alternatively, you could keep an eye out for an old Stanley #66 Hand Beader (which Stanley made between 1886 and 1941).
Lie Nielsen also do a very nice but expensive version, based on the old Stanley.
Of course, if you are not seduced by shiny new tools, remember the home made ones can work just as well and can be made from scrap. Either way, here's a nod to the humble scratch stock. Commercial or home made, it is a very handy tool to have around...


.jpg)


