Wednesday, May 2, 2012

Kids Working Wood at Perth City Farm.

Perth City Farm is a great place. It was a pleasure to be involved once again in their April school holiday program for kids aged 6 - 12 years. Over five days, a heap of kids did cooking, woodwork, circus skills, garden sculpture, art & craft, and tasks around the farm and gardens. I ran the woodwork activities each day.

As well as free creative play with hammers, nails, saws, and lots of wood,  I offered different projects for the kids each day. These included kitchen spatulas, cheeseboards, message boards, garden planter beds, and Cajun drums.
Greg showing the kids different woods and where it comes from
Talking to some kids about the wood we are using. Photo courtesy Perth City Farm.
All the material we used was recycled timber, rescued from the waste stream - predominantly from packing crates and other packaging materials, etc. Much of this I had previously docked up ready for the kids to use.


Benches and space set up at the start of the program, with the "sawing station" on the front right.


Tool use.
The kids utilised a wonderful range of traditional hand tools, including hammers, spokeshaves, rasps, coping saws, tenon saws, hand saws, blockplanes, other hand planes, hand drills, and brace & bits.
The sawing station always gets a workout. Nice technique!
Nice stance! The sawing station makes it easy for kids to use tenon saws.
The "sawing station" is an important place. I have a rule with kids that Tenon saws are not used at the benches, but are only used at the sawing station. Cramped onto a pair of saw horses, there is a wide board each side. These each have two wooden stops screwed to them, creating two sawing positions each side which can be used either right of left handed. It is essentially like having 4 bench hooks in action simultaneously. The boy in the picture above is holding the piece he is cutting against the stop. I also have cramps for the kids to use if they want in odder to hold the work securely.  It is important that kids also learn correct technique for saw use, which makes sawing easier for them.

Pirate-mania. Zoe nails together a hilt for her pirate sword. Nice hammering technique!
A range of hammer sizes plus a range of bench heights help make it easier for the kids.
I have a range of hammer sizes available to the kids, and I encourage them to use hammers suitable for them and the nailing task they are undertaking. I also teach the "index-finger-on-top" technique for holding the hammer, as shown by the kids in the pics above. The hammers are all Warrington Cross Pein pattern - nicely balanced, and the best for kids to learn hammer use. No distracting claws. If nails need to be removed we use pincers.

Zoe pauses to closely check the bevel she is making on her sword edge with a block plane.
Using a small hand saw to cut out the sound hole on side of a Cajun Drum.
Using a brace and bit to drill drainage holes in the base of a planter box.
Using a rasp to shape the handle on a pirate sword, held in a vice.
I find kids are quick to learn how to use new tools and techniques, once they have a few basic tools under their belt. I continue to expand the array of tools I am using with kids...  


Project: Hardwood Salad Servers.
The kids mostly used coping saws and spokeshaves to make these. Finished with orange oil.  

Project: Garden Planter Boxes.
Garden planter box, made from recycling a glazing packing crate.
A completed planter box, lined with plastic and planted out from the Perth City Farm Nursery.

 
Project: Message Boards.
These were made from off-cuts of white faced Masonite cabinet backing, onto which the kids attached wooden frames. Ideal for whiteboard markers.
Nailing the frame and the border components together.
Time to test the completed message board.
Who made this message board?

Project: Cajun Drums.
Made mostly from plywood derived from packing crates from the USA, this was the first time I had done this project with kids. It was a real hit. Some of the components were pre-cut, and others were cut to size and planed to fit by the kids. Most of the boxes were made from 1/2inch ply, with the playing face made from 1/8inch (3mm) ply. Glued and nailed together.


The kids designed and cut their own sound holes in the side of their drum.  
Zoe leads the drumming. Cajun drums are sat on to play. They sounded fantastic!
Another shot of the drummers in action. They were doing a performance for the rest of the kids.

Such a great program. The kids rotated through the activities during the week, in smaller groups. However, we all came together to eat together each day for lunch, enjoying the food cooked for us by the morning's cooking group.
Enjoying lunch together. Great cooking, kids!

This guy wasn't the only one smiling at the Perth City Farm Holiday Program!

Tuesday, May 1, 2012

Three gigs, three locations, three days. Why?

A recent weekend I had was pretty hectic. Unusually, I was doing woodwork with kids in 3 different events over 3 days. Keeping an eye on 25 kids at a time using hammers, nails and saws is hectic enough, but the setting up, cleaning up, packing up, and moving it all to the next location is physically hard yakka.

Yeah, but the looks of delight on the faces of the kids as they created their masterpieces was worth all the sweat and tiredness...

Friday 30 March - Bentley Primary School Harmony Day Fair.
The School Fair was an event under Harmony Week. So appropriate for such a wonderfully multicultural school. Heaps of kids had a wonderful time making stuff with hammers, nails and saws.

Here I'm mostly set up and ready for the arrival of the kids. My small kids benches.
Parents love seeing their kids creating things with wood.
Being a Harmony Week event, many kids were wearing their national dress.
Kids quickly learn to use the bench vices to help hold their work...
 
Saturday 31 March - Hilton Harvest Twilight Festival.
This bunch of Community Gardeners in Hilton turn on a great event for the public which morphs into Earth Hour in the evening. Heaps of great family fun, including stalls, music, games and activities, and of course this year my woodworking area for kids...


He's too young to have known the KonTiki! His two pontoon raft has a sail and a hut on board.
This young fella was very proud of his recreation of the Titanic.

Sunday 1 April - Perth Sun Fair.
An annual event held at the University of Western Australia, the Perth Sun Fair is a renewable energy and sustainable living fair. I was in the thick of it all doing woodwork with kids, using only recycled timber, which had been rescued from the waste stream. My benches are all made from recycled timber too. Despite the odd shower of rain coming through, my woodworking area was hugely popular. I was really flat out once again, so have few photos to show for it all. 
I managed to get a photo of my area during a quite break in the crowd.
A couple of older kids made salad servers. Nice piece of New Guinea Rosewood.
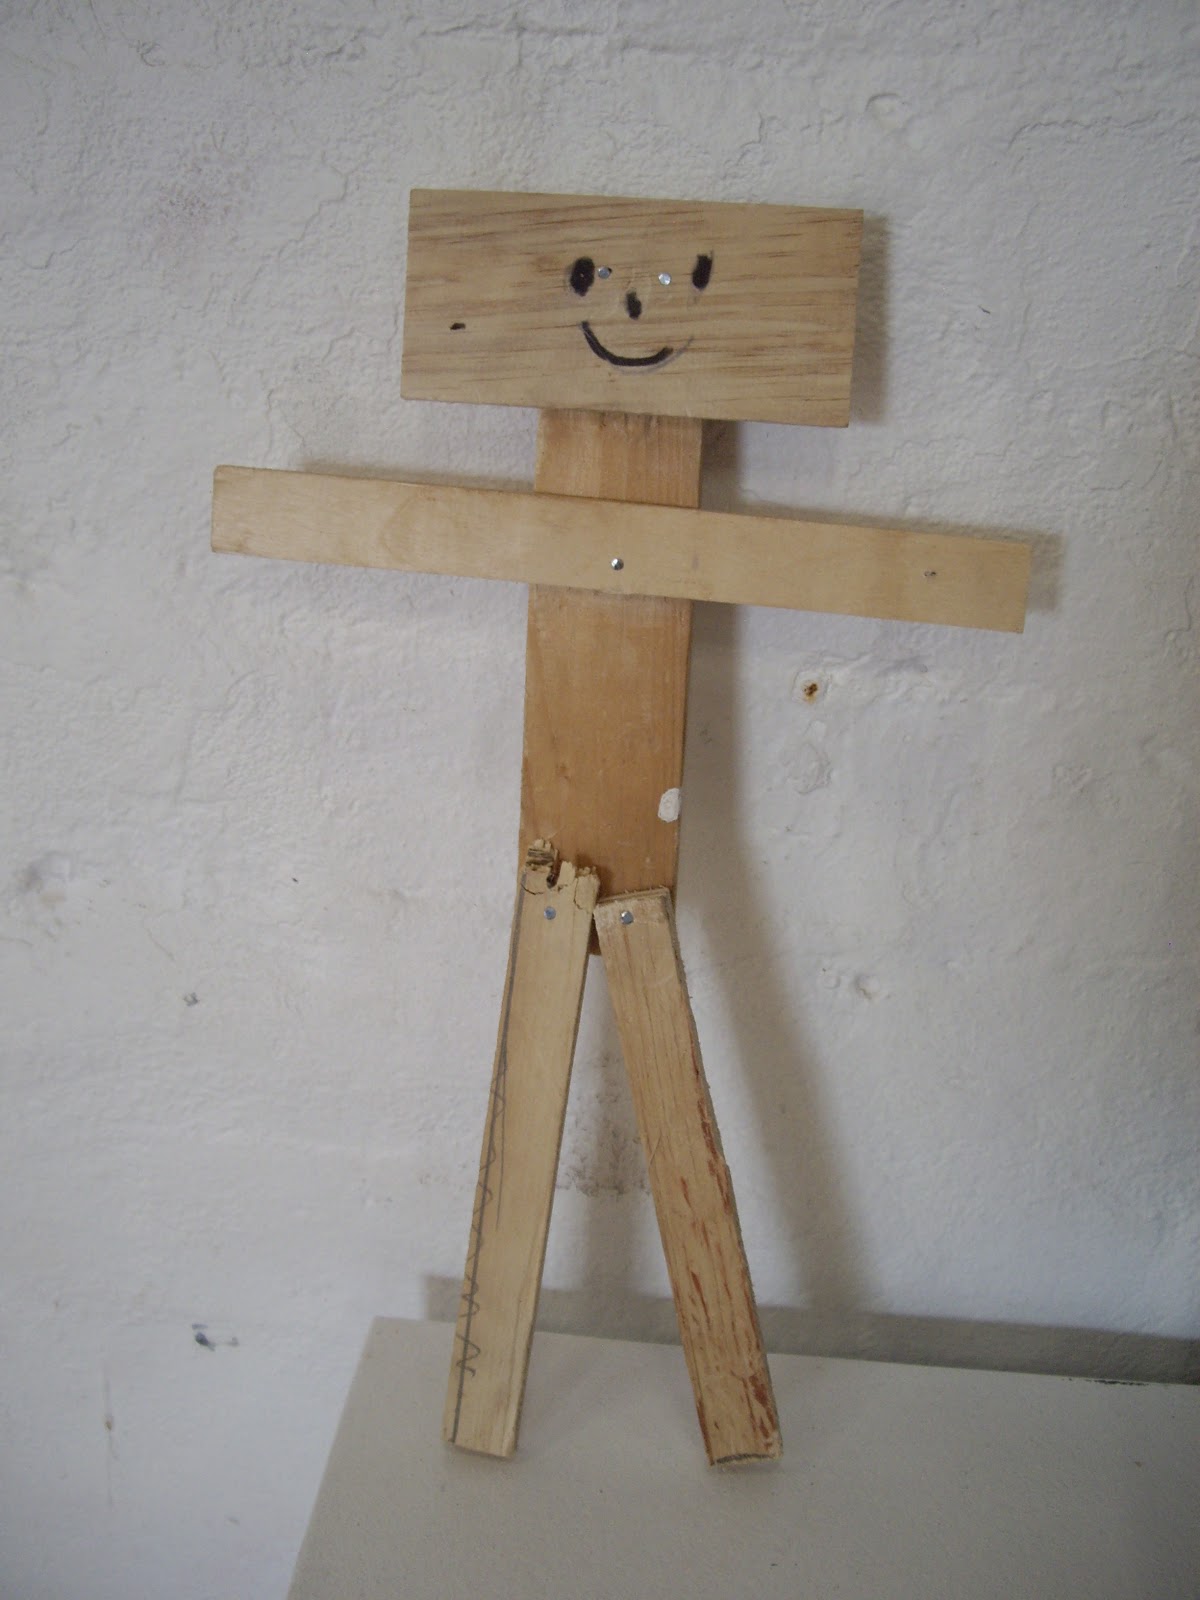
Nice robot!

 So why do I like to go to Fairs and Festivals offering woodworking activities to kids?
It's pretty simple really, though multi-faceted:
  • On a mission to bring back basic woodworking hand skills as life skills, I love to introduce kids to the delights of using hammers, nails and saws to create stuff.
  • Public events like this give me access to parents too. They love to see their kids using tools, mostly for the first time. We need parents to encourage kids interest in wood working.  When a kid afterwards asks their parent "Do we have a hammer?" - I reckon I've had a win. I also talk to parents about how they can encourage their kids, by supplying appropriate tools, etc.
  • Publicity. Teachers are often in the crowd. I hope to get approached by teachers about coming to their schools after they have seen the fantastic engagement of the kids at my benches. Adults also ask me about opportunities for them to have a go at woodworking. This exposure to the public also can lead to me running other woodworking programs.
  • Promoting wood recycling. I am also on a mission to communicate the importance of wood recycling. The Western Australian context here is our continued wastage of wood. Too much wood goes into land fill, or goes into low grade uses for landscaping wood chips. Perfectly good timber framed houses are smashed up by excavators every day, with little attempts to salvage the wonderful timber in them. It mostly ends up in landfill. Native hardwood trees with valuable timber are bulldozed and burnt each day to make way for mining operations and housing developments, with little or no attempt utilise this wonderful  and diminishing resource. In fact, small sawmillers are blocked from accessing this resource through red tape and a lack of vision by authorities. Successive governments, the building industry, developers and the general public are all complacent and complicit in this unsustainable waste of our limited timber resource.  A small voice I am, but as they say: "It's the slow drip that wears away the stone". So many people are unaware of the importance of wood and trees for carbon sequestration, and of the importance of timber as a re-newable, recyclable, low energy and sustainable building material. All the material kids use in my activities is wood rescued from the waste stream, including softwood packaging crates and pallets from all over the world. 
  • People. A youth and community worker by trade as well as a woodworker, I love seeing people blossom and thrive through the benefits of being creative, making stuff together, learning and using news skills, and using their hands. There is something therapeutic for the soul when we are creative with our hands. Wood is such a wonderful medium.

In a nutshell? ... It's all about introducing people to the importance of trees and the wonderful wood they give us, and the joy of wood working as a healthy, sustainable, positive, and live-giving thing to do...


Incidentally, this note appears at the top of my other blog, The Joy of Wood for Kids:

Warning to parents: If your child becomes interested in working with wood, this may result in a variety of physical, social, and mental health consequences.

Your child will develop hand-to-eye co-ordination, learn manual skills, grow in self confidence, find expression for their natural creativity, develop problem solving skills, develop a greater appreciation for trees, reduce their dependence on electronic entertainment, build muscle strength, increase dexterity with their hands, become handy around the house in future years, and may even develop a lifelong passion for woodworking. 

Saturday, April 7, 2012

Young and old, makin' stuff together.

Picture this: a bunch of grandfathers and their grandkids doing woodwork together... Yep, and they had a ball, too!

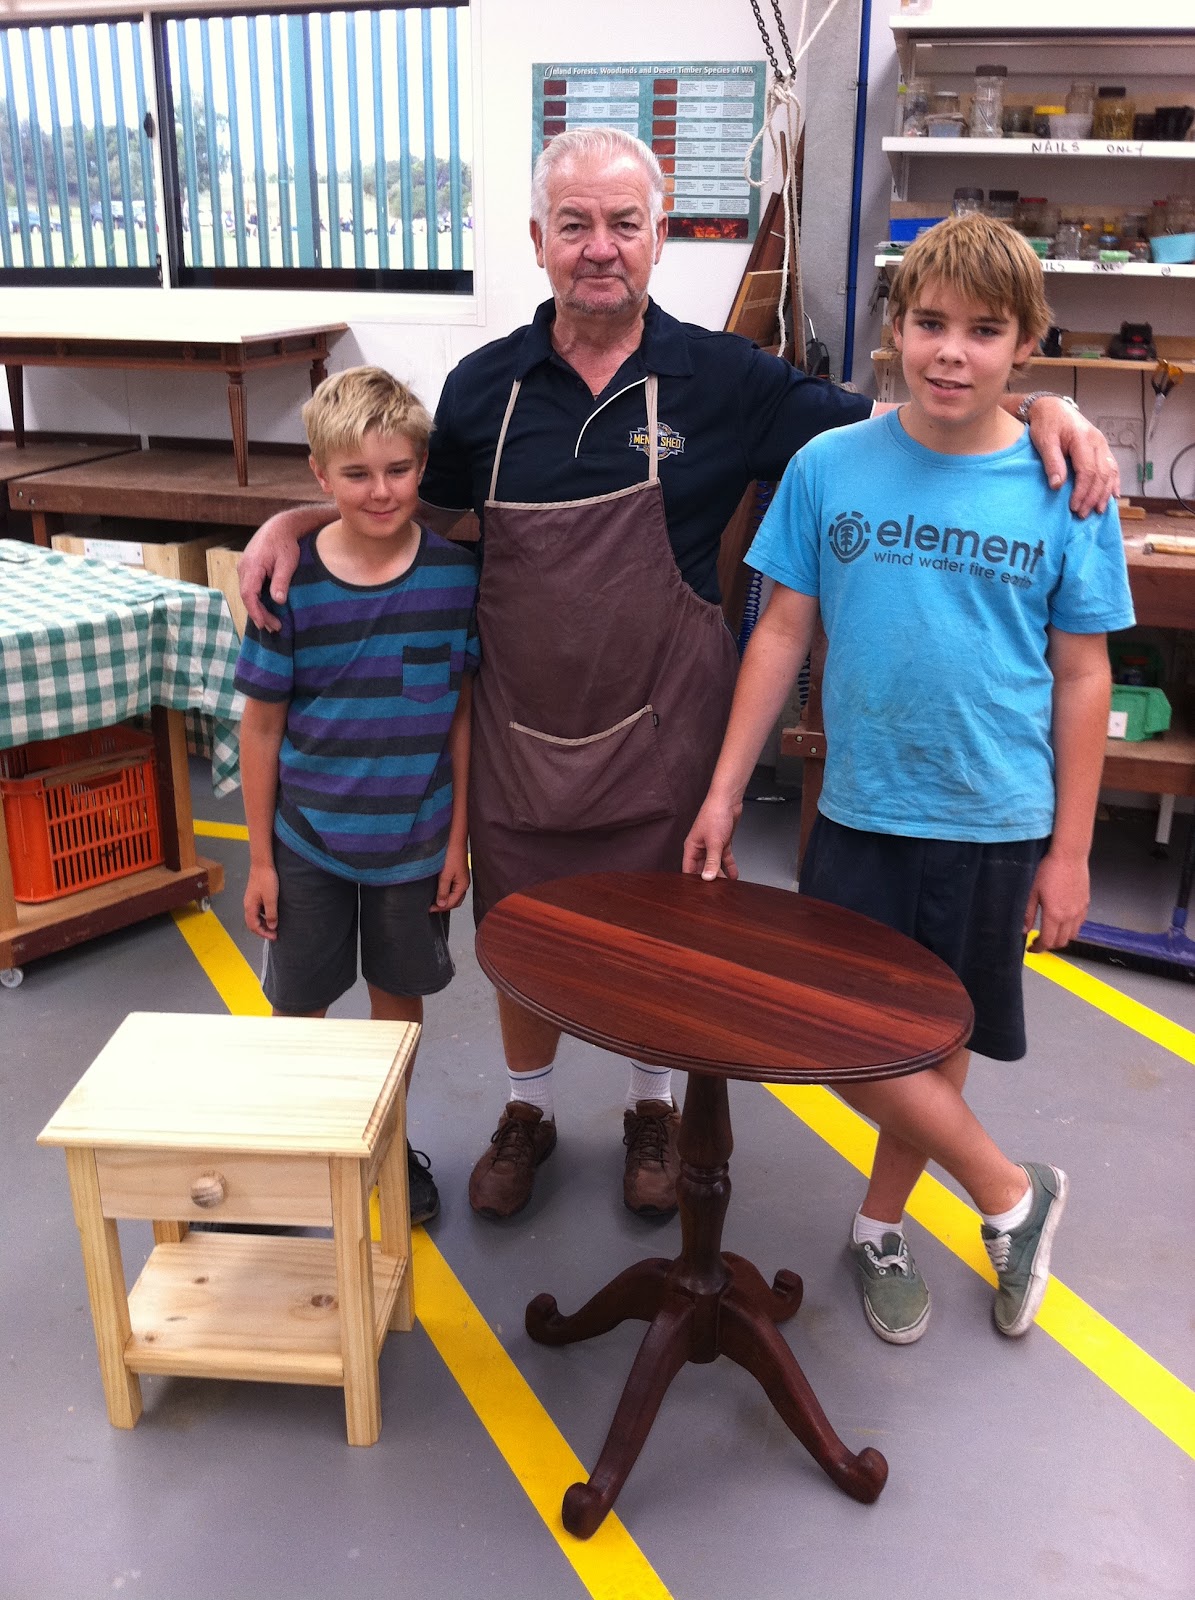
I recently had the pleasure of facilitating the "Intergenerational Creations" program at the Stirling Community Men's Shed. Over 5 consecutive Saturday mornings, a bunch of Grandfathers and grandkids came together to make stuff, at the wonderful facility, the Stirling Community Men's Shed. They have a fantastic woodworking workshop at the Shed, in regards to machinery and power tools - however it's not really set up for hand tool woodworking. We need to do some work on that front!

The promotional flyer for the program.
Getting started.
Initially there was no plan, other than the grandads and grandkids would be making things together. As the facilitator, my task was to put the meat on the bones, so to speak, and to enable and guide the whole thing to a successful conclusion. So how to do this? The projects we would embark upon needed to be meaningful, "do-able" for young and old, and achievable in the timeframe. In order to focus the energies and ideas of the participants, I decided to narrow the field down. We would make tables.

On Day One, after the introductions, I explained to the group the process ahead... We would be making tables together over the next 5 Saturday mornings. First, I lead a discussion where we explored the anatomy of a table. The essential ingredients, the range of variations and possibilities, the names of the components, and the likely cutting list considerations.  It would be up to the pairs and trios to decide together what type of tables they would make, whether they would make one each or one between them, and so on. I gave each small group some plywood, rules and pencils, and suggested they drawer a full scale front view of their table(s) in order to get the proportions right, plan the dimensions, and ensure they are clear on the direction ahead. Plywood set-out boards are far superior to paper, survive being kicked around the workshop, and can always be recycled into jigs or drawer bottoms when we have finished with them! 

The material we would use would predominantly be pine from Japan. Packaging, in fact, derived from crates holding huge tyres imported for trucks in the mining industry. These boards were about 14" (350mm) wide, over 1 3/" (45mm) thick, and around 7 feet (2.1m) long. There were also some 3" square pine sticks (75x75mm) from the same source and of similar length. I had several small tables there as examples which we referred to in our discussions, and the small groups got down to talking together and drawing. The first day ended with people starting to machine up timber for their projects. I had demonstrated how to use a jack plane and winding sticks to flatten one face of a piece of board in order to put it through the thicknesser. Then they got going. The mob were so enthused, it was very hard to get them to stop at the designated time! The program was off to a good start.

The following weeks were a hive of activity, with a range of tables coming together. There was oodles of enthusiasm, much to learn, and much sharing of information taking place. Some of the grandads did do some additional work on the more complex tables, and a couple of dads also came in to assist at times on the Saturday mornings.

By the time Day 5 came along, the final week, all of the tables were completed though not all were polished. One pair had made a spice rack together instead of a table, which was fine. The concluding BBQ together on that last day was a happy occasion with other family members there also. All were impressed with the wonderful array of creations that he been produced by these Grandads and their grandkids working together. 

The results.
Bert and Dermot made this nice little occasional table together.

Bernie helped Callam and Aiden make a small table each.

Ashley and Raff built this beaut desk together.

Alf and Aaron with the pair of bedside tables they made.

Daniel and Doug made this Spice Rack together.


David worked with James and Luke to make their tables. Their Dad's came and helped at times too!
The results go far beyond a nice bunch of tables and a spice rack, and a heap of happy people.
Over the 5 weeks, I observed so many wonderful moments. I was delighted to see the level of participation increasing, as the older guys increasingly ensured the young guys were engaged and involved. Information, ideas and experience were shared, and learning took place together.
It was the kind of working together that the program was originally designed to foster and facilitate. The program was a winner in many different ways. Thanks to the City of Stirling, the Stirling Community Mens Shed, to Ben and Mike and to the participants for their great contributions.

It was indeed a pleasure to share with these grandads and grandkids as we made stuff together...

Monday, March 26, 2012

Making a Marri TV Cabinet.

I have to admit it. I am not a big fan of Marri (Corymbia calophylla) as a furniture timber. Sure, here in Western Australia it is currently the most popular furniture timber in the furniture retail outlets...  but that doesn't encourage me to want to use the stuff! However, I had customers who wished their TV cabinet to be made from Marri, so after I was given the go-ahead I was off to the local timber merchant to pick through the racks.
Marri timber in the racks. Ex-inch and a half stock here, dressed to 175 x 30mm. 
Selecting the timber for the project.
You have to do a lot of digging in the racks selecting any timber, to get the good stuff - but with Marri there is much more digging to do as there is a lot of rubbish. One of the family of trees knows as Bloodwoods, most Marri is riddled with gum veins (kino). This gives the wood it's feature, but the down side is that much of the gum veins can fall apart and can be structurally unsound.
That's spalting on the right - in the sapwood. Sapwood also tends to get pinholes from Lyctus borer.
Classic big borer holes in Marri, loosely filled with a natural mixture of the larvae's sawdust and excrement.
Classic rampant Marri gum veins. Too much of this and the integrity of the timber is compromised. 
The common technique used by many furniture manufacturers is to pour black resin into the gaping gum veins. This looks good for a while, but personally I reckon it is not a good practise. It defies our understanding of timber technology. Pouring an inert material into big fissures in the timber, when the timber will move with changes in moisture content, just doesn't seem to make sense. Run your hand across a table top with resin filled chasms, a year of two after the table has been made, and you can feel the raised "speed bumps". On occasions the resin can separate from the timber, which is a real bummer. So my aim was to select timber which had some gum for the feature, but no gaping chasms.
The other challenge selecting timber from the racks is to find sticks which have no wind (propeller twist), almost no bow (bend on the face), and very little spring (bend on the edge). I rejected a lot of boards in the racks to find the few sticks I would purchase!
Another variation, where bands of gum are parallel to the board's surface. This stuff fritters.

The selection process. Board sections are selected, docked oversize, and here laid out to maximise colour matching etc.
Edges have been jointed ready to prepare for gluing up.
The story of Marri.
It's worth doing a deviation on the story at this stage, for the Marri story is an interesting one.
Endemic to the southwest of Western Australia, Marri grows in a broader range than Jarrah, but commonly in the same territory. Well know for it's characteristic fruit which are often know as Honkey Nuts or Gum Nuts, Marri was until recently lumped under the genus Eucalyptus. The botanists have since shifted all the Bloodwood sub-set into their own genus - Corymbia. Most people still think Marri is a eucalypt. The name Marri is a Nyoongar (local indigenous) name for the tree, which has been adopted as the most common name for the tree. Interestingly the gum (kino) from the tree has many medicinal properties which have been utilised by Nyoongar people for thousands of years. Mature Marri trees are a very significant for food and habitat for a wide range of bird and animal species in the southwest of Western Australia.

Marri is a very hard timber, with interlocking grain. Marri has an air dried (12%) density of  850kg/m3. For readers in the Northern Hemisphere, this compares to European Oak at 720kg/m3 and American White Oak at 760kg/m3. Not good for firewood, as it is hard to split and the burnt gum tends to block up chimneys. The gum veins break down in the elements, so it is not good for external construction. The gum veins hold a lot of loose material, so they can often break down. This can make it unsatisfactory for construction purposes, though it was sometimes used for construction out of the weather, like for rafters, joists and beams. This was not very common.
Classic Marri timber.
While a few people had played with Marri as a furniture timber over the years, it came into its own as a furniture material really by chance. Marri was mostly logged for woodchips for the paper pulp industry, from 1976 until 2001. Many millions of tons of these low grade chips were sent to Japan in that period. Every now and then a log would be found that had very few gum veins in it. Only about 1 or 2 logs in every ten are considered suitable as sawlogs, and there is no known reliable way to select these suitable sawlog trees from standing trees in the forest. These suitable logs found via the woodchipping industry were offered to the timber industry for sawlogs. The experimentation took place and gradually a small furniture industry grew up around Marri timber. Time passed, and by 2001 the Japanese wanted a higher grade cleaner greener product, not derived from native hardwood or old growth forests. The transfer across to woodchips from Blue Gum plantations had begun.

The resulting demise of the Marri woodchip industry had a big impact on the Marri furniture industry. The Marri logs available to the furniture industry come from areas of forest being logged for jarrah and karri, so most of the marri sawlogs tend to have lots of gum veins. Hence the use of the black epoxy resin as an effort to do high value adding to what is really a lower value timber than the furniture industry has traditionally used. The popularity of marri furniture is driving this, and the gum veins are the seen as feature in what would otherwise often be a featureless timber.
End grain of the glued up cabinet ends, showing the gum veins and the plywood tongues used for jointing.
Interestingly, if it wasn't for the gum veins, Marri would probably be Western Australia's most valuable timber resource, now that jarrah is gradually disappearing from the timber menu, due to reducing logging quotas and our changing climate . With the reducing rainfall over the last 40 years that has beset the Jarrah forest, Jarrahs are just not growing back as they did before. Marri has become an invasive species, growing faster than Jarrahs and surviving in drier conditions. The nature of the jarrah forest is changing, as the climate changes. Of course the changing jarrah forest was already underway due to the logging of the forest for the last 180 years. As a timber of limited value for well over a century, selective logging saw Marri trees left standing in preference for the highly valued Jarrah trees which were felled for sawlogs. The gene pool of higher quality jarrah trees was in this way gradually being reduced as Marri trees increased as a proportion of the forest. In the 1970's, the use of clearfelling coincided with the woodchipping era. Whole areas of jarrah forest were clearfelled with jarrah becoming sawlogs (or later logs destined for the silicon smelter) and the marri logs went off to the woodchip mill, to be chipped for export.

The loss of so many very old mature Marris from the forest during the woodchipping era has reduced the number of habitat trees available for so many of our native birds and mammals who need these hollows for shelter and nesting. Marri trees are very common in our famous wine growing areas of Western Australia. A summer flowering tree, wine growers are keenly aware of the Marri flowering. If the trees flower too late, the hungry Silvereyes (small native birds) will eat the grapes if netting is not used. If the trees flower before the vintage is ready, the birds will mostly leave the grapes alone. Marri flowers are rich in nectar and are an important food source for a great many species of birds, mammals, and insects. In so many ways, Marri is an interesting and important tree in the south west of Western Australia.

Making the cabinet.
After that little diversion, lets get back to the making of the Marri TV Cabinet my customers' had requested.

All furniture starts with an idea and a function in mind. My customers' initial drawing.
 Simple in design, the cabinet will have a big flat screen TV sitting on top, an open shelf underneath to house DVD players and other bits of media technology, and a pair of drawers under that to house a heap of DVDs and other stuff. Length 1500mm (nearly 5 ft), depth 480mm (19 inches) and height just over 520mm (21inches).
With the timber selected and the edges jointed, it was time to prepare for gluing. 
A 1/4 inch Slot-cutter bit in the router does a great job cutting the grooves for the plywood tongue.
Ready to go. The epoxy glue mixed up, the boards and plywood tongues ready, laid out on sash cramps...
The top glued up and cramped to dry overnight. The cabinet ends and mid shelf were done also.
The glued up end panels, now sanded. The protruding plywood tongues visible. Still to be dimensioned.
Dados, rabbets and housings cut ready for the cabinet clue-up.
The dry fitting in progress, getting ready for the cabinet glue-up.
The cabinet glued up and in cramps. It was left to dry overnight.
First coat of polish applied after the necessary sanding and preparation.
While the polish was drying, it was time to get on with making the drawers and the backing boards.
Cutting the dovetails for the drawers.
I always cut my dovetails by hand. I have done it enough over the years to do it quickly and accurately. Most of the time they come together with a nice snug fit, with no need to muck around paring and trimming to make them fit. However, it is still always a great source of satisfaction when that clean snug fit takes place on the first run!

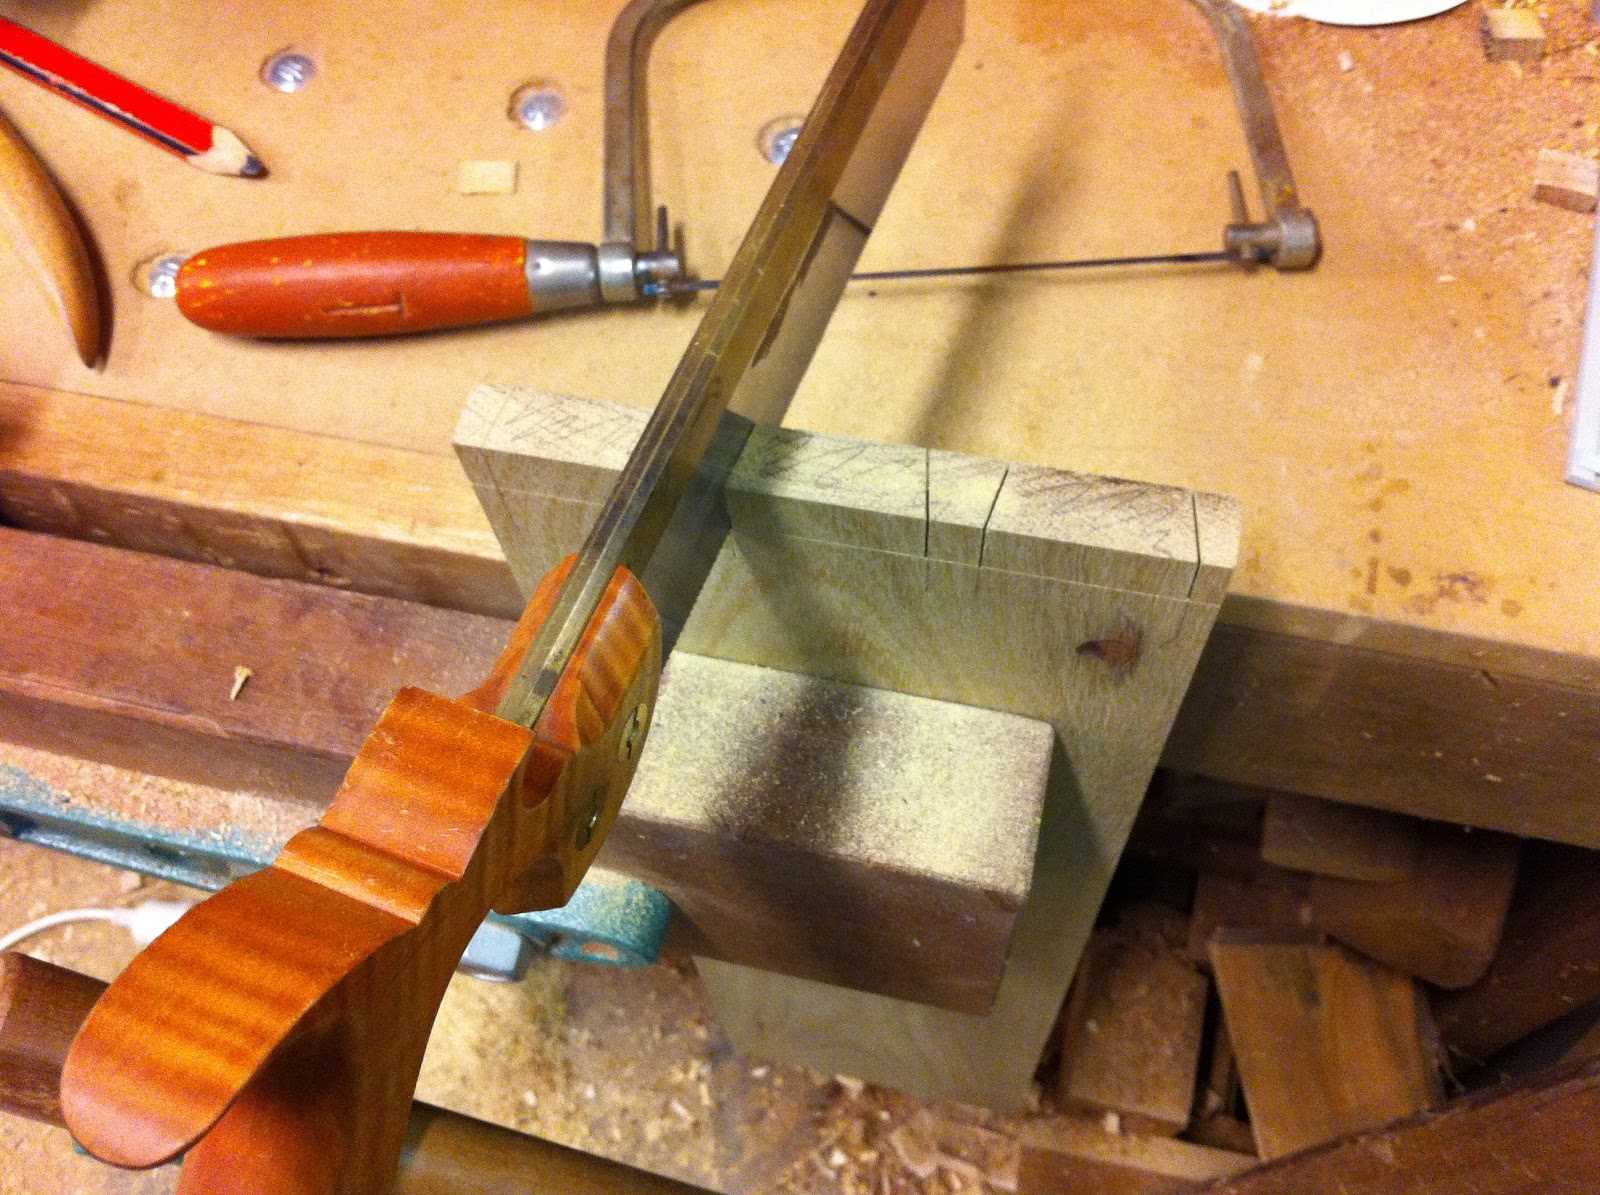
Having prepared the timber based on the dimensions of the drawer, the scribe lines are made and the tails are planned and marked out. Doing it tails first enables the saw cuts to take place through the whole stack of 4 drawer sides simultaneously. The stack is separated and the chopping out of the waste is done.
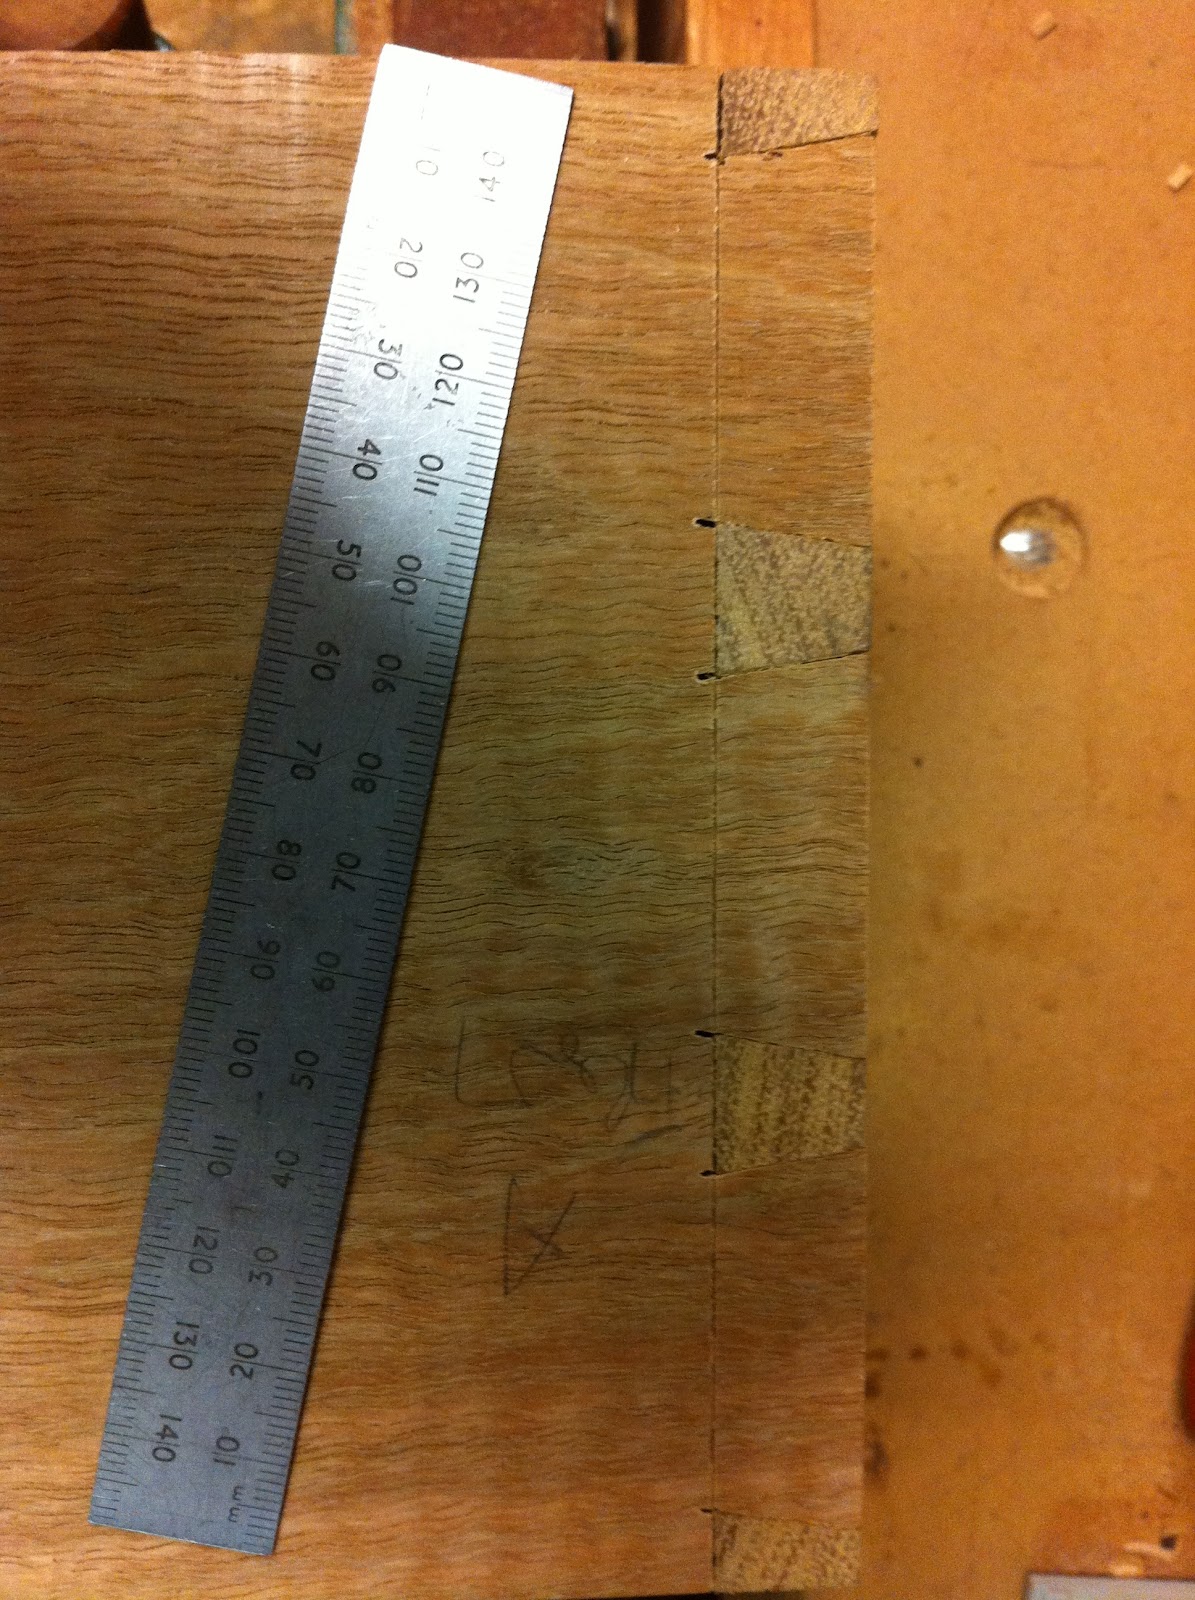
My trusty mallet and a bevel-edged Footprint chisels do their magic, chopping out the waste to form the tails.
The stack of drawer sides ready to mark out the pins.
Marking out the pins.Carefully lay the side in position and use marking knife to mark the pin positions.
Cutting the sides of the pins - on the WASTE SIDE of the scribed lines.
It's a nice fit first go... you beaudy!
With the dovetails cut for the joints on the front of the drawer boxes, it was time to make the rest of the drawer components. There are a variety of methods used for the rear joints of drawer boxes. The method I used here was to house the back into dados near the rear of the drawer sides.  The drawer base is housed into a groove half an inch above the inside base of the sides and the front. The drawer base is housed into the groove on those three sides, and is fixed onto the underside of the drawer back. The drawer base was made up from tongue and grooved boards I made up from off-cuts, running across-ways. All in all a pretty standard way of making drawers, old school. The difference here though was that my customers wanted the drawers mounted on metal self-closing drawer runners. These do have a very nice action! I was in a bit of a rush, so finished making the drawers without taking any photos. Unfortunately, I forgot all about it at the time...

Putting it all together.
After careful selection of timber, I was able to make up the most wonderful pair of drawer fronts from a few nice sticks I had dug up for the purpose from the racks at the timber merchants. Machining Marri is always interesting, as the pattern and nature of the gum veins changes as your remove each layer through the thicknesser. I was very happy with the result I was able to obtain. Lucky!

With the drawers made, and the drawer fronts too, it was time to fit the drawers. In this case I did the fitting first, and then removed the runners from the drawers and polished the drawers. I also cut finger grips under the drawer fronts, in case my customers agreed with me that the drawer fronts would look better without the metal handles they had talked about. They did agree, too.
Drawers fitted on the runners, drawer fronts fitted to the drawers. Time to polish the drawers.
How's those drawer fronts! Very nice indeed.
 Other than the final waxing of the whole cabinet, the last task to be done to complete the cabinet was to fit the back. For this I used V-joint Marri lining board, purchased from the timber merchant. At 8mm thick, it has a 65mm cover. I often make my own lining board, but the material available was OK for quality. I had docked the pieces to length and polished them, them cut some holes for cables and ventilation. 
The finished piece of furniture, ready for delivery.
I arranged delivery to my customers' home, and their process of transferring the media technology from the old TV cabinet to the new one began. A serious amount of cable spaghetti! Standing before the TV cabinet is an older large Marri coffee table. They fit together well.
The new cabinet fulfills its purpose.
Another job done, and some more happy customers.
I commenced this blog post admitting that I was not a big fan of Marri as a furniture timber. However, I have to say I did enjoy working with the stuff on this particular project. It was a nice change, and the hardness of the timber did make the dovetailing very easy. You can saw, chop and pare nice clean sharp elements of the joinery with a timber like this using sharp hand tools - so long as you avoid the gum veins. The most important thing of note from making this piece was the reminder that a lot more time needs to be spent working with Marri, being careful about gum vein quality and placement, and selecting the right stick for the right application. Did I use any filler or black resin in this piece of furniture? Nope. None at all. It took the couple of coats of the oil/varnish mix well, and the nice wax coating at the end made it silky smooth. A simple design, but a nice and functional piece of furniture. Thankyou, Corymbia calophylla.