Tuesday, February 22, 2011

A good day for a bargain.

I admit it. I love going to my local markets. Is it the delightful collage of people and languages buying and selling all manner of household bric-a-brac? Is it the thrill of the hunt? Is if the ever present chance of scoring a bargain? Yes, yes, and especially YES!

I am usually chasing tools at the markets. Sure, I have lots of woodworking hand tools. Some might reckon I'm a tool junkie. Teaching woodworking handskills to groups of up to 20 people, I need a lot of tools. Good quality old fashioned tools - not the cheap modern imported crap from the big hardware stores. Hence I have in my head a list of priority tools I am always seeking, and a list of tools I will be opportunitistic about given the right chance. Other than that I am always open to being surprised...

My grandaughter Paree with a bargain $5 wheelbarrow

Run by the local Rotary Club as a fundraiser each Sunday morning, anyone from the public can sell whatever goodies they have (except food) by paying a few dollars for a car bay or two in the local shopping centre car park to set up their wares. It is a cross between a giant garage sale and a car boot sale. I try to go early each Sunday morning, usually early enough that many stallholders are still setting up. This way I aim to beat the crowds and more importantly, beat the tool collectors. Tool collectors are a problem for me, as they help to inflate the prices of good second hand tools. Theirs will live in a box or a display cabinet, but I am seeking tools that will be used for the purpose they were intended. I can't afford to have 20 of everything at tool collector prices. So yes, I try to beat the tool collectors to the bargains.

Bargains. Some days there are none, but other days there are plenty. Ya just never know... that's the thrill of the hunt, eh?

Last Sunday I was there early as usual, at the crack of dawn. It takes me about an hour to cruize the hundreds of stalls, so off I went. I have been doing it for a few years so I have a good visual scanning system operating. I know what I'm looking for.
Sure enough, across several stalls I was to snap up a few good bargains:
A nice couple of 10 point panel saws. Not oldies, but good users just needing some cleaning up. A Disston and a Sandvik. At $2 each, they are a bargain just to cut them up to make cabinet scrapers! However they are worth sharpenning and putting in the pool for my group activities. They can be sharpenned until there is no blade left, unlike the saws with low grade steel and sharp but unsharpenable hard point teeth found in the hardware shops. Do the planet a favour and don't buy "disposable" hand saws!
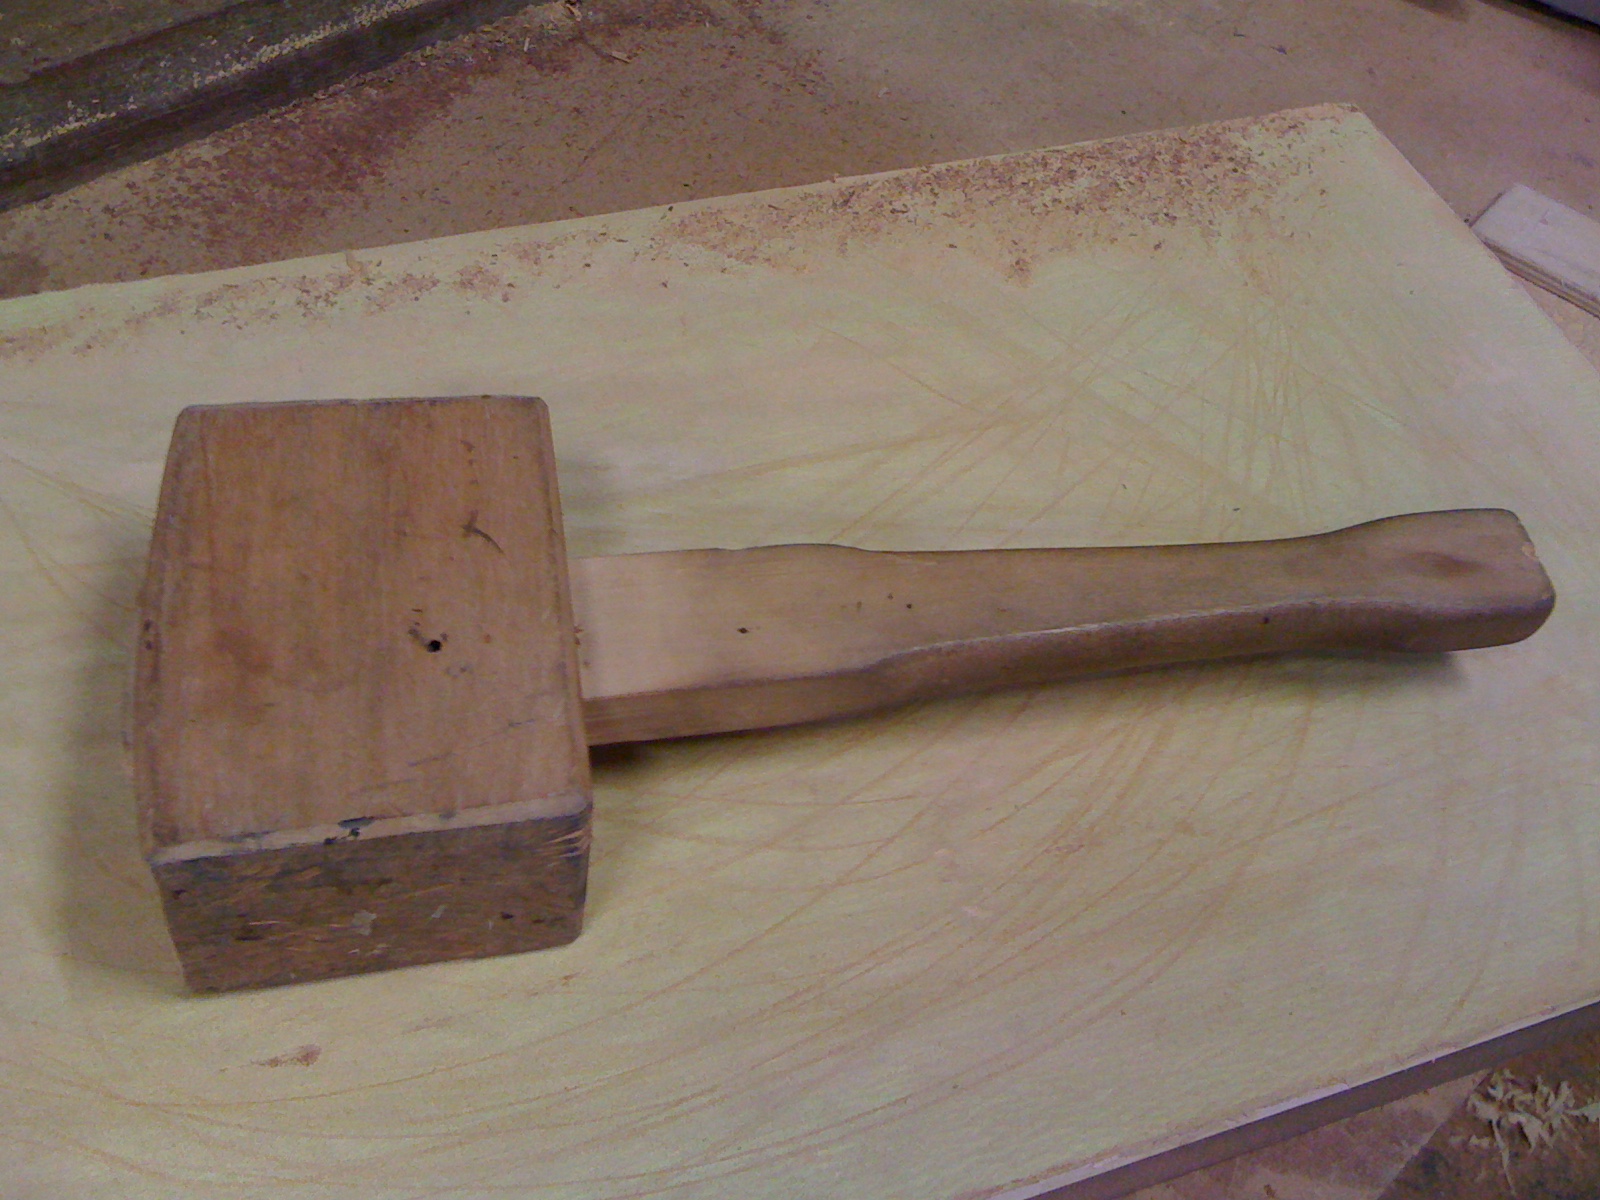
A carpenter's mallet. In good condition, and ready for more action. A steal at $3...

A beautiful 12inch x6 inch RICHA speed cramp, also known as an F-cramp. One of the best you can get - like any tools with "Made in West Germany" stamped on them. I have a heap of cramps, but no cheap and nasty ones. I bought 20 Richa cramps new in the early 80's. Little did I know what a good move that was! This one is a nice big one - and an absolute bargain at the $8 it cost me. Thankyou, Mr. Stallholder!
These old 6 inch vises are on my high priority list, as I use them on the kids benches I make. Nobody seems to make them anymore, so I continue to scour garage sales and markets looking for these. The 12 vices I have found over the last year are a mixed bag of brands, quality and condition. What makes this particular vise so desireable is it's a DAWN. This used to be the best quality brand available in Australia, from the days long gone when Australia had a booming manufacturing industry. This vice is in brilliant condition, so I could hardly contain my face-splitting smile when I shelled out a mere $10 for this incredible bargain!

A Stanley No.110 block plane - not with original handle! Someone had put a nylon bush on the front, but it is otherwise in excellent condition. Lucky I have a spare handle. But hey, I can always turn up  a new handle. This is going to be used heaps in my group activities, remember. It won't sit on a shelf. Block planes are also on my priority list. While these are a pig to adjust for beginners, I confess I have a soft spot for them. My father gave me my first plane, a Record No.110, when I was nine years old. I still use that plane every day. Can you believe the price for this nylon handled tool pictured? I paid $5!! This, folks, was the bargain of the day.  

This week there were no really interesting finds, like very old and desireable planes. Unless a tool collector got there before me and cleaned them out. However the "users" I scored this week had me leaping with joy.

OK, I'll stop bragging now. True, some days I come home with no bargains. Then there are those other days when I hit the motherlode.

...Is it nearly Sunday morning yet?

Saturday, January 22, 2011

Aahh!, the wonderful dovetail joint.

What is it about the dovetail joint that it seems to have such mystique these days? In the past, it was just a standard every day method of jointing timber. Maybe it is the prevalence of new technologies and techniques better suited to mass production, man-made panel products and flatpacking which has lead to the growing fascination for this traditional joint. Most woodworkers creating dovetail joints nowdays use screaming routers aided by finely machined metal router jigs to cut these joints. Sure, they are sharp and crisp joints, but the journey is just not the same... there is something wonderful about using your hands and traditional hand tools to make a nice dovetail joint.

If you are interested in how to cut these joints by hand, I invite you to follow through the process and come with me on the journey.

Half-blind dovetails on the top edge of some sheoak bedside cabinets under construction.

I am one of those people who does not own a dovetailing router jig. I cut my dovetails by hand, just as it has been done for centuries - though on occaisions I may use use a bandsaw or a drill press instead of a coping saw to help with faster waste removal. The hand cutting of dovetails can be almost as fast as setting up and mucking around with router jigs. The key of course is good marking out, quick and accurate hand sawing, and good chisel work. Sounds like a whole lot of satisfaction coming up! The joy of woodworking...

Getting started.
Firstly, we need some pieces of timber to join together. The pics through this story were taken during the making of a sheoak bedroom setting for a customer. This involved cutting "through dovetails" in the making of 6 drawers for the bedside cabinets, and 4 big drawers under the kingsized bed, and the cutting of "half blind dovetails" for the jointing of the bedside cabinet carcasses and the bed frame. All of the timber started out as 6"x1" material. The cabinet sides and tops were glued up using "lightning joints" to create the big panels which were 21mm thick, as were the big drawer components which were 19mm thick. The bedside cabinet drawer components were 14mm thick, and were butt jointed to bring the compenents to width.
The bedside cabinet side panels completed ready for the dovetail joints.  

The marking out - tails first.
We are about to make the drawer boxes. These will be "through dovetails".
There are many different ways of doing this, but for this job I have created a "story stick" which is being used across all of the dovetails in this partticular furniture set. A piece of scrap timber has the pin and tail spacings marked out on it. There are two sets of these markings, one at each end of the stick.  One set has all the pins and tails 1mm wider than the other set. This way the best fit can be found for each drawer side, but they will look consistent. It makes marking out quicker too. With the drawer sides selected and arranged in their pairs, first the bases lines for the pins and tails are scribed all round each piece. Several pairs are then cramped together with the scribed ends lined up flush, to mark the tails on the ends.

A marking gauge is used to mark the base lines for the pins and tails. These lines will be 1mm wider than the drawer side thickness. 
Some woodworkers argue whether it is better to cut the pins first or the tails first. It really doesn't matter. Whatever works for you, I reckon. Me? I am a tails first person. Why? Because that is the way my father taught me to do it many years ago. It still works nicely for me every time!!

Marking the tails on the ends or two pairs of drawer sides, using the story stick.

A marking knife and square are used to transfer the tail markings across the ends of the drawer sides.

The sliding bevel is used to transfer the scribed lines on the ends back to mark the tails. A 1:7 angle is used here. A pencil is used, marking well beyond the scribe line for the base of the tails.

The lines on the very ends of the drawer sides are scribed, to aid very accurate sawing square to the face. A pencil is used to mark the waste. The sides of the tails are marked with a pencil, as the accuracy of the cut is not as important on this plane. The pencil lines go well beyond the scribed base line to assist with the sawing which is done by eye following those pencil lines, stopping at the scribed base line. 

The marking out of the tails on the drawer sides is complete. Time to start cutting.

Cutting the tails.
It is easiest to cramp the drawer sides in a vertical position such that the group of lines being cut are vertical. This is easiest for the eye, making for accurate cutting. Then the piece is tipped and re-cramped so that the other group of lines are vertical. The saw kerfs are cut accurately on the waste side of the scribed line and following the pencil lines, own the the scribed base line of the tails.
Cramped so that one group of lines being sawns is vertical. When these are all cut the drawer side is turned so that the remaining lines are vertical - it is much easier to make the cuts this way.
My wonderul Lie-Nielson 15point rip sharpened dovetail saw is an absolute pleaseure to use for this task. Quick and very accurate. Cutting down to the scribed base lines.

Chopping the waste from between the tails. All those parallel cuts in the waste were done on the bandsaw to speed up waste removal. Traditionally you would use a coping saw. Careful chisel work from both sides to the scribed base line is what we are seeking here. 

That's what we are looking for! One of the drawer sides with the tails cut. Then it is on with the next one...

A whole bunch of drawer sides with their tails cut. Time to mark out and cut the pins.

Marking and cutting the pins.
With the drawer end held vertically low in a vice such that the drawer side can be laid on the top at 90 degrees, this enables the accurate marking out of the pins.
The base line of the tails is lined up perfectly with the inside face of the drawer end below it. A marking knife is then used to carefully scribe the positions of the tails. A pencil is then used to mark the sides of the pins at 90 degrees to the edge.  
 With the tails marked out, the cutting to the base line is done - making sure to be right on the waste side of the scribed line, for nice firm fitting joints! Cut on the wrong side of the line and you get a useless sloppy fit.

Once again the waste is removed with careful chisel work from both sides down to the base line, resulting in a nice set of pins. As this is a drawer front side, the same will be done to the opposite end also.

A whole bunch of drawer front sides with their pins cut ready to go.

Bringing it all together.
Having done all that marking, sawing and chopping, the moment of truth finally arrives when we put the respective pieces all together. 
  The moment of truth! The two parts of the joint, the pins and the tails, come together... like a dream.

These two parts should be able to be hammered together as a firm fitting joint. Too tight and something will split, so some trimming may be required to avoid this. However in this case no trimming was needed. If fact, no triming was required for the whole 12 joints required for these  6 small drawers. Each was a perfect and firm fit. I reckon there is nothing quite as satisfying as these joints coming together so beautifully first go!

Nice! Another good fit. Note that the extra 1 mm of overhang we had allowed for is there on both sides, to be cleaned up after the drawer has been finally assembled and the glue has dried in the joint.
It is a beautiful thing... no gaps and no filler. Just a good honest joint.
  
 If you were wondering about the fitting of the rear end of the drawers, in this case the rear joints used are a housing joint. The dovetails are only used on the front two joints of the drawer box. The groove for the drawer bottom is cut within the bottom tail of the joint, so that it is not evident from the outside. Cutting in the pin area would be a mistake!

A drawer box glued up and ready to be cleaned up and polished.
These drawers will have an additional drawer front attached to the front of the drawer box. If the visible drawer front was also the front of the drawer box, then a different type of dovetail joint would be used - a "half blind" dovetail joint. 

What about those half-blind dovetails?
The bedside cabinets each house 3 drawers. These cabinets sides are to be jointed to the top by way of half-blind dovetail joints, as there was to be no overhanging top. It will create a nice edge joint feature.

The marking out of this joint is different, as the tails do not go all the way through the adjoining piece.
   
These joints are 480mm long. That's a lot of tails to cut!
That's a lot of pins to cut as well...
A forstner bit was used in the drill press to speed up the removal of the waste when the pins were being cut. The cutting of the pins for a half-blind dovetail requires very accurate chisel work. Too many opportunities for nasty gaps! 

The base shelf of the cabinet is housed in a stopped trench. These joints must be fitted prior to assembly of the cabinet. The half blind dovetails have already been cut and test fitted in a "dry run".  

Here it is, the cabinet joints all glued up and ready to get cleaned up.
Cleaned up and polished. One of the joints at the top of the bedside cabinets. A good example of a half-blind dovetail joint.

So there you have it. The wonderful journey of joining two pieces of timber in a tried and proven traditional method which has both mechanical strength and aesthetic beauty. And no noisy routers.

Dovetails are such a delight to create using my trusty hand tools, and so satisfying to the soul... 

Wednesday, December 1, 2010

Woodworking, East Timor Style.

I have just returned from 3 weeks in East Timor. This was my fourth volunteer stint in East Timor in the last 3 years. Once again I was there to assist with building projects, in support the work of the local NGO, Fundasaun Lafaek Diak (The Good Crocodile Foundation).

Whenever I am in East Timor, I like to take pictures of carpenter/joiners at work. There is building going on everywhere, so little carpentry shops are busy making large numbers of windows and doors, as well as other items like furniture and coffins.
A pic of some fairly standard windows and doors in a new house. Vents above are pretty normal.

East Timor was a Portugese colony for 450 years. The older joinery from this era is beautifully made, in the traditional european methodologies and techniques. Wedged mortice and tenon joints, etc.
However, Indonesia invaded in 1975, and from this period until Independence in 2002, the Indonesian way of doing joinery was to become the norm. It still is the way things are mostly made. The joints in windows and doors are primarily stub mortice and tenon, pegged but not draw-bored. Glue is not always used in the joints. Quality tends to be poor by western standards, probably limited by the rudimentary tools and equipment available to tradesmen, and the lack of training and skill development opportunities. The timber used is usually fairly green. Buzzers and thicknessers are very rare. When power is available, timber is ripped to size with home made table saws, docked to length with power saws and dressed to size via the use of power planers.

Table Saws
A typical home-made table saw.
A power saw is fixed to the underside of the top, as per the pic below.


Gaspar setting the fence on his table saw.

The table saw in action, ripping door stiles to size.

At a different joinery shop, I found out how the fielded panels are made using a table saw...

These doors have been temporarily put together ready to measure up and make the panels.

A stack of door panels ready to go.

Question: the Profile of the panel... how was it made?

Answer: An angled fence was used to cut the profile around the panel, on all sides. Simple but effective.

These guys make a lot of joinery using the table saw in their workplace.

Dressing timber.
Most timber starts out as big flitches, usually measuring 8" x 4" x 13 feet long. They are broken down sometimes in the timberyards over big old sw benches and sometimes by the carpenter/joiners themselves using their table saws or power saws. Once broken down, then need to be dressed to the final dimensions. However buzzers and thicknessers are a very rare commodity...
Mataeus using a power plane to dress up a stick into a door frame stile. This is the standard method, tool and bench combination used all over East Timor for this task.
This power planer is a monster! It has 6 inch blades. Here used to dress an 8 inch wide board. 

A hard working power planer. The sound of these workhorses is ever present in the background of the cities of Dili and Baucau and hundreds of villages around East Timor at the moment. There is a lot of builiding going on.

Hand Tools.
Power is intermittent and in many places non-existent. All carpenter/joiners have a few hand tools which they use. Good quality tools are very hard to find, and too expensive for most people to afford. Improvised tools are a common sight.

These tools were on the ground where they were being used. Good quality claw hammers are hard to come by. This one has a bent handle just below the head. Then of course there is the gympie, too.
It is common for tradesmen to work on the ground. Let's have a closer look at some of these tools:

 This bevel edged firmer chisel has had the wooden socket handle replaced with a nut and a piece of water pipe.

This small handsaw has been sharpenned many times. There is very little set on the saw teeth, and the teeth are filed at a low angle creating longer teeth than we would use in the West.

 Mateaus is skilled in the use of his small adze. Here he is shaping the horns on the tops and bottoms of the window frames. This will be used to house them into the masonry walls.

A home-made wooden plane. Instead of a wooden wedge the blade and chipbreaker are held in place with a bent piece of mild steel rod. The plane iron has come from a standard No4 or No5 metal plane. These irons are also commonly used as chisels, developing an amazing mushroom end through use!

What every carpenter needs. A bucket of nails. Most nails available are flat heads rather than bullet heads.

This mortice guage I found at a different carpenter/joiner's shop. The spurs are made from nails.

Workshops.
Most workshops are a room and/or an open space under a roof at the front of the house.  Here are a couple of pics of different carpenter/joiner workshops:

Church pews under construction at this workshop in Baucau.

I took this pic in the village of Beculi a couple of years ago. A very typical small workshop.

Gaspar outside his home and workshop.

Another joinery shop, this one outside of Baucau. I bought some nice teak from this establishment.

A bed head under construction.

A tradesman at his bench in his workshop.

Across nations and cultures, there is so much that we woodworkers have in common. I am reminded of this whenever I am in East Timor. I love to visit joinery shops and talk to carpenter/joiners (within the limits of my Tetun language skills!)

While we may use some different tools and different techniques, there is something at the core which is common to us all.  It's a wonderful thing, eh?