Friday, August 31, 2012

How to cut tight fitting Dovetail joints. (Recycled Jarrah Cabinet, Part 3).

The big recycled jarrah  cabinet continues to take shape. The top sections of the cabinet will primarily be used for the housing and displaying of ceramic art pieces. The bottom sections of the cabinet will house some serious HIFI and media gear, plus as many LPs, CDs & amps; DVDs and as muchother technology as we can creatively fit within the space available.

I am currently working on the lower section of the cabinet. The longer section is quite deep, and the return is very shallow in depth. In this shallow section, behind the pair of doors, will be two storage bins for good old-fashioned vinyls - LP Records. In an effort to maximise the space available, I have been making another pair of bins to hold as many audio CDs as possible. The space left over will be divided into small shelves to hold more CDs. The bins will be hinged to fold outward in order to access their contents, and these bins will be held together by dovetail joints, with Half-blind Dovetails at the front and Through Dovetails at the back.

Marking out and cutting the dovetail joints.
With the sides, ends and faces of the boxes a consistent thickness, marking out the Through dovetail joints requires the use of only one marking gauge setting - approx 1.0mm wider than the thickness of the material. This leaves a tiny bit to clean off after the glue has dried. I am one of those "tails first" woodworkers.
Marking out the Half-blind dovetail joints, two marking gauge settings are required. One will be as above, about 1.0mm wider than the thickness of the material. The other will be the length of the tails - in this case 3.0mm less than the material thickness of 14mm. These tails will be 11mm long.

The tails are always cut in the sides of drawers and containers. With use of marking gauge, sliding bevel, rule and marking knife, the tails are marked out. In this case, there is a difference in the marking out on each side piece, as the front joints will be half-blind dovetails and the back joints will be through dovetails. Regardless, all the tails are cut first. When doing the marking out, the only pencil lines needed are on the ends and one one face. Note on the pic below that the pencil lines off the sliding bevel are marking the tails deliberately longer than required, extending well below the scribe line which marks the base line of the tails. These long pencil lines make it easier to make sure the saw follows the correct angle. No lines re needed on the other side of the piece.  The bevel was set at 1:6.
A side piece held in the vice ready to do the first set of cuts.
It is always easier for the hand to make cuts vertically than on on an odd angle, so the piece is held in the vice for sawing such that one line of pencil lines is vertical. Once these are cut, the piece is turned in the vice so that next set of lines are vertical, enabling more accurate and consistent cuts to be made.


A nice little dovetail saw makes the cuts with ease and makes a very tiny kerf.
A note for the tool junkies amongst you - that beautiful little saw is English, a Marples dovetail saw. Accurate sawing involves carefully cutting down the waste side of the sharp line, to the base line. It is better to over-shoot this line than to come up short of the line. These are hand cut dovetails, and a good look at old furniture/drawers shows that it was common for these lines to go a little beyond the base line. I have no problem with the odd overshoot with this stage of the joint cutting!

Main cuts for the tails completed, down to the scribed base line.
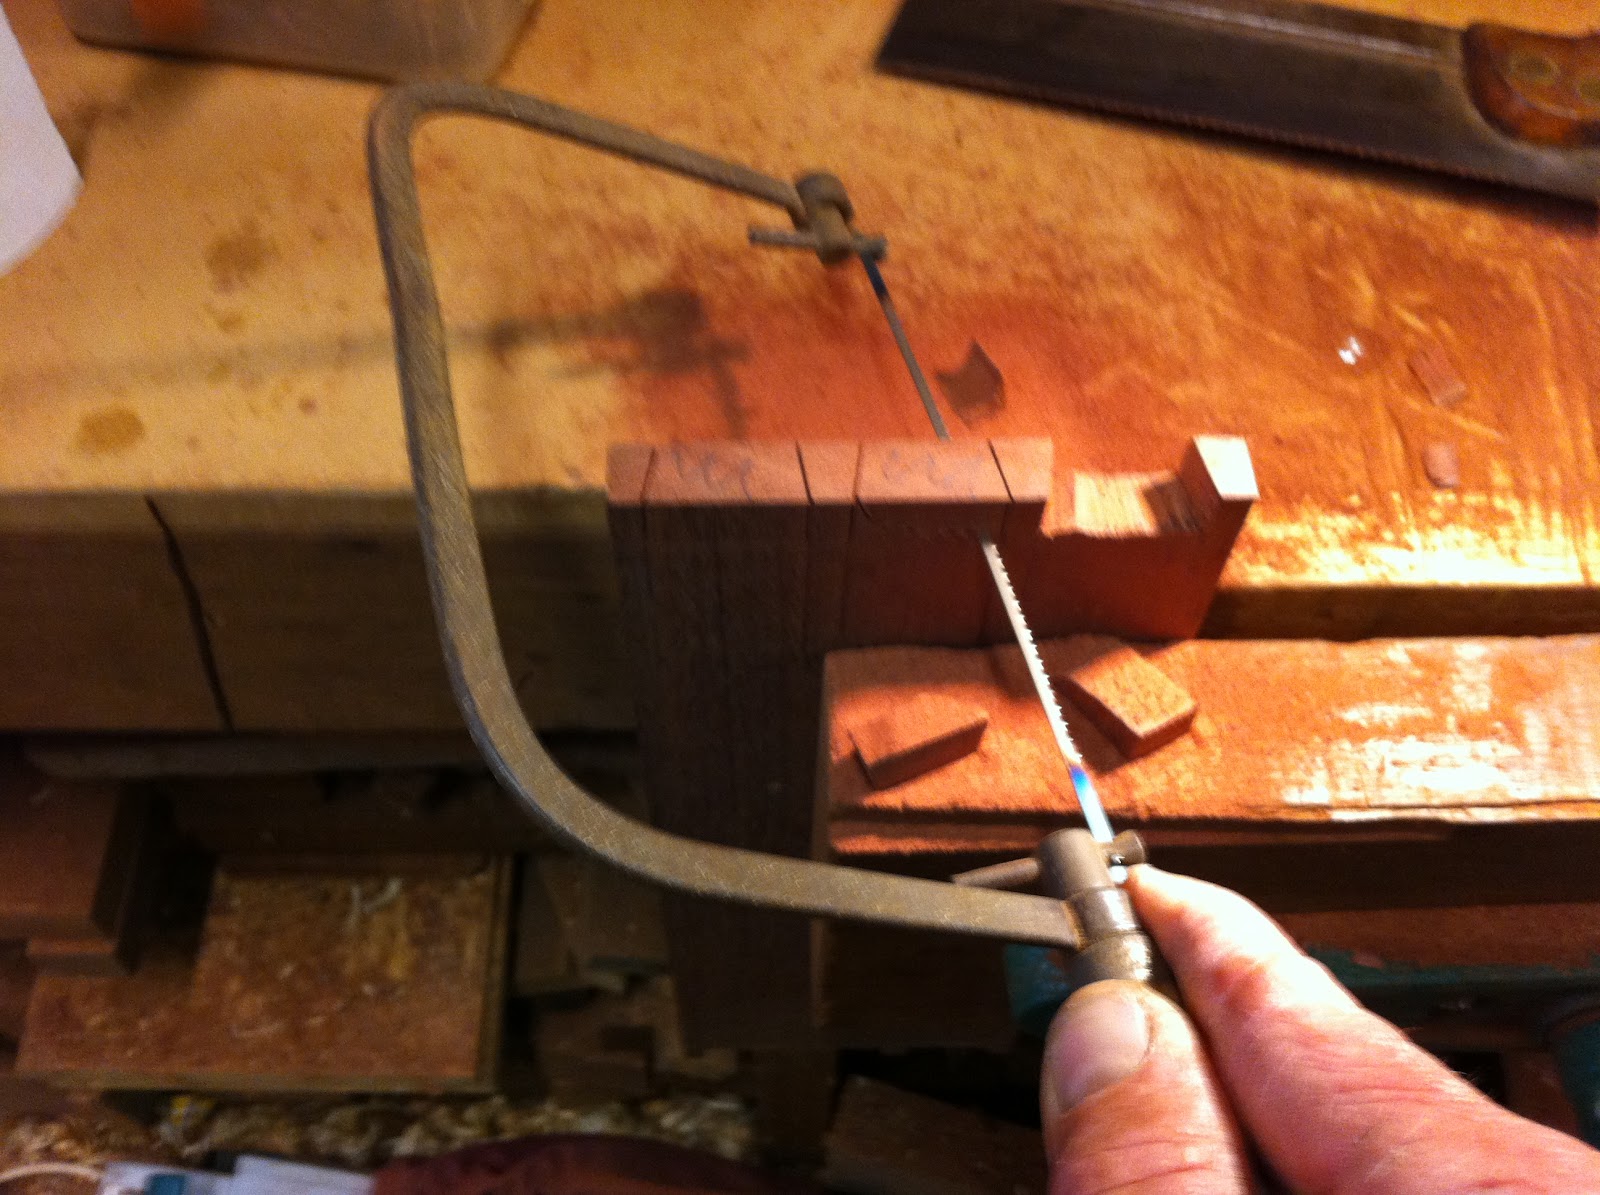
Once these cuts are made, the waste on the corners is cut off as the piece is turned in the vice. Then the waste between the tails is then cut out using a coping saw.

Use a coping saw to remove the waste down close to the scribed base line.
Once the waste has been removed from between the tails, it's time to chop down accurately towards the base line.
Sneak up to the base line with the chisel. The last vertical cut is done with the chisel sitting right in the scribe line.
I tend to chop out a bit of waste from each gap between the tails on one side, then turn the piece over and do the same from the other side. This reduces the chance of a blow-out on the bottom side to where you are working. It is important to sneak up on the scribed base line, with the last vertical cuts done with the chisel sitting right in the scribe line. If you don't sneak up on it, and you chop into the base line with too much waste still there, the chisel's bevel pushing against the waste will force the chisel back against the base line. The result will be a base deeper in than the base line you can still see across the tails. We are looking for a beautifully straight line for the housings and the base of the tails, defined by the scribed base line. You also need to make sure that there is no high-spot between the two opposite sides. Ideally, we want it to be dead flat - though slightly hollow is OK too. When you do this enough, you develop an eye for it. Meanwhile, if you need to, lay a straightedge or the edge of your chisel across the bottom of the cut-out, to check there is no high spot between the opposing base lines.

All tails cut and ready for the next stage - to transfer the lines over to mark and cut the pins. 
You may notice that the tails are a different length in the pic above. This is because we are cutting Through dovetails at the back of the box and Half-blind dovetails at the front of the box.

Transferring the tails to mark the pin positions - half blind dovetails.
By cramping the side piece to the bench front, or putting it in a vice, I line up the base line with the inside edge of the box front. This should also mean that the scribed base of the housing for the tails, between the pins, are lined up as well. It's easy if I have accurately used the two marking gauge setting in the preparation and marking out of the stock. Like most joinery, it's all in the marking out!

Extending the pin marking lines downwards to assist accurate cutting.
Once again, by extending the scribed pin lines down the adjacent face with pencil lines, this enables accurate sawing of the pin sides. This a helpful technique for both Through dovetails and Half-blind dovetails.
Cutting the pins for the half-blind dovetails means cutting down to the two base lines.
Remember to always cut on the waste side of the line with these joints. With careful marking out, accurate cutting with a nice fine saw with minimal set and narrow kerf, and good waste removal with sharp chisels, the joints should be able to come together firmly without having to do any paring or modification. That's the aim, anyway!

First stage of the waste removal, sneaking up until you can chop right on the scribed base line.
Second stage: Waste between the pins best removed with the piece held vertically with support behind.
Half-blind dovetails are much trickier to cut than Through dovetails - but are more satisfying when they come together nicely!  You do have to be careful not to split the timber around the pins when chopping out the waste between the pins.

Sneaking up on the other scribe line of the half-blind dovetail joints.

Job done. Waste removed between the pins for the Half-blind dovetail joints.

The moment of truth! Hammering the two components together for the first time.

Not bad. You can see where a small amount of paring to the top shoulder, to the tail base line, will bring a tight fit on the end of the adjacent tail end.
With all of the half-blind dovetail joints cut, fitted and pulled apart again, it was then time to cut the tails for the Through dovetail joints. 

Line up the tail base line with the inner face of the other piece, and mark the pin positions with a marking knife. 

Marking knife marks show pin positions for the Through dovetail joints.

Extend the lines down and cut the pins, on the waste side of the lines.

Using a coping saw to remove most of the waste between the pins.

Most of the waste removed, ready for the chisels to do their work.

Waste chopped out. Torn out fibres are not unusual where the chopping meets from each side. 

Another moment of truth. Hammering the joint together for the test fit.

Nice fit! No paring or trimming required. Tight, clean and accurate. Yippee!

Prepare purpose built clamping blocks will help pull up the joint during gluing.

There's nothing like a bit of squeeze-out from nice tight-fitting joints. Beaudy.
Only one of the four half-blind joints (pictured earlier) required any paring to improve the fit. All four of the through cut joints required no paring. It is very satisfying when the joints come together firmly first time straight off the saw and chisel.

With vertical space within the cabinet at a premium, I opted to fit the bases in a way that took up the least amount of space. I rebated the base of each box after assembly, with a router, cleaning out and squaring the corners with a sharp chisel. Ply bottoms 1/4" thick were glued and screwed into the bottoms of the 4 boxes.


Fitting the storage bins into the cabinet.
The storage bins for vinyl LP records, the storage bins for CDs and the little CD shelves taking up the remaining space, will all be housed behind a pair of doors.
The two LP bins I have opted to hinge from the front, using "Florentine Bronze" flavoured piano hinge. I only needed just under 900mm (3 ft) of it, but had to buy in in a 3.6m (12 ft) length. The other option was to buy it in a 35m (115 ft ) roll!! ...I settled for a 12 foot length. To prevent the bins from emptying their contents onto the floor, a stop was fitted for each bin.
Fitting the CD bins above these was tricky, due to the limited space. After some planning and experimentation, I have fitted sliding pins which I made specifically for the purpose.

LP bins and CD Bins will be behind doors. The plinth is sitting on top of the cabinet.
When the bins are slid forward, they pivot downwards on the pins, giving access to the CDs while cleaning the LPs below. A bit of creative thinking gave me some stops which bring the bins to a final open position. Lifting the bin enables it to be slid back on its pins to the closed and elevated position. A good solution, and worth losing sleep over it, this remedy came to me in the wee hours of one morning as I cogitated over the dilemma.
One of the two CD bins in the dropped-down open position.
The pins I made from an M10 threaded bolt, cut 4 into pieces each about 25mm long. Grinding the thread off half of each section, I then cut a screwdriver slot in the end of the threaded part. Having calculated the right location for the pivot point in the CD bins, I drilled a hole and tapped an M10 thread inside the hole with a conventional metal tap. The ground down pin end is just small enough to insert through the threaded hole, and then the pin is turned from inside with a screwdriver, winding the threaded end into the box side until it protrudes into the sliding track the appropriate distance. This method enables the CD bins to be fitted on installation/delivery and be removed at any time as required. It is also the hinging/pivoting method which takes up the least amount of room.

One of the four pins I made from a piece of M10 threaded rod.

One of the two LP bins in open position. It's hinged on piano hinge at the bottom.
The plinth.
The whole cabinet will be sitting on a 4" (100mm) plinth. When making up the plinth, I opted to do half-blind dovetails on the two external corners. Not what I would normally do, it looks pretty good I reckon. I have seen it before in some antiques furniture, and given this cabinet is being made to fit in alongside other antiques, it is a small detail which will work well - if anybody notices!
Gluing up the plinth. You can never have too many cramps - or straightedges...
One of two dovetailed corners on the plinth.
More on dovetail joints.
There is a lot written and said about dovetail joints. These days we give them an importance and mystique which would have seemed very strange in days gone by. In the past these joints were just a practical way of creating a strong joint between two pieces of wood at right angles to each other, without the use of metal fixings. That's just what I did for the joints in the plinth, really. It is also a good way to build strong corners in the 4 bins/boxes referred to in this post.

Sure, you can make pretty flash dovetail joints with screaming routers, fancy jigs, and all that. For me, though, the real satisfaction comes from confidently making these joints by hand - and using no filler. It's just good honest old-fashioned hand tool woodworking. Sensual and satisfying.

The other thing I really enjoy is feeling a sense of connection to past generations of craftspeople who have come before me. In fact, that beautiful little dovetail saw I used has the name of a previous owner stamped in the handle. His perspiration and mine mingle in the patina of the handle. I wonder what he made all those years ago as he toiled at his bench with that saw. I share in the legacy of those who came before me. I am but a custodian, of both tools and knowledge - but also of the simple joy to be found working wood by hand. As a custodian, I also have a responsability to pass all this richness to the coming generations of woodworkers. My hope is that you found the info in this story helpful.

Wednesday, August 8, 2012

Sharing the Joy, at the Perth Wood Show.

Last weekend I spent 3 days at the Perth Wood Show. It's an annual event I always like to get to, and have done so for many years. However, this is the first year that I have "hung up my shingle" there to promote the group woodworking activities I run. Of course, this was no static display - I was offering a chance for people to have a go.
That's my space at the Wood Show - before the show opened. It would get busy!
Amid all those displays, demonstrations, and salespeople peddling a huge range of power tools, wood, machinery, gadgets and gizmos - I offered a chance for people, especially kids, to have a go at making stuff.  No screaming routers in my area, just traditional woodworking hand tools and skills.

That's me.... providing coaching on the subtleties of the use of the Coping Saw.
As well as offering "free creative play" (a heap of wood, benches, hammers, nails and saws - make whatever you like, kids!) we offered an opportunity for the bigger kids and adults to make a kitchen salad server from a nice piece of hardwood. Our corner of the Show was a very busy place!

I was fortunate to have my oldest grand daughter, Zoe, assisting me for 2 of the 3 days. She's 11 years old, got some good basic woodworking skills, and has a great manner with people. What an asset! Thanks to Zoe for the great contribution she put in over the weekend. What a star.

Once again, I was too busy to take many pictures. Shame about that! Here's a few...

My trusty assistant, Zoe, at work helping out a little girl.
The "sawing station" had a lot of use. A designated place for carcass saw use by the kids.
Serious concentration during nailing!
Using a spokeshave to shape a spatula.

Zoe sands the finishing touch to a kitchen spatula.
It was a good experience at the Wood Show, an opportunity to promote my woodworking activities to the woodworking public. I talked to a lot of people, and hope to pick up a few more school gigs and other group activity programs out of it.

I also spent a lot of time talking to parents, who wanted to know about the right tool choice for their kids. In a huge pavilion full of machinery, power tools, hand tools and timber - there were not a lot of tools there which are suited to kids. More into about tools for kids can be obtained from my other blog: The Joy of Wood for Kids . Next year I'll do a bit more about this if I return to the show.

The thing that all those exhibitors, retailers and associations don't seem to realise is this:
Unless we pass on our skills and our passion for wood and woodworking to kids, there is no long term future for their businesses, woodworking clubs and the traditional skills of the trade.

Me? I'm on a mission to bring back hand tool skills as life skills. The future of the things we value from the past lies with the young. Time to be handing over to the next generation.
Join me in sharing the joy of wood with the kids in your life...

Friday, August 3, 2012

The joy of Cajon Drums!

I recently spent another 5 days at the Perth City Farm's July School Holiday Program, doing woodwork with 6 - 12 year old kids. A very popular program, the kids rotate through a range of activities, including cooking, circus skills, working around the farm and gardens, making garden sculptures, soap making, paper making, and more. Woodwork is offered each day, with morning sessions and afternoon sessions.

 My third such holiday program for Perth City Farm, I usually offer a different project each day as well as the ""free creative play" where kids make whatever comes into their heads using the wood, hammers, nails and saws available. The specific projects on offer this time were cheese boards, kitchen spatulas, handled carry boxes, garden planter boxes, and Cajon Drums.

Cajon Drums are Afro-Peruvian in origin. Essentially a six-sided box, they are usually played while being sat upon. These instruments were originally improvised from wooden crates, boxes, and cabinet drawers. These days they can be quite sophisticated, with levers and features providing the ability to turn off and on a wide range of percussion sounds and acoustic embellishments. The Drums we would be making with the kids are simple boxes, with a thin sound board for the face, and a sound hole cut in one side.

Zoe. aged 11,  in full flight on my Cajon Drum. (paint job by some of my grandkids.)
The drum making session this time had 8 kids participating. Although it is very popular, we only did one drum making one session that day, as there was not enough material to do many more. Wherever possible, all the materials I use for the holiday program are recycled timber - wood rescued from the waste stream. The Cajon Drums are made from plywood, most of which has come from packaging or industrial off-cuts. So on this program the amount of ply I had been able to round up determined the number of drums we could make!

Making the Drums.
On this project, I supply the sides, tops and bottoms cut to size. The kids have to measure and cut the back and faces to size, and design and cut their sound holes in one side, and glue and nail the whole thing together.

Cutting a sound hole - with brace and bit and small rip saw. Nice sawing technique!
Cleaning up the sound hole with a half round wood rasp.

I usually get the kids to cut their sound holes after the boxes have been assembled, but prior to the drum faces being fitted. The two pics above show the sound holes being cut to the kids' own designs.
Plan for the Cajon Drum
The sound holes are designed by the kids, and I usually encourage the design to be based around holes and straight lines. This lends itself easily to the use of a brace and bit for drilling largish diameter holes and the use of tenon saws and small rips saws for cutting out straight lines between the holes.

The boxes are nailed together with butt joints, glue and panel pins. For the faces I tend to use glue and small flat head nails (wallboard nails).

Of course, the next bit of fun for the kids is to personalise them further by painting them!
Four rubber feet fixed in the four corners of the base are also recommended.


Playing the drums.
These drums are made to be sat on, usually with the face at the front.
These drums are a great little project. One of the wonderful things about them is that as soon as we have finished making them, we can play them together. Click on the pic below for a short You-tube video I captured of three kids playing together spontaneously.


What a positive project these drums are! Fun to make, even more fun to play...

Zoe leads another group in a bit of responsive drumming. They all made their own drums.
Perth City Farm School Holiday Program,  April 2012.
So there you have it... the joy of Cajon Drums. I look forward to the next time I get to make these drums with a bunch of kids - or adults or that matter!

Tuesday, July 24, 2012

Beware the Falling Shake.

A majestic hardwood tree stands in a forest. For well over a hundred and fifty years it has been growing here, but now it bears a forester's mark. This phase of its life will soon come to an end.

The faller approaches, using his skillful eye and experience to determine the best direction for it to fall, based on wind direction, balance of the tree, the lay of the land, position of stumps rocks and other material on the ground. The silence of the forest is shattered by the cough and roar of the chainsaw as it comes to life. It's pitch intensifies as a big wedge shaped piece is first cut from one side of the trunk, about waist height to the faller. With the saw's engine idling irregularly, the faller moves around the bole of the tree to the opposite side from where the wedge was removed. He checks again the intended direction of fall, and lines up the saw on the back of the tree. The whine of the saw increases as the chain bites into the bark and sapwood. Chips fly as the bar gradually disappears into the tree. The skillful faller's arm muscles strain as he holds the saw, moving it in a rocking action and shifting the pressure. It is a skillful technique honed over years of practice. He has felled many hundreds of trees in his time.

Fibres at the base of the tree begin to pop and crack. The faller looks up, to check the direction of the slight movement of the canopy against the sky. He knows how long he can keep cutting - it's a fine line. The long bar is removed from the slowly widening kerf. He kills the engine as he quickly steps back away from the tree. As the popping and cracking of the tree's fibres increases, the faller continues to move away, to be clear from the huge butt kicking back and to be clear of falling branches. These unwelcome surprises, in the form of dead branches falling from above, are known in the trade as "widow makers". He lost a good friend to one of these a few years ago, and fleetingly remembers this as he quickly and carefully moves back through the undergrowth, looking up periodically as he goes. The movement of the tree speeds up as the remaining fibres around the base continue to give way under the huge forces at work. Gravity.

As the tree fell, it rotated slightly as a big branch in its crown hooked into the crown of a neighbouring tree. This slightly altered the path of the falling tree, swinging it just a little to the left as a loud tearing sound sent several huge limbs crashing to the ground. The faller cursed under his breath as the massive trunk fell across the stump from a previously felled tree. The enormous trunk kicked back from it's bole several metres as a shower of leaves, bark, and branches rained down on the forest floor over a wide area. The thud and crash eventually came to an end in a cloud of dust and debris. It was all over. The faller and his offsider approached the huge trunk and fired up their big chainsaws, cutting the big trunk into sections suitable for snigging to the landing and transporting to the saw mill. The crown and its branches would remain on the ground, to begin decomposition and be burnt in future fires - the resulting ash-bed providing nutrients for the seeds which would germinate and join the race to fill the void in the forest's canopy above.

However, the heavy impact of the tree crashing onto an uneven surface would have as-yet unseen consequences... 

What is a Shake?
A "Shake" is the term used for a split or fracture, the separation of fibres which has been caused by reasons other than shrinkage. Differential shrinkage causes "Checks" - the shallow separation of fibres along the grain. "Splits" are the term given to the gaps or cracks which go right through from one surface to the other due to shakes or checking.
Shakes can be caused by a number of factors, but here we are looking specifically at "Falling Shakes", also called "Felling Shakes". These are caused buy the rupturing of fibres through the massive shock forces which can occur in the falling of the tree. In the case of our forest giant above, the tree's trunk fell across the stump of a previously felled tree. The resulting forces can create internal fractures within the log, which at times are almost invisible.   

A falling shake in a piece of New Guinea Rosewood
The picture above shows a Falling Shake which extends right across the piece of wood as well as diagonally. It would easily snap on the fracture lines.

This Falling Shake is like a set of stairs across this piece of Jarrah.
 The problem with most Falling Shakes is that they are not always obvious nor are they always visible to the inexperienced eye. A perfectly good looking beautiful stick of timber can hold surprises.

I built a lot of Campaign Chairs over about a decade, each of which had 4 turned rails at 30mm (1 1/4") diameter. The tenons were tapered and housed into tapered holes in the legs. During that period, I had two chairs which collapsed under the weight of a person sitting heavily into them. Investigations revealed that there had been a Falling Shake in each case - one near the point where the tenon entered the leg, and another  midway along the rail. The former was a Jarrah rail, and the latter was a Sheoak rail, in two different chairs made in different batches, a few years apart. Of course I replaced the rails for free, but was intrigued that I had missed these Shakes in all the handling, machining, turning, sanding, polishing, and assembly.  Of course, that had been a couple of other Falling Shakes that I had found. These rails ha been discarded or recycled.

Another example in Jarrah, with the Falling Shake running through a tiny rot pocket.
The two photos of jarrah above were found by my recently when I was machining up recycled jarrah to build a big cabinet. These larger sticks had formerly been part of the construction of a building. Interestingly, Falling Shakes can hold together pretty well in many situations, as they do not always go right the way through, and the fracture often weaves an interesting path through and across  the fibres. However, they can also be a nasty surprise just waiting to happen. Shakes create a significant weakness in a piece of timber.

The moral of the story? ... Beware the Falling Shake. So keep a close eye out for them.

Friday, July 13, 2012

How to dress salvaged timber.( Recycled Jarrah Cabinet, Part 2)

I am building a nice big custom cabinet, using predominantly recycled jarrah. This post is the second part to telling the story of this build and the techniques used along the way.

To make high quality furniture and joinery, you need material which is flat and straight. Recycling salvaged timber involves a fair bit of machining work to convert these sticks to the flat and true state.
Most of this timber has been seasoned in situ. The houses were built with green construction timbers, as it is much easier to work despite being heavier, and over the years the timber seasoned while nailed in place in the structure of the building. Therefore it can be cupped, bowed, with wind, with spring, and peppered with nails! It is also very dry and hard. It just needs to be dressed so that we can utilise this resource in the best way possible.

Dimensions Matter.
In keeping with an earlier era, much of this piece of furniture will be a predominantly finished at 22mm thick (7/8"). This was a very common material thickness in the past. In the modern era this has been reduced to 19mm (3/4") which just doesn't quite cut the mustard. It's like the difference between a bevelled edged mirror and a flat mirror ... there is no comparison in the look and sense of quality of the piece.

Not the best picture, but a nice load of 8"x2" sticks needing to be dressed.

How to dress timber which is too big for your buzzer.
I have a small workshop, and my machinery includes a beautiful old cast iron 6" Woodfast Buzzer and a modern Taiwanese 15" Thicknesser.  Buzzer? I think that's an Australian term. To you bods in North America and Europe, read "planer". Thicknesser? Again, this can be translated to "thickness planer".
If you put a twisted stick through a thicknesser, you just get a thinner twisted stick coming out the other end. Therefore the normal machining process involves flattening a face and straightening and squaring an adjoining edge over the buzzer and then creating faces parallel to these using the thicknesser. You can't effectively flatten an 8" board over a 6" buzzer, but once a flat face is created it can be easily put through a 15" thicknesser. This post describes how to get around the problem of the buzzer being too small for the material being used!

Preparing the timber.
OK, lets start from the beginning, with a pile of dirty used timber, probably containing nails, etc. What wonderful potential there is, waiting to be unlocked, and used to create a beautiful piece of furniture, a future heirloom. This stuff in the pile is all jarrah. I reckon this is one of the most versatile and beautiful hardwood timbers on the planet - though I could be accused of bias!
The process is as follows:

1. Elevate the boards onto a pair of saw horses or some other surface. It's good to save your back from some grief, so make it easier for your body.

2. Scrub each surface with a wire brush. Cleaning out decades of accumulated dust and grit from the surface will be easier on the knives in your machinery. The grit dulls them prematurely. While doing this, you will also be doing a visual check on the material - particularly looking for nasty embedded nails, screws, and other unfriendly surprises for your buzzer and thicknesser knives. These metal foreign bodies will need to be removed.
A quality wire brush brush helps remove grit and dirt from between the surface fibres.

3. Scan the boards carefully with a metal detector. The visual check can miss a lot of metal, so the wood recycler's best friend is a metal detector. Just remember that the metal detector will also pick up the screws in your saw horses! You get the knack of using these things pretty quickly. After the visual check and sweeping the material with a metal detector, if you hit a nail with your machinery it's all down to human error! ... your human error. It is a bummer when it happens. I've done it more than once, unfortunately. Try not to take short cuts with the preparation.

A cheap metal detector can save you a lot of money in machine knife re-grinding!

4. Remove any nails and metal hardware. Once you have identified any metal foreign bodies either by eye or by metal detector, these will  need to be removed. If the nail is still hanging out, a claw hammer or pinch bar may simply remove it. However there are times the object is below the surface, leaving nothing to grip. To remove these, here is the process:
Ya gotta go, nasty nail! ... but it's buried below the surface, and needs extracting.
Use a chisel to create access below the head - enough for the pincers to be able to grip it. 
It's looking like a winner! Out ya come!
It's not very big, but it would've done a lot of damage to the thicknesser knives. 

5. Create a flat face. A pair of winding sticks (two pieces of wood used to check for "wind") are important here. By sighting across the top edges of the winding sticks, which have been placed across the board at intervals, we can see how out of parallel the sticks are.
A pair of winding sticks in action.
Planing of the surface is undertaken wherever necessary in order to create a flat surface. This is achieved when the winding sticks sight for parallel consistently, when one is placed across an end and the other is places across the board anywhere along its length.
Straightedge in use to check lengthwise flatness.
The use of a long straightedge assists in checking that the surface is also flat along its length. Additional planing is used where necessary to ensure the surface is straight along its length.
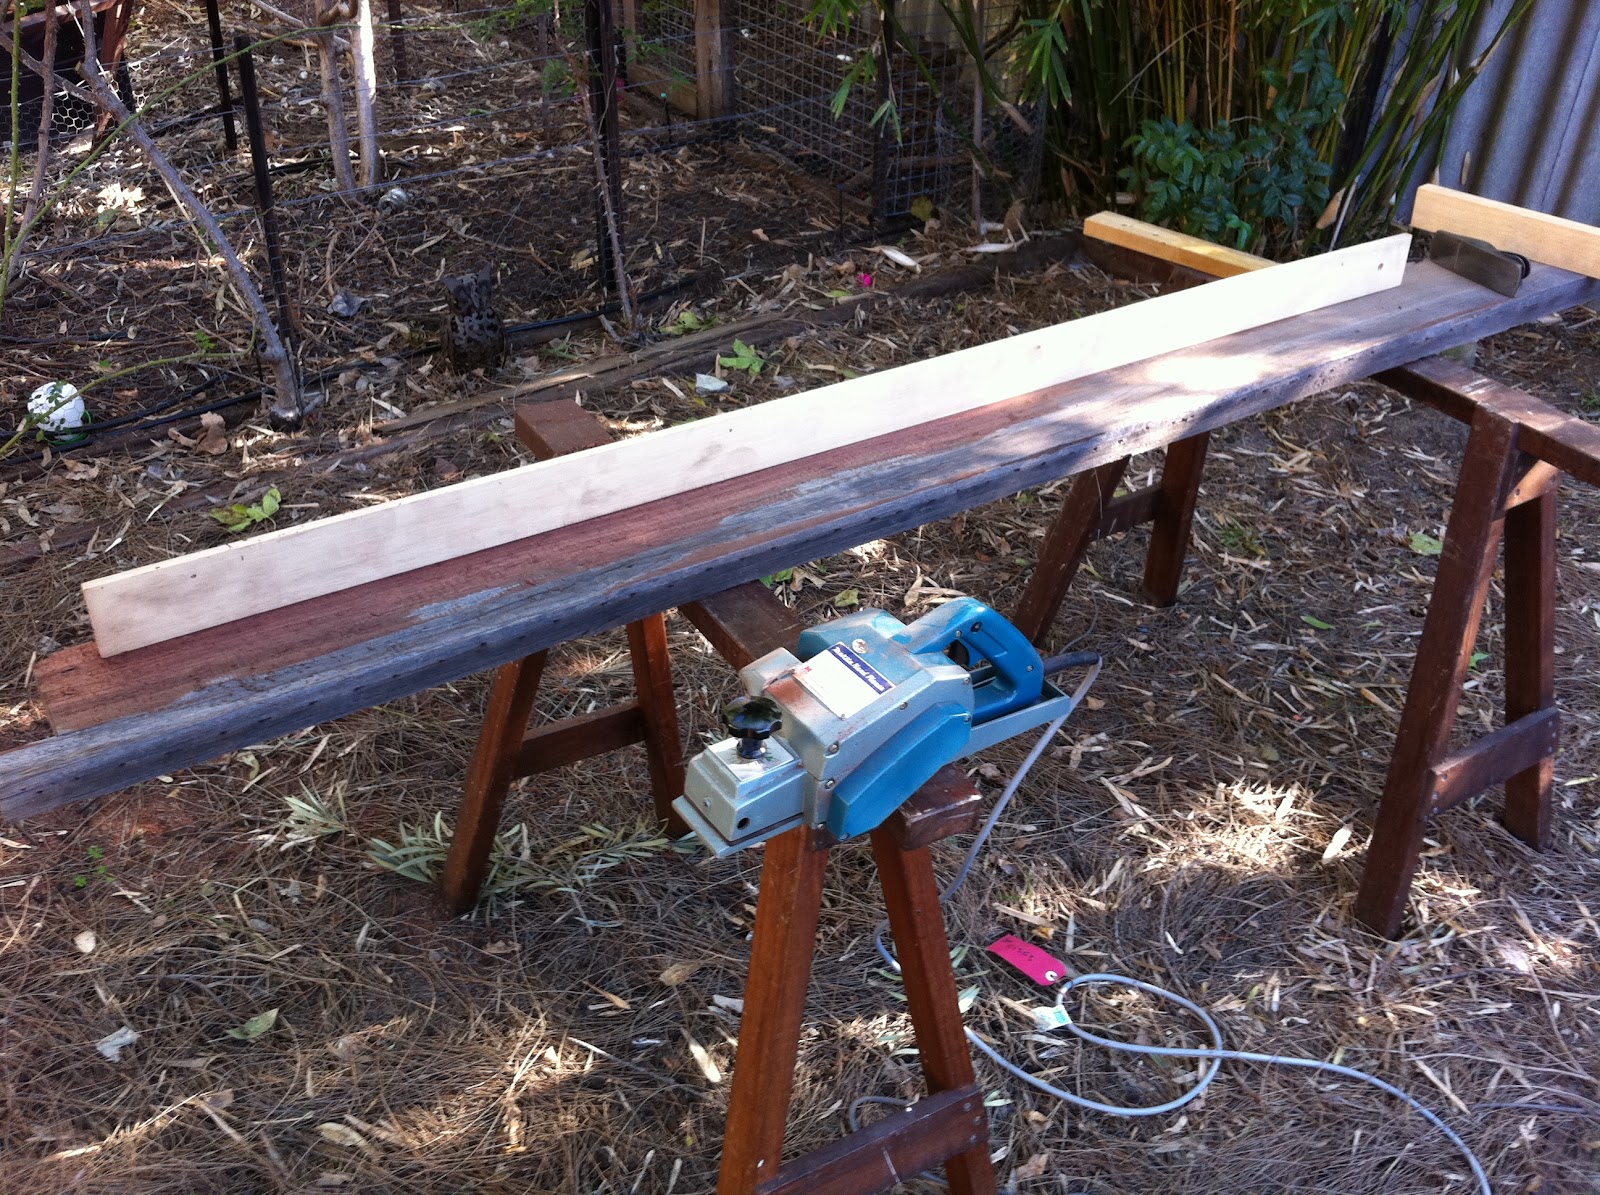
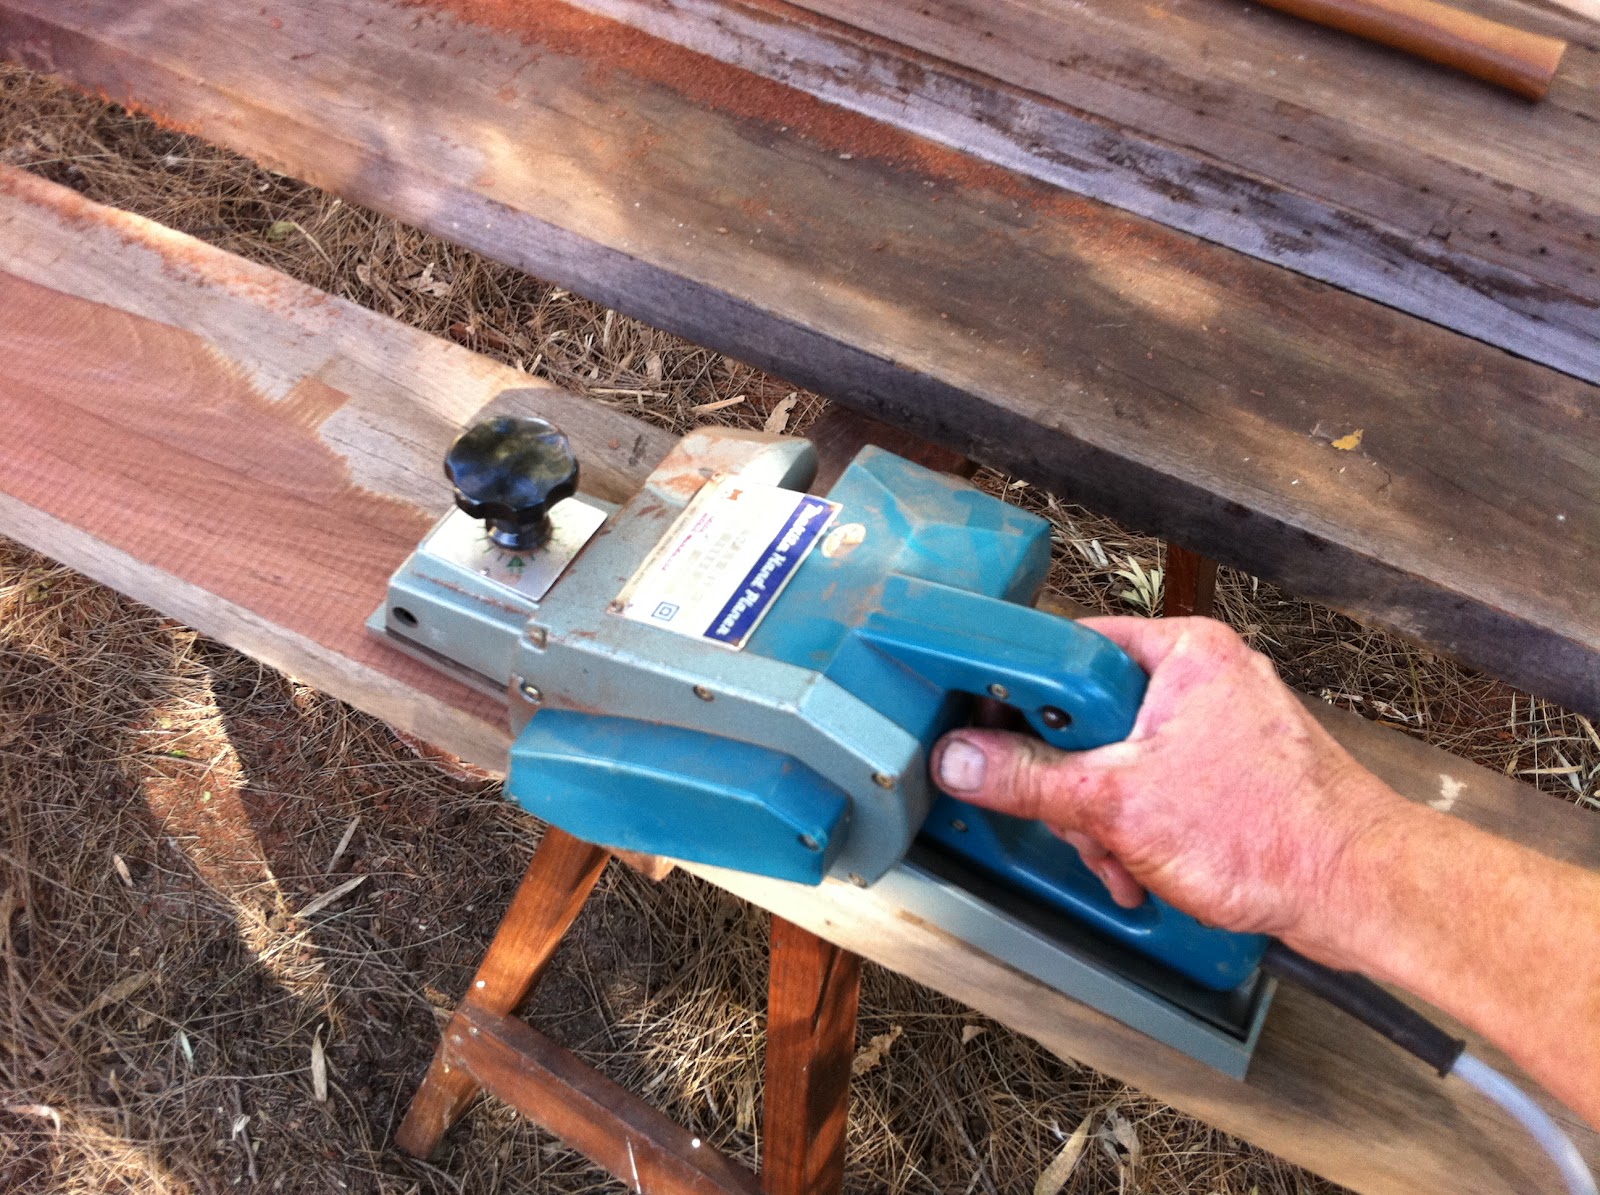
It's a beast... heavy as lead, which is an advantage. The 25 year old Makita planer.
On small boards, this flattening process is easily done using a jack plane - like my trusty No.5 1/2. However, in this situation, with a pile of very hard jarrah boards 8" wide and up to 11 feet long, my nice heavy old Makita electric plane is a life saver, with a block plane for fine tuning of the surface.
Now that's looking pretty good. The winding sticks don't lie.

Dressing the boards through the thicknesser.  The whole idea is that the flattened surface goes down on the machine table. The cutter block then removes material from the top side. The board is passed through the machine until the surface on the top side is flat enough to flip the board over and machine the original flattened surface. This passing and flipping continues until both surfaces are dressed and the desired thickness is obtained. (Sorry, no pics of the machining process here.)


Two beautiful flattened and dressed boards emerge from the thicknesser at 25mm thick.
The buzzer and table saw are next used to straighten and parallel dress the board edges.
Salvaged jarrah commonly has the most amazing colours in it! Yum.

From previously twisted sticks we have now created dressed and beautifully flat boards.
That was the whole idea, wasn't it?
... Now I can get on with making this cabinet.

Friday, July 6, 2012

Tool Chest? Nah... give me an open tool box.

There's been a lot of talk about lidded tool chests over the last year or two in the woodworking world, aided by the US woodworking legend Christopher Schwarz of Lost Art Press. His wonderful book The Anarchists Tool Chest has been a manifesto of hand tool woodworking both since it was published last year and in the lead-up to it.  Chris is an advocate of lidded tool chests for woodworkers - preferably made by woodworkers themselves to keep all their own tools in. It is true, storage in an almost airtight tool chest does help protect tools from moisture, salt air, dust, etc. After all, we are talking about quality tools here, which will last the user a lifetime and be worthy of passing on to future generations.

Despite all this wonderful talk, I confess I am still more keen on an open tool box, with a carry handle.
My new open tool box. It carrys nearly all of the hand tools I need on the job.
These are not so good for carrying on aeroplanes (yes, that is the correct British/Australian spelling) but ideal for living inside the cab of my dual cab ute (North American readers, for "ute" please read "pickup truck"). The back seat carrys a lot of tools in assorted containers. More stuff lives in lidded plastic crates in the rear of the vehicle. As a professional woodworker, I probably spend half of my time in the workshop and half of my time in my customers' homes, on building sites, etc. So portability of tools is important. In reality, I have two sets of tools - those in my workshop and those in my vehicle. Over the years, I have used a range of open tool boxes.

For  while now, I have been working out of a small overflowing jarrah open tool box and a big plastic crate to hold my most used hand tools in the ute. The little tool box has been great, but the big crate is not good for the tools which just lived in a pile inside. I have been dreaming about a change for some time. While I was following Chris's unfolding lidded tool box story, I had to question my open tool box preference and look at what tools I really needed to cart around. It's been a good process. However, I emerged convinced that the time had come to make one tool box to replace the other two containers. An open tool box, housing specific tools, so that it is harder to lose track of them on building sites. The time had come to stop dreaming and do it... now I had a plan.

The jarrah box in the foreground (plus a big plastic crate) were replaced by the box behind.
I use hand tools a lot. Sure, I have machines in my workshop and power tools in my ute, but hand tools figure largely in both environments. Ooh yeah, I love my handtools and use them every day.

Getting time to make this box has been a challenge. I have made it over several weeks, doing a bit here and a bit there every few days. Eventually I got it finished. It's a bit rough, but it works well. I'm very happy with it. Every tool has its place.
The new toolbox has one tray, made to fit the space available.
The external dimensions of the new tool box are as follows: 840mm long (33"), 340mm high (13.5"), 200mm wide ( 8'') and the base is just under 200mm (8") deep. When loaded up, the whole thing weighs right on 25kg (55 pounds).

The box and its tray is made from recycled plywood. Plywood derived from crates which carried goods from the US to Australia. The handle is made from Vitex, a hardwood from the Solomon Islands, and a scrap discarded by a joinery shop years ago. It's been in my stash. There's that recycling theme again. The whole thing is coated with a couple of coats of shellac brushed on, and a canauba wax coat to finish it off.

So exactly what is in there? The hand tools I use for on-site carpentry, joinery, and general woodworking. OK, not everything got in there, but about 95% did. More stuff lives in my apron pocket all the time, plus there is the oil stone and oil which just live in my ute...

The whole booty!

So what's in the box? Here's the list:
Saws: Rip panel, cross cut panel, tenon, dovetail, coping, mini hacksaw, keyhole. Spare blades for coping and hack.
Planes: No.5 1/2 jack, No.78 duplex rebate with full fence, No.60 1/2 block, No.71 router, No.75 bullnose rebate, No.151A spokeshave.
Marking/measuring: 600mm steel rule, 300mm steel rule, large sliding bevel, small sliding bevel, marking gauge, spring dividers, 300mm combination engineers square, variable angle measurer.
Chisels: bevel edged 1/4", 3/8", 1/2", 5/8", 3/4", 1", 1 1/2", 2", 2 1/2", another 1", and a veining tool.
Striking tools: wooden carvers mallet, claw hammer, warrington cross pein hammer.
Screwdrivers: spiral ratchet screwdriver and assorted bits, slotted driver, philips driver, combination driver.
Pliers: pincers, bull-nosed, long-nosed.
Other: hand drill and bits (1/16" - 1/4"), half round rasp, 2 small F-cramps, 2 x nail punches.

Now that is a bunch of tools you can make a lot of stuff with!!


Never mind those lovely lidded tool boxes, good as they are.
I like my delicious new open one... it's a real beaudy!

Wednesday, July 4, 2012

Getting Started - Recycled Jarrah Cabinet, Part 1.

This project has been brewing for a while. For some months my customers and I have been bouncing design concepts back and forth. I've done a pile of drawings, we've had a couple of meetings, and exchanged a bunch of emails... Well, a week and a half ago I started the build...

What is about to be created? A large L-shaped cabinet which will be a stunning feature in their living room. It will have two primary functions: to house some very nice HI-FI/media gear and to display a heap of very beautiful collectibles - particularly ceramic works by a range of artists.   Not only will it be made from recycled jarrah, but the cabinet must also fit in with a nice antique tall sideboard which shares the room. Many of the little details in the new cabinet will be taken from that sideboard. That'll be fun!  For me, it always feels such a privilege to make a beautiful heirloom for someone. I'm looking forward to this project. It's a big job, so I'll post stories about the build in a number of parts as we progress - interspersed with other stuff which occurs along the way.

On the Material, a foray into history, and the wood recycling imperative...
The jarrah we'll use will come from a range of sources - my customers, my own stocks, and stuff I obtain from other sources, like salvage yards.
The first batch of used jarrah my customers have contributed. Old shelving and heavy floor joists.
For those readers outside Western Australia, it's worth just reflecting for a moment about Jarrah. This magnificent tree, Eucalyptus marginata, is indigenous to the south-west corner of the Australian continent. When the British colonists first invaded this part of the world in the late 1820's, they couldn't believe their luck. This amazing and seemingly prolific tree offered a dark reddish-brown high quality hardwood timber found to be suitable for building construction, furniture, joinery, ship building, charcoal production, firewood, fencing, later railway sleepers, and so much more. The settlers gave it the common name Swan River Mahogany, and the colony was built on its back. For many years it would be the primary source of export income for the growing colony, as the flourishing logging industry sent railway sleepers, construction timbers, paving blocks and more all over the British Empire.  Jarrah would continue to be the building material of choice in Western Australia for the next 150 years. It was treated as an infinite resource, and taken for granted by generations.
However, by the 1980s, growing limitations on the supply of jarrah logs to the industry, emerging competition from plantation-grown pine, the increasing availability of cheap imported rainforest timbers from South East Asia, and the rising voice of the environmental protest movement  would combine to see things gradually change. It is said that less than 6% of the original Jarrah forest remains. Reducing rainfall over the last 40 years has had a dire impact, which is accelerating through the drought stress which these trees are suffering each summer now. The result is that our remaining jarrah forests are not regenerating like they once did. In fact, too many of them are dying. In addition to this, huge swathes of jarrah forest are cleared every year under the steady march of bauxite mining and mineral sands minimg (and most of these trees are burnt!), others in the way of the ever expanding urban sprawl are chipped up into landscaping woodchips, and much of the remaining forest is threatened by the spread of the deadly Die Back disease (Phyophthora cinnamomi).

You would think that we would value this once plentiful timber, and treasure it as it disappears from the environment and from the timber menu. Tragically, we still take Jarrah for granted. Housing pressure, economic affluence, "urban infill" and a lack of commitment at all levels of our community to environmental sustainability is seeing perfectly good houses being demolished to build smaller units or huge "MacMansions".  The majority of these older houses, having been built over the last 100 years, are constructed from jarrah. Even the brick houses still have jarrah floors, bearers, joists, rafters, etc. Why is it that we don't value this amazing timber - that the majority of this timber from demolished houses ends up in landfill!? It is a criminal waste, and breaks my heart. Our children and theirs will be gob-smacked that we could be so short-sighted.


In case you hadn't noticed, I am passionate about the wood recycling imperative. Recycling, up-cycling, re-using, value-adding - whatever you want to call it, we have a responsibility to the planet and to the trees themselves to treat this wonderful resource with the respect and value which it truly deserves.

This big cabinet build which I have embarked on will be made almost exclusively from recycled jarrah. Having had a variety of former lives, these pieces of timber will come together to have a whole new life. Nice. Unless it rots or is eaten by termites, timber can be recycled indefinitely for centuries. I am honoured to have this joy and responsibility.

I hope you enjoy the story of this project as the journey unfolds...