Monday, March 26, 2012

Making a Marri TV Cabinet.

I have to admit it. I am not a big fan of Marri (Corymbia calophylla) as a furniture timber. Sure, here in Western Australia it is currently the most popular furniture timber in the furniture retail outlets...  but that doesn't encourage me to want to use the stuff! However, I had customers who wished their TV cabinet to be made from Marri, so after I was given the go-ahead I was off to the local timber merchant to pick through the racks.
Marri timber in the racks. Ex-inch and a half stock here, dressed to 175 x 30mm. 
Selecting the timber for the project.
You have to do a lot of digging in the racks selecting any timber, to get the good stuff - but with Marri there is much more digging to do as there is a lot of rubbish. One of the family of trees knows as Bloodwoods, most Marri is riddled with gum veins (kino). This gives the wood it's feature, but the down side is that much of the gum veins can fall apart and can be structurally unsound.
That's spalting on the right - in the sapwood. Sapwood also tends to get pinholes from Lyctus borer.
Classic big borer holes in Marri, loosely filled with a natural mixture of the larvae's sawdust and excrement.
Classic rampant Marri gum veins. Too much of this and the integrity of the timber is compromised. 
The common technique used by many furniture manufacturers is to pour black resin into the gaping gum veins. This looks good for a while, but personally I reckon it is not a good practise. It defies our understanding of timber technology. Pouring an inert material into big fissures in the timber, when the timber will move with changes in moisture content, just doesn't seem to make sense. Run your hand across a table top with resin filled chasms, a year of two after the table has been made, and you can feel the raised "speed bumps". On occasions the resin can separate from the timber, which is a real bummer. So my aim was to select timber which had some gum for the feature, but no gaping chasms.
The other challenge selecting timber from the racks is to find sticks which have no wind (propeller twist), almost no bow (bend on the face), and very little spring (bend on the edge). I rejected a lot of boards in the racks to find the few sticks I would purchase!
Another variation, where bands of gum are parallel to the board's surface. This stuff fritters.

The selection process. Board sections are selected, docked oversize, and here laid out to maximise colour matching etc.
Edges have been jointed ready to prepare for gluing up.
The story of Marri.
It's worth doing a deviation on the story at this stage, for the Marri story is an interesting one.
Endemic to the southwest of Western Australia, Marri grows in a broader range than Jarrah, but commonly in the same territory. Well know for it's characteristic fruit which are often know as Honkey Nuts or Gum Nuts, Marri was until recently lumped under the genus Eucalyptus. The botanists have since shifted all the Bloodwood sub-set into their own genus - Corymbia. Most people still think Marri is a eucalypt. The name Marri is a Nyoongar (local indigenous) name for the tree, which has been adopted as the most common name for the tree. Interestingly the gum (kino) from the tree has many medicinal properties which have been utilised by Nyoongar people for thousands of years. Mature Marri trees are a very significant for food and habitat for a wide range of bird and animal species in the southwest of Western Australia.

Marri is a very hard timber, with interlocking grain. Marri has an air dried (12%) density of  850kg/m3. For readers in the Northern Hemisphere, this compares to European Oak at 720kg/m3 and American White Oak at 760kg/m3. Not good for firewood, as it is hard to split and the burnt gum tends to block up chimneys. The gum veins break down in the elements, so it is not good for external construction. The gum veins hold a lot of loose material, so they can often break down. This can make it unsatisfactory for construction purposes, though it was sometimes used for construction out of the weather, like for rafters, joists and beams. This was not very common.
Classic Marri timber.
While a few people had played with Marri as a furniture timber over the years, it came into its own as a furniture material really by chance. Marri was mostly logged for woodchips for the paper pulp industry, from 1976 until 2001. Many millions of tons of these low grade chips were sent to Japan in that period. Every now and then a log would be found that had very few gum veins in it. Only about 1 or 2 logs in every ten are considered suitable as sawlogs, and there is no known reliable way to select these suitable sawlog trees from standing trees in the forest. These suitable logs found via the woodchipping industry were offered to the timber industry for sawlogs. The experimentation took place and gradually a small furniture industry grew up around Marri timber. Time passed, and by 2001 the Japanese wanted a higher grade cleaner greener product, not derived from native hardwood or old growth forests. The transfer across to woodchips from Blue Gum plantations had begun.

The resulting demise of the Marri woodchip industry had a big impact on the Marri furniture industry. The Marri logs available to the furniture industry come from areas of forest being logged for jarrah and karri, so most of the marri sawlogs tend to have lots of gum veins. Hence the use of the black epoxy resin as an effort to do high value adding to what is really a lower value timber than the furniture industry has traditionally used. The popularity of marri furniture is driving this, and the gum veins are the seen as feature in what would otherwise often be a featureless timber.
End grain of the glued up cabinet ends, showing the gum veins and the plywood tongues used for jointing.
Interestingly, if it wasn't for the gum veins, Marri would probably be Western Australia's most valuable timber resource, now that jarrah is gradually disappearing from the timber menu, due to reducing logging quotas and our changing climate . With the reducing rainfall over the last 40 years that has beset the Jarrah forest, Jarrahs are just not growing back as they did before. Marri has become an invasive species, growing faster than Jarrahs and surviving in drier conditions. The nature of the jarrah forest is changing, as the climate changes. Of course the changing jarrah forest was already underway due to the logging of the forest for the last 180 years. As a timber of limited value for well over a century, selective logging saw Marri trees left standing in preference for the highly valued Jarrah trees which were felled for sawlogs. The gene pool of higher quality jarrah trees was in this way gradually being reduced as Marri trees increased as a proportion of the forest. In the 1970's, the use of clearfelling coincided with the woodchipping era. Whole areas of jarrah forest were clearfelled with jarrah becoming sawlogs (or later logs destined for the silicon smelter) and the marri logs went off to the woodchip mill, to be chipped for export.

The loss of so many very old mature Marris from the forest during the woodchipping era has reduced the number of habitat trees available for so many of our native birds and mammals who need these hollows for shelter and nesting. Marri trees are very common in our famous wine growing areas of Western Australia. A summer flowering tree, wine growers are keenly aware of the Marri flowering. If the trees flower too late, the hungry Silvereyes (small native birds) will eat the grapes if netting is not used. If the trees flower before the vintage is ready, the birds will mostly leave the grapes alone. Marri flowers are rich in nectar and are an important food source for a great many species of birds, mammals, and insects. In so many ways, Marri is an interesting and important tree in the south west of Western Australia.

Making the cabinet.
After that little diversion, lets get back to the making of the Marri TV Cabinet my customers' had requested.

All furniture starts with an idea and a function in mind. My customers' initial drawing.
 Simple in design, the cabinet will have a big flat screen TV sitting on top, an open shelf underneath to house DVD players and other bits of media technology, and a pair of drawers under that to house a heap of DVDs and other stuff. Length 1500mm (nearly 5 ft), depth 480mm (19 inches) and height just over 520mm (21inches).
With the timber selected and the edges jointed, it was time to prepare for gluing. 
A 1/4 inch Slot-cutter bit in the router does a great job cutting the grooves for the plywood tongue.
Ready to go. The epoxy glue mixed up, the boards and plywood tongues ready, laid out on sash cramps...
The top glued up and cramped to dry overnight. The cabinet ends and mid shelf were done also.
The glued up end panels, now sanded. The protruding plywood tongues visible. Still to be dimensioned.
Dados, rabbets and housings cut ready for the cabinet clue-up.
The dry fitting in progress, getting ready for the cabinet glue-up.
The cabinet glued up and in cramps. It was left to dry overnight.
First coat of polish applied after the necessary sanding and preparation.
While the polish was drying, it was time to get on with making the drawers and the backing boards.
Cutting the dovetails for the drawers.
I always cut my dovetails by hand. I have done it enough over the years to do it quickly and accurately. Most of the time they come together with a nice snug fit, with no need to muck around paring and trimming to make them fit. However, it is still always a great source of satisfaction when that clean snug fit takes place on the first run!

Having prepared the timber based on the dimensions of the drawer, the scribe lines are made and the tails are planned and marked out. Doing it tails first enables the saw cuts to take place through the whole stack of 4 drawer sides simultaneously. The stack is separated and the chopping out of the waste is done.
My trusty mallet and a bevel-edged Footprint chisels do their magic, chopping out the waste to form the tails.
The stack of drawer sides ready to mark out the pins.
Marking out the pins.Carefully lay the side in position and use marking knife to mark the pin positions.
Cutting the sides of the pins - on the WASTE SIDE of the scribed lines.
It's a nice fit first go... you beaudy!
With the dovetails cut for the joints on the front of the drawer boxes, it was time to make the rest of the drawer components. There are a variety of methods used for the rear joints of drawer boxes. The method I used here was to house the back into dados near the rear of the drawer sides.  The drawer base is housed into a groove half an inch above the inside base of the sides and the front. The drawer base is housed into the groove on those three sides, and is fixed onto the underside of the drawer back. The drawer base was made up from tongue and grooved boards I made up from off-cuts, running across-ways. All in all a pretty standard way of making drawers, old school. The difference here though was that my customers wanted the drawers mounted on metal self-closing drawer runners. These do have a very nice action! I was in a bit of a rush, so finished making the drawers without taking any photos. Unfortunately, I forgot all about it at the time...

Putting it all together.
After careful selection of timber, I was able to make up the most wonderful pair of drawer fronts from a few nice sticks I had dug up for the purpose from the racks at the timber merchants. Machining Marri is always interesting, as the pattern and nature of the gum veins changes as your remove each layer through the thicknesser. I was very happy with the result I was able to obtain. Lucky!

With the drawers made, and the drawer fronts too, it was time to fit the drawers. In this case I did the fitting first, and then removed the runners from the drawers and polished the drawers. I also cut finger grips under the drawer fronts, in case my customers agreed with me that the drawer fronts would look better without the metal handles they had talked about. They did agree, too.
Drawers fitted on the runners, drawer fronts fitted to the drawers. Time to polish the drawers.
How's those drawer fronts! Very nice indeed.
 Other than the final waxing of the whole cabinet, the last task to be done to complete the cabinet was to fit the back. For this I used V-joint Marri lining board, purchased from the timber merchant. At 8mm thick, it has a 65mm cover. I often make my own lining board, but the material available was OK for quality. I had docked the pieces to length and polished them, them cut some holes for cables and ventilation. 
The finished piece of furniture, ready for delivery.
I arranged delivery to my customers' home, and their process of transferring the media technology from the old TV cabinet to the new one began. A serious amount of cable spaghetti! Standing before the TV cabinet is an older large Marri coffee table. They fit together well.
The new cabinet fulfills its purpose.
Another job done, and some more happy customers.
I commenced this blog post admitting that I was not a big fan of Marri as a furniture timber. However, I have to say I did enjoy working with the stuff on this particular project. It was a nice change, and the hardness of the timber did make the dovetailing very easy. You can saw, chop and pare nice clean sharp elements of the joinery with a timber like this using sharp hand tools - so long as you avoid the gum veins. The most important thing of note from making this piece was the reminder that a lot more time needs to be spent working with Marri, being careful about gum vein quality and placement, and selecting the right stick for the right application. Did I use any filler or black resin in this piece of furniture? Nope. None at all. It took the couple of coats of the oil/varnish mix well, and the nice wax coating at the end made it silky smooth. A simple design, but a nice and functional piece of furniture. Thankyou, Corymbia calophylla.

Wednesday, February 22, 2012

New life to a 1930's kitchen cabinet.

I have recently been rejuvenating an old kitchen cabinet. Most people would have tossed it out, but my customer wanted to have it as the sink cabinet in her kitchen as part of her house renovation. While it just oozes with character and history, it also required a serious amount of work to bring it back to life. The cabinet came out of a house in Wembley which was built around 1934. During the 1980's, a new kitchen was installed, and the old cabinet went outside to become a potting table in the garden. There it stayed and was used as such for many years. The weather was not kind to it. When I first saw it at it's new home in Fremantle, it was awaiting some serious attention before it could be installed.
The cabinet door latches were too heavily rusted to be salvageable...
A classic piece of Western Australian history.
What a mug! I forgot to get a photo before I started working on it. It is truly a classic piece of Western Australian 1930's construction. So here is a description: the cabinet was clearly made on site by a carpenter from materials used in the construction of the house. It was part of the role of the carpenter.

The cabinet is nearly 6 foot long, 18 inches wide, and about 40 inches tall. Pretty tall! The shelves were made from jarrah tongue and groove floorboards. The frame was made from 3"x 1 1/2" jarrah. The two doors on the front, the end panels, and the cabinet face were made from 4 1/2" x 5/8" thick jarrah V-joint lining board - the same stuff which was used for the old "ledge and brace" dunny doors. The doors have two cleats on the back which the lining boards are nailed onto - and the nails are clinched over behind the cleats. The doors are hanging on T-hinges. The colour was Battleship Grey, though it seems an earlier colour may have been white or whitewash. An undercoat? It seems there was no other coat of paint ever applied to it. The backing of the cabinet was rough sawn boards of Yellow Pine, about 7" wide, edge butted together. The whole thing was held together with a variety of nails. The cabinet top was one of those old wooden ones. These were usually made from Kauri Pine or Hoop Pine. The enamel bowl would have been suspended underneath the hole in the sink top, and draining grooves were planed in the sink top radiating towards the bowl. Interesting to remember that once these wooden benchtops were normal. The cabinet was in a bad way, with most of the nails loose so the whole thing wobbled around. There was some rot in the shelving, in the base of the backing and the base of the cabinet ends. The top itself was very badly split from being in the weather for years. Most of the original top would not be re-useable for the benchtop.

Face down on a set of saw horses, the back has been removed.
The Yellow Pine backing boards, lined up in order. Plenty of rot at their bases.
The other wooden sink top, the spare one.
The rear of one of the doors. Note the clinched nails on the cleats.
In addition to breathing new life into the cabinet, it would also be modified so that it would fit into a recess behind the new cabinet position in the kitchen.

Steps to a new life for the cabinet.
1. The backing boards were removed. This enabled me to remove the rotten boards in the shelving, and replace them. The shelving was screwed down onto the cabinet frame.
2. I squeezed up the lining boards on the cabinet ends with sash cramps, at the same time as squaring up the ends. The lining boards were then re-nailed onto the end frames.
3. A new horizontal support was added under the rear base of the bottom shelf, to counteract the hammock shape of the bottom.
4. Additional stiles were added at the rear to accommodate the frame extension at the rear required to fit in the new kitchen location.
5. The cabinet was turned onto it's back, and the face firmed up. Too fragile to nail, I opted to screw the lining boards onto the face. Slotted screws were used, consistent with the era.
6. Using a big square and my 6 foot straightedge, a new top and bottom level was drawn onto the frame all round, and the I cut to these lines. By removing about 1/2" from the top and about 1" from the bottom, much of the rotten damaged ends of the lining boards were removed and the frame straightened up.
7. The new rear frame extension was completed, and the backing boards were shortened and re-fitted. Additional lining boards were used, from my stocks. These had come from a very old house in West Perth. Sometimes it is an advantage to be a wood bowerbird!
8. My customer wanted the old paintwork to be partly removed. So I removed the doors and used my belt sander, random orbital sander, and hand sanding to chew off the bulk of the paint. The result is very pleasing, and will eventually receive a clear coat of something -with echoes of the old colours coming through subtlely. Nice.
Removing the doors ready to clean off the bulk of the old paint.
The chosen level of paint removal. Mostly jarrah showing, but with echoes of the old paint coming through... 

9. Time to put the cabinet into position. Using the old fashioned method, I placed the cabinet in position, packed it up so that it was level, and scribed the based to follow the contour of the kitchen floor where it would now live.
10. The holes were cut in the back of the rear frame extension to take the waste pipe, water pipes and power point. With this done, it was time to fix the cabinet in its new position.
11. The frame was bolted to the brickwork behind. The doors were still to be re-hung, after new catches could be found, and probably after the plumber has been - to make access easier. Time to measure up for the top which needs to be made to replace the old one and extend into the recess behind.

The rejuvenated cabinet, with its new rear extension into the recess. Beautifully level.
Making the new top.
The original top was just too damaged to be usable in making up a suitable top - except for a strip along the front. My customer had another wooden top to toss into the mix, but it was not alot better. These tops were traditionally made from either Hoop Pine or Kauri Pine - though I do not claim to be able to tell the difference at this stage. My hunch is that the original top was made from Kauri Pine.  With the new top to be bigger (extending into the recess behind) and the timber in the old tops being to badly split and rotten, we decided to create a whole new top. I was able to obtain a new 3.0m (10ft) length of kauri pine which  was 250 x 75mm (10" x 3"). After ripping it down the middle, I was able to create two 10inch wide boards which were just over 30mm thick. From this I glued up the material for a whole new benchtop.
The oversized new top glued up, with epoxy resin this time.
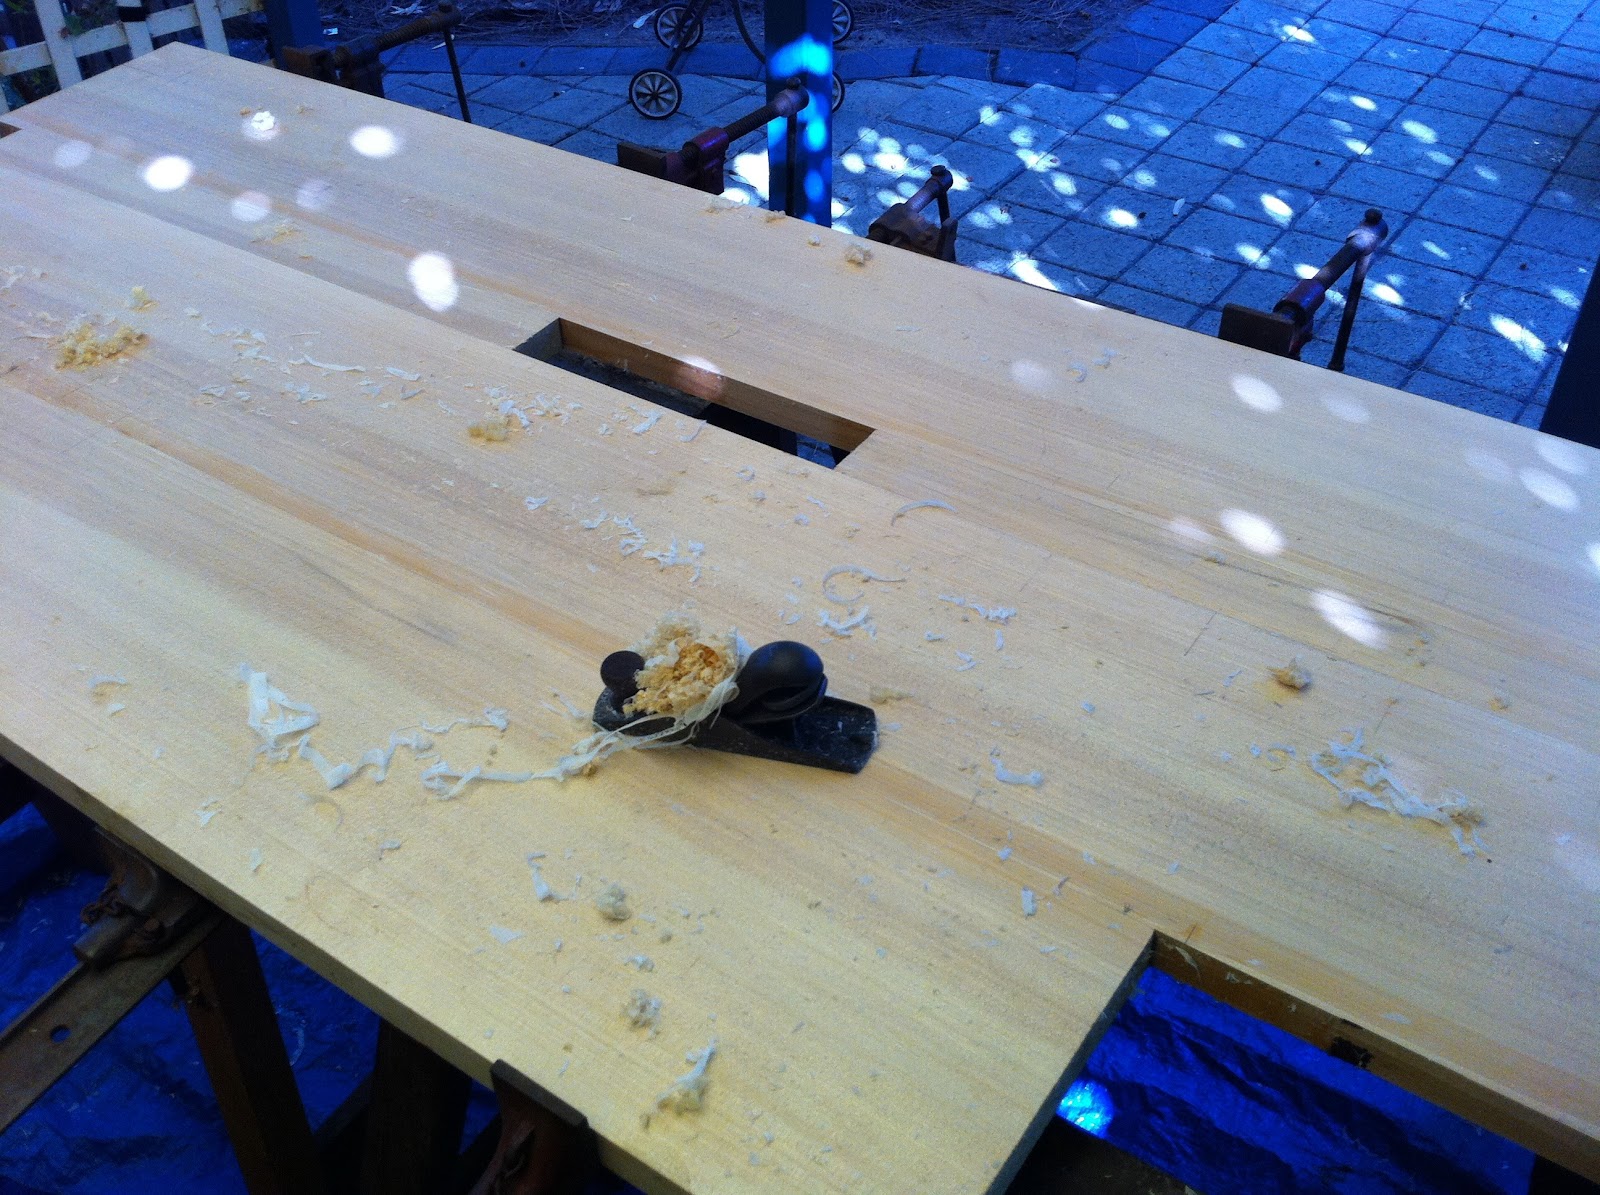
My trusty Record No.0110 was used to clean off squeeze-out from the joints.

I gave the back of the sink top a sealing coat of Tung Oil/Orange Oil mix, and left it to dry a couple of days. I then took the top to my customers home to complete the sizing and fitting of the top. She'd had an old metal basin re-enamelled, so I would need to measure it carefully to be able to cut the hole in the benchtop.
The "bowl hole" cut out of the benchtop, but the top not sized yet.
Router jig used for cutting the drainage grooves. 
Making the drainage grooves was interesting. My Dad tells me the way it used to be done was a strip was pinned onto the sink top in the right position, and a moulding plane with a coving cutter was used to progressively cut each groove getting deeper as you approach the bowl hole. I did not have such a moulding plane, so I rigged up a jig for  a router trimmer with a coving bit. By making a track for the router which was tapered in elevation by about 7mm over a 600mm length, I was able cramp it over each drain position and easily cut the drainage grooves. It worked a treat!
Drainage grooves completed, and top cut to size. Now for a test fit!
After a couple of goes fitting the top to the brickwork surround while in position on the cabinet, it was time to do the final sanding and apply a coat of Orange Oil to the top. An hour later, I fixed the top to the cabinet frame.
Top now made, and first coat of Orange Oil applied. Looking good!
Top now fixed down to the cabinet frame.
Detail shot of the bowl edge and the drainage grooves.
That nicely re-enamelled bowl looks pretty good under the new sink top.
Job done. A new top like those which were common in the 1920's and 30's.
 I am particularly pleased the way the new top worked out. Lucky to be able to get some Kauri Pine which also happened to be quarter sawn. Ideal for the job. While the original top was just too degraded to be useable, there is a reasonable section of the front edge, about 5" wide, which could be re-cycled into breadboards for the kitchen. I've made the suggestion. The other top, the spare one, has a strip through the middle which is badly split. That could be cut out of it, and again I reckon the rest of the material is very recyclable. The decision to make a whole new top (and not to cobble together a mixture of the two old tops plus some new material) was a good one.
It's been a very interesting and enjoyable job to re-vitalise the old kitchen cabinet, and install it in it's new home. Although the top is new, the original cabinet from the 1930's has been given a new lease of life, extended to fit into the recess behind, and has pride of place in it's new home as the kitchen sink cabinet. The new top will soon look more aged through use, and down the track people will be amazed that such an old cabinet can be in such good condition! It also fits into it's new home very pleasingly. Once the plumber has come to hook it all up install the taps, we'll re-hang the doors. Might be worth an updated photo then, of the completed whole. Stay tuned for that one...

After the plumber, the doors will go back on. What a glorious renewal...
Thanks to my customer for seeing the potential in the rickety old kitchen cabinet, and for giving the the task and honour of bringing it back to life. That has certainly been done to great effect!

Tuesday, February 21, 2012

Making a Karibari Frame.

Have you ever heard of the "Batman Joint" in woodwork? Not until now... you see, for want of a better term, that is the name I called this joint used in the making of a Karibari frame.

Another interesting project! The paper conservators at the State Library of Western Australian wanted a karibari frame made up to particular specifications which they provided me. Mind you, the picture on paper of the corner did not make sense technically, so after a few goes at experimenting, interpreting the diagrams and comparing what I could find on the Internet, the Batman Joint was born as a solution.
The component on the joint which gave the Batman Joint its name.  
The material specified to be used was Western Red Cedar. It is light and stable, and resistant to mould and insect attack - but also very soft and cheesey to work. I was seeking to avoid any knots and keep the grain as straight as possible as I machined up the timber from the 3"x2" material that I bought to do the job. 

The completed Batman joint. If this is correct, then there must be a Japanese name for the joint...
So what is a karibari frame? Developed during the Ming Dynasty in China and later developed further by the Japanese, the karibari frame was used for flattening and drying scrolls and documents of paper and silk. The wooden frame has 7 - 9 layers of paper glued to one or each face. Like all things traditional Japanese, there appears to be an intricate and highly developed discipline, methodology and philosophy behind the construction and use of these papered frames. The karibari frame is favoured by paper conservators the world over for flattening paper documents and artworks.

Making the frame components.
This particular frame was to be 2.0m x 1.5m. The internal lattice is made up from 20mm x 20mm material, housed into the outer frame via tongue which fit into the groove which runs around the inside of the outer frame. The outer frame is rhomboid in cross-section, made from 30mm x 30mm material, which has been machined such that the inner face is 20mm wide, the outer face is 30mm wide, and the top and bottom faces both have the same angle from the outer face to the inner face.  The internal lattice joints are half lapped cross housing joints, alternating under/over. The corner joints of the outer frame are shown on the plan I was provided. It was this interesting and complex joint that became the Batman Joint after some experimentation. All joints in the outer frame are to be pegged with bamboo pins through that frame.  I did not assemble the frame, as this would happen at the lab in the Library, for conservation grade adhesives only are to be used. I offered to assist in the assembly and the pinning of the joints.
The cross-housing joints were cut on the radial arm saw after careful marking out.

A joint comes together for a test fit.

Ya can't argue with that!

The tongues were also cut on the radial arm saw.

Yep, a nice firm fit. An inner frame tongue housed in the groove of the outer frame. 

The rhomboid profile of the outer frame, before being grooved.
The outer frame's profile was achieved with careful machining using a couple of jigs in the thicknesser. The resulting profile was perfect. The full length groove was created via the table saw.
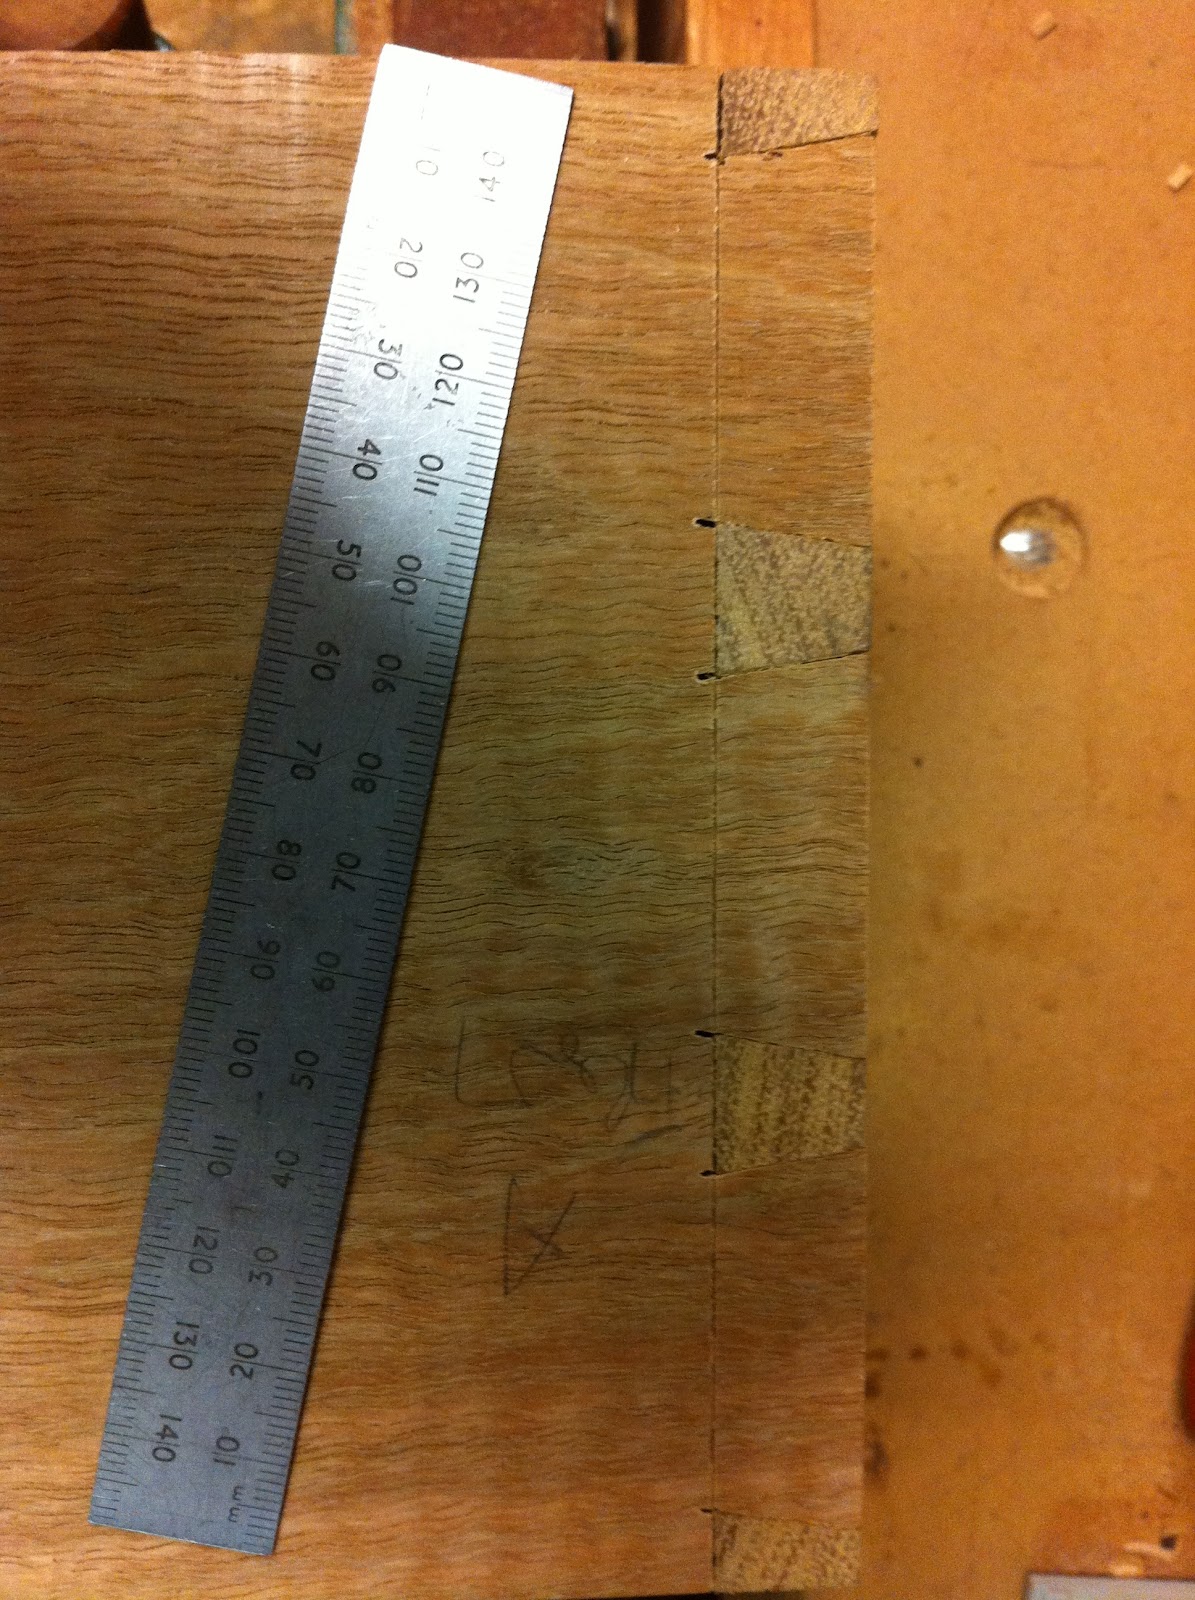
Inside shot of the Batman Joint, the outer frame corner joint. The long frame ends have horns.
Outside shot of the Batman Joint in the outer frames' corner.
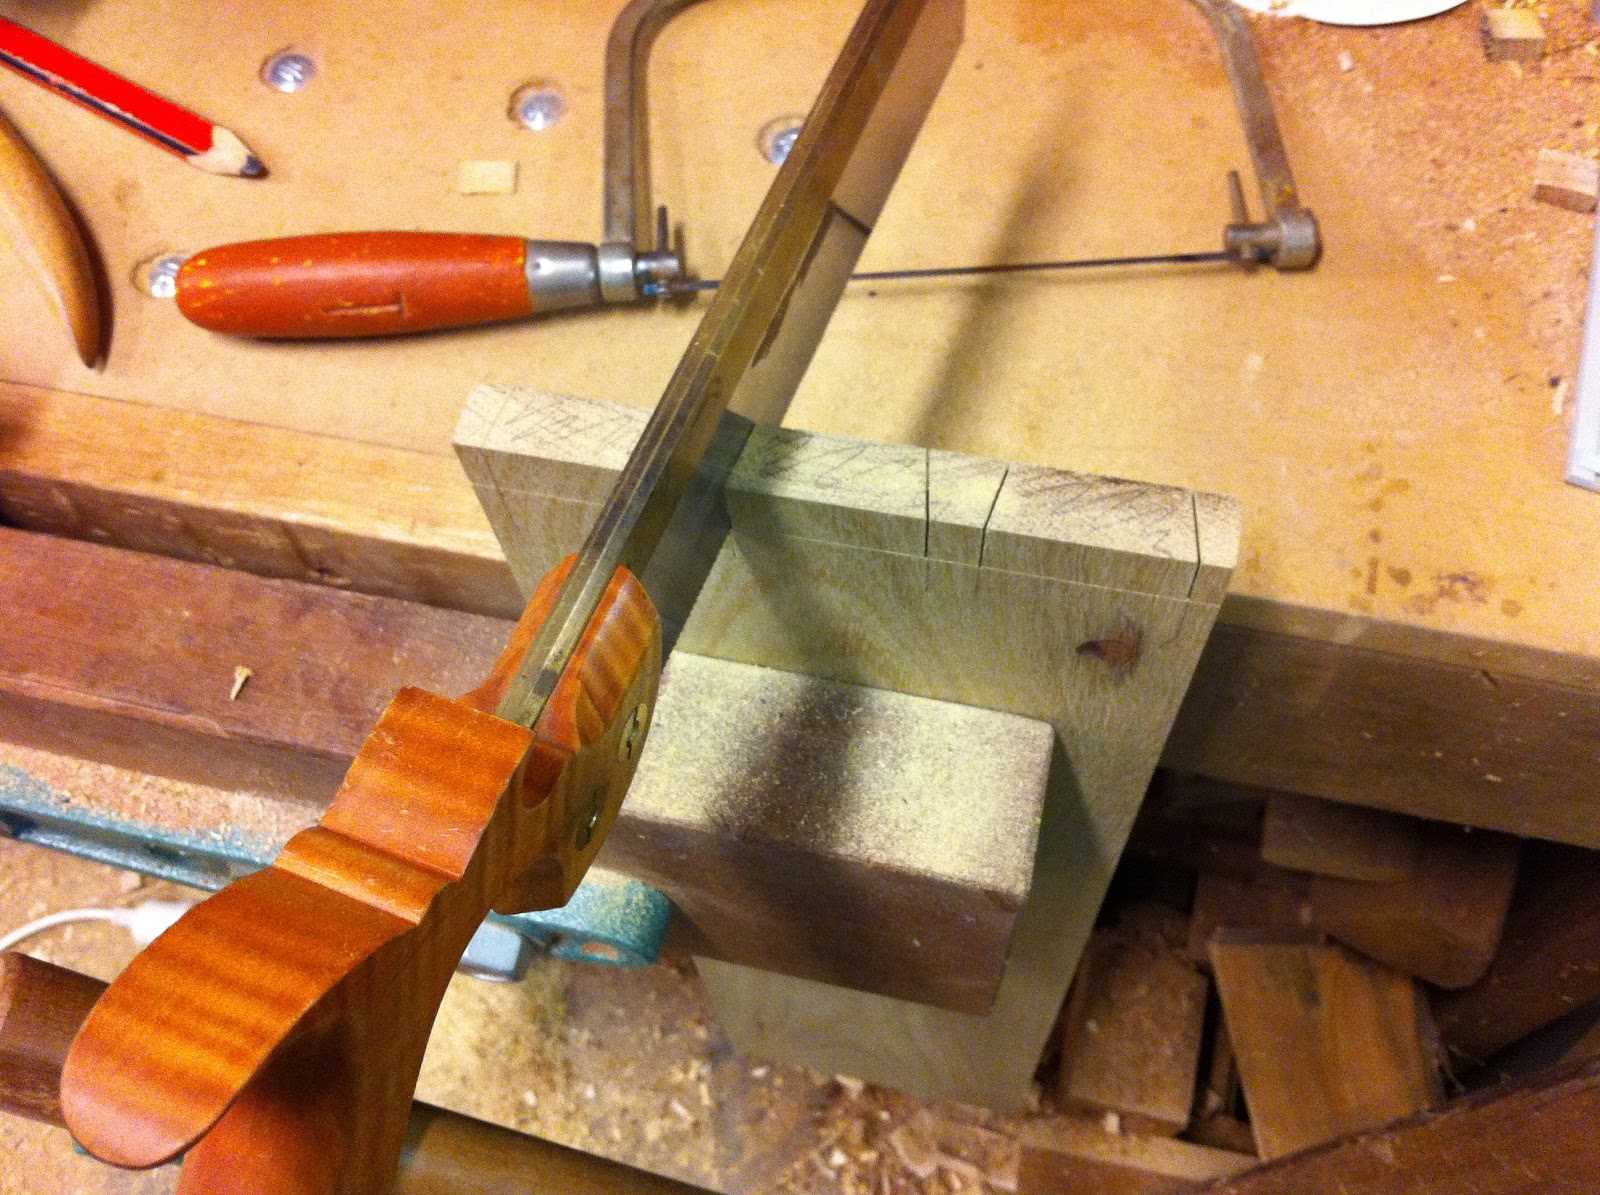
The Batman joint was predominantly cut by hand, using my trusty Lie-Nielsen 15pt dovetail saw.Waste was removed with use of my drill press, scroll saw, and a couple of very sharp chisels. However, even with very sharp chisels, it was difficult to avoid crushing the wood fibres when chopping across the grain. Hence the use of the drill press to bore stopped holes down the scribed lines in a couple of places! Careful marking out was the key, as with all woodworking joinery.

Putting it all together.
Assembly day came around, when I had arranged to put it together in the lab at the State Library with the wonderful paper conservation staff. The components had not all been put together before, so it was good to get it done so easily on site. Assembling the inner lattice was a tricky job, like a big open basket weave, so we had to be careful not to break any of the cross-members while putting it together. I had a few spare sticks with me just in case, but fortunately did not have to use them.
The inner lattice assembled. Time to fit the outer frame.
With the inner lattice assembled successfully, all with nice tight fitting joints, it was time to put the external frame onto the lattice and put the Batman Joints together. the ends of the crossmembers had tongues on them ready to house into the grooves in the outer frame, and all these were nice snug fits too. These joints were glued with Wheat Starch glue. Conservation grade adhesive... no PVA or Titebond III here!
Applying the wheat starch glue to tongues and shoulders of the joints in the outer frame. 
The outer frame went together beautifully. The final thing to do was to insert the bamboo pins through the outer frame and into the ends of the lattice crossmembers.

That's a bamboo pin (more like a nail) fitted.  
I used bamboo skewers as the pins, pre-drilling with a 7/64th " drill bit and driving them in with a hammer, wiping a bit of that wheat starch glue onto the pins before driving them in. Any protruding length was cleaned off flush with my trusty block plane. The final job to do was to use the block plane to trim flush any of the cross halving joints in the lattice which were not perfectly flush.

Job done! the completed Karibari frame.  
While my part in the building of the library's karibari frame was over, there is still much to do by the library's conservation staff. They are waiting for the special paper and other materials to arrive from Japan. Nine layers of the special paper will be glued over the entire frame, on both sides, following a strict methodology. I look forward to seeing the end result.

This project has been a very interesting one. Thanks to the very nice conservation staff at the WA State Library for asking me to make the wooden frame up for them. It's been fascinating!

Farewell to the Batman Joint!