Thursday, February 9, 2012

Building a timber deck.

It is a nice change every now and then to shut the door on my workshop and go do a bit of carpentry instead of making furniture and joinery. Mind you, when it is around 40degreesC neither the workshop nor outside offer easy working conditions! Here in Perth we have had a run of days over 35 degrees and as high as 42. Humid as well, so the perspiration just pours off when swinging the hammer or doing anything physical!

So it was a pleasure to be building a timber deck for my customer Pam in Fremantle, with her friend Anna as a TA assisting me. I take my hat off to Anna for working so hard despite the heat and for being such a quick learner. Together we have been a good team and progress had motored along. Such an interesting old house. In a former life it was a bakery, now undergoing a serious renovation. It is always so interesting to me to work on old places. They just ooze with character.


In case deck building is something you're about to tackle and is not something you've done before, I hope this post may provide you with some ideas and tips for how to do it and make a really good job of it too...

Planning the job.
Once my customers had given me the dimensions and details of the position and height of the deck, my task was to first draw it up. The scale drawing process brings together the planing the construction, the dimensions and types of materials to be used, and the calculating of the quantities.  Within the Building Code of Australia we have "span tables" which provide guidance and minimum standards for the selection of materials and the specification of acceptable maximum spans for bearers and joists for decking. This deck was to be at floor level (about 450mm above the planned ground level) so there was no balustrading to consider. 
Doing a scale drawing enabled the specs and quantities to be calculated.
With the calculations and the scale drawing completed, I emailed off the drawing to my customers for approval. We met again to discuss the details further and a starting time and they ordered in the materials based on the quantities lists I had provided. After some discussion, CCA treated pine was chosen as the timber to use. All metal fixings (nails, screws, bolts, stirrups etc) would be hot dipped galvanised.
Setting out the job on site.
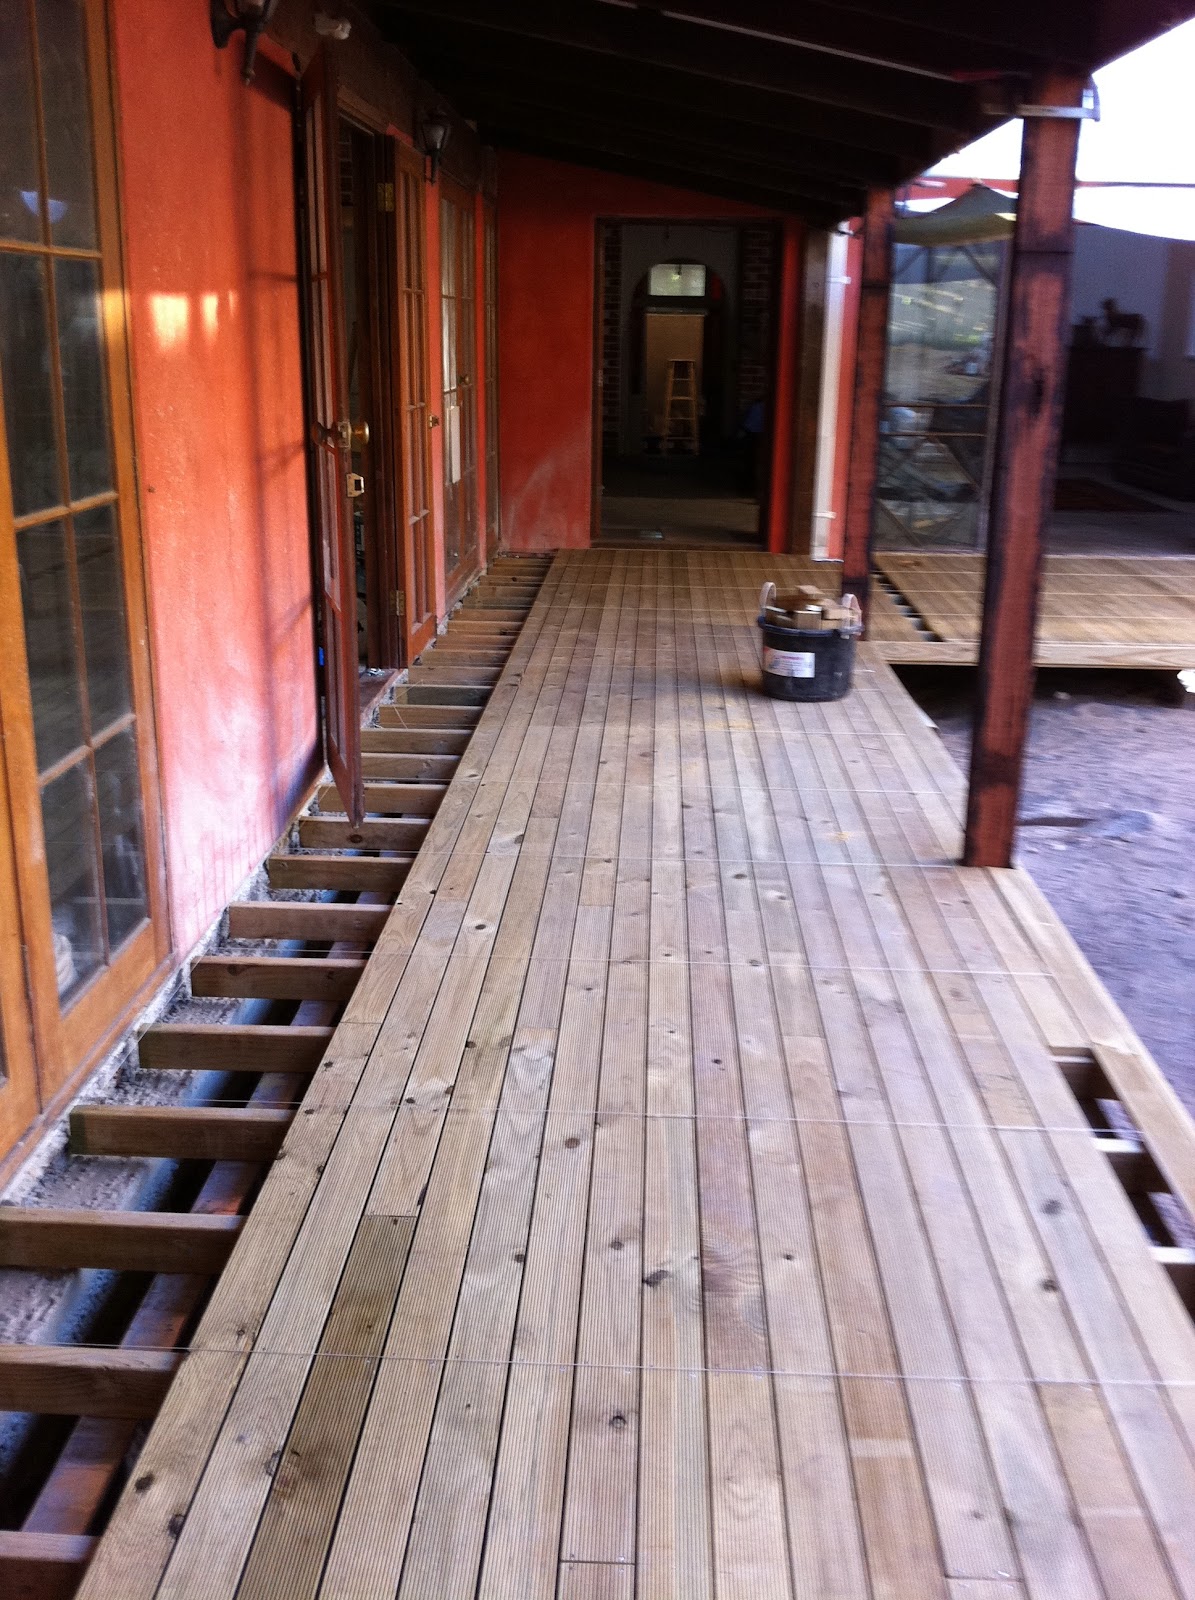
When I returned to commence the job, I found that the old concrete verandah had been removed, the soil level had been lowered, and Anna had used the drawing to pre-dig the holes for the metal stirrups which would be used in the place of timber stumps - to support the bearers. The timber was on site as with as most of the other materials that we would need. Everything was ready to go. Working backwards from the intended height of the decking surface, we determined the required level of the top of the bearers. We used my el-cheapo laser level to establish a reference line, and knew what height below that reference line the tops of the bearers had to be established. String lines helped to define the outer limits of the deck based on the required dimensions. The deck was to be in an L-shape, with the long leg being almost 10m ( 32.5 ft) by 2.1m (7 ft) wide. The short leg would be 7.5m long (24.5 ft) by 3.0m (10 ft) wide, meaning the 3.0m wide section extended a further 5.4m (17.5 ft) beyond the 2.1m section. This 10m long x 2.1m section was under an existing verandah. The edge of the deckline was to be directly below the verandah plate above it. This deck line was determined with the use of plumb lines from the top plate. The total area of decking would be about 37m2 (400 ft2).
Two views, one each of the legs of the "L shape" of the decking.

Laying out the bearers and stumps.
There are a number of ways to do this, but my preferred method is to make up the bearers full length, attach the metal stumps (stirrups), suspend the bearers levelled and in the correct positions, and pour the concrete around the stirrups. These days, it is common for bearers to be made up from two narrow sticks nailed and bolted together as a pair. In this way we made up the two bearers that were 10m long each, and the remaining 3 bearers which were 3m long each. The joints in the 10m bearers were staggered, mitred, and always over a stirrup. The bearers in this way were made from pairs of 120mm x 45mm CCA treated pine sticks.
The two 10m long bearers, propped up and in position, with concreting under way.   Temporary prop holding up the verandah until the new verandah posts go in.

The placement of frequent temporary supports, (made up of bricks, blocks, pieces of timber and fine-tuned with assorted packers) enabled the bearers with the stirrups already bolted on to be suspended over the holes ready for concreting. The laser level was used to ensure the bearers at each support and stirrup were leveled at the required height.  When the bearers were all set up ready, the concrete was mixed and poured around each of the 23 metal stirrups, and left for a couple of days to dry.
Detail showing the propped bearer with metal stirrup, suspended over the hole. The concrete would be poured half way up the 12 inch leg of the stirrup. Note also the staggered mitred joint in the bearer above the stirrup.  

Fixing the joists.
Before the joists were fixed to the bearers, the aluminium flashing was rolled out along the tops of the bearers. This flashing prevents the ingress of moisture between the pairs of timber making up the composite bearers, and thus greatly improves the durability of the bearers.
The joist positions were set out over the bearers, at 365mm centres. This is a little closer than the original plan, but putting an extra joist in the span will improve the decking by marginally reducing the spring in the decking. I am happy to be accused of over-engineering. String lines were used to ensure the joists were nailed in straight lines, and each joist was skew nailed from each side into the bearer below at each junction. Lots of 4 inch galvanised nails, pounded in by hand  using my trusty old Cheney hammer.
While the concrete was curing, I was still able to cut the joists to length ready for fixing down the next day. The flashing has yet to be rolled out along the tops of the bearers.
The joints in the joists were always staggered, mitred and centred over the bearers. The bearers and joists were always left "over-long", to be cut to final length later.
The long run of the decking structure, with most of the joists now cut to length, determined via stringline.
The original verandah posts had to be removed in order to undertake this work, before the bearers could be positioned in place. Amazingly enough, the old verandah top plate was full length - 10m (over 32 feet) which is a long 8"x2" of jarrah! You can't get them like that any more...  Anyway, in order to do this and provide the support, I first had to pick up the plate half way along it's length. The picture above shows how I did this. Once the temporary support was in place, the original posts were removed. The bearer/stump positions had been planned so that the new verandah posts would each be over a stump. 
Pam pleased to see the joists all fixed down. Some cutting to length still to be done.
The nailing down of the joists is the part of the job I always find very satisfying. You can really see the progress unfolding as you go.

Tips for fixing down the decking.
The decking boards on a completed deck are what is seen the most, not the structure below it. It is therefore very important that the boards are nailed down straight, with regularly placed fixings, and with nothing that jarrs the eye. Here are a few tricks to doing it right:

1. Work from string lines. With a stingline taut between one end of the joist to the other, the line of nails should be beautifully in line. It will look really good.
Nailing down in progress. Sticks in the foreground under the stringlines and ready to be used.

2. Place the nails in a consistent staggered pattern. Putting the nails in a straight line weakens the joist below by helping it to split open over time. By alternating the nails either side of centre (ie. either side of the stringline) When hammering in the nails, move the stringline as you finish each nailing, or you will leave a dent from the string in the soft pine!

String line used with consistent nail placement pattern. Note the remaining spacer - the others have been removed. Note also the tidy butt joint under the stringline.
3. Use deformed shank nails and skew them. Deformed shank nails have spiral shanks. This gives them greater holding power. You can see them rotating as you drive them in! Skewing the nails give them additional holding power to resist the forces exerted by the decking boards over years as they respond to the constantly changing moisture content of the boards between winter and summer. Decking nails in extremes of the Australian climate are notorious for working their way up and out.The use of deformed shank nails and skewing them greatly helps increase the life of the decking and reduce the maintenance.
Deformed shank (spiral) galvanised decking nails, skewed. Doubly good holding power. 
4. Maintain a consistent gap between the boards. This is very important, and is easily achieved using spacers. For this deck, I used 5mm spacers. These were made by docking up a piece of melamine faced MDF which was kicking around my workshop.  A nail is driven half way through each spacer, which is docked to about 60mm x 30mm. This enables the spacers to hang on their nails in between the boards while the boards are pushed up and nailed in place.  I made up a pile of spacers, more than 20, to make the laying process easier.
A few spacers shown in place here. Short board in foreground yet to be cut to length
5. Use reference lines. A nice tight string line, laid the full length of the deck in the direction of the decking boards, helps to ensure the first boards go in a straight line. While the use of spacers helps to ensure nice even spacing, pushing bowed and sprung boards up to them will not always guarantee that the spacing will be perfect. You will also find that not all boards are necessarily machined to exactly the same width. Different machining runs can result in slightly different sizing. Possible errors growing and multiplying are brought back in check by the use of additional occasional reference lines exactly parallel to the original reference line. Subtle corrections can be made to bring things back into perfect visual alignment. 
Looking good. New verandah posts in place. Full length reference lines used to ensure lines remain straight.
6. Cut good joints and stagger them. If you have to join decking boards end-for-end, make sure you place the joins over the joists, and keep the joins as far away from other joins as possible (ie. stagger them and spread them over the deck). Good looking joints are obtained by a small chamfer on the top face at the end of each of the two boards at a joint. This V-joint is much more tidy visually than two ends butted up with their arises intact.

7. Finish the edge cleanly with a fascia.
Having a defined edge by the use of a fascia board makes a huge difference to the look and the finish of the deck. Daggy ends of a deck are not a good look. Housing them within a nice clean border makes for a much better product.
Fascia board made with use of a decking board. In this case the brick paving will be built up flush to the top of the decking. That's the retaining wall partly under construction.  
8. Use hand tools! Forget your drop saw and your nail gun. Seriously. For accuracy, speed and ease of operation, you just need a sharp tenon saw, a sharp block plane, a small try square and pencil, and a good quality hammer suitable for the task. When working under an array of nailing string lines, it does not make sense to walk each stick over to a drop saw, bring it back, and feed it under the stringlines again. While each board is laying on the joists, under the nailing stringlines, you can easily mark a square end over a joist, cut it to length beautifully square while laying on the joists with your tenon saw, and remove the arises on the ends with your black plane. Then insert the spacers and nail the stick down. I recommend pre-drilling the nail holes in the ends of the boards at the joins, to ensure the boards do not split at the ends. Skewed, of course.  Nail guns do not dress the joint like a hand driven nail will do. If you have a gap between the joist and the decking board, a nail gun will nail it down with the gap still there. A conventional hammer will close the gap as the nail is driven in, dressing it down. 

9. Take pride in what you do, and be your own harshest critic.
It's never OK to say settle for second best and say "that'll do". With power tools it's easy to make a mess of cuts. Too much power and not enough control makes for a lack of accuracy. However with hand tools it's all up to you how much attention to detail that you maintain and how accurate your cuts and hammering will be. That's one of the great things about using hand tools. 

Worried that your skills are not up to it? Keep your tools sharp and your hand skills will improve quickly while you use them on the job. Don't settle for second best. If your cut isn't square, do it again.

Nice job, eh? And it is really so easy to do...

So there you go... the story of a deck. Thanks again to my ever reliable off-sider on this job, Anna, for being so quick to learn and for putting up with my demanding attention to detail.
Now Pam, it's time for you to enjoy that sherry on your new deck...

Sunday, January 29, 2012

Feasting on a smorgasbord of furniture and joinery.

While in Europe and the UK recently, I enjoyed looking at lots of old furniture in galleries and museums. Oooo, it was so nice. This furniture ranged from the completely over-the-top Rococo style stuff in Napoleon III's apartments at the Louvre in Paris, through to simple home made rural pieces from the 12-14th century.
Just a  touch of gilding on the joinery and furniture... Napoleon III Apartments, the Louvre, Paris.
There were all the big names in English cabinetmaking, like Sheraton, Hepplewhite, Chippendale, and Morris - through to the long forgotten and nameless people ranging from very early DIY to incredibly skilled craftsmen who created outstanding furniture and joinery for Royalty, Lords and aristocrats, as seen preserved in various castles and stately homes. What a feast for the eyes!! What food for the soul!!
Awesome carving in panels of partitioning, Edinburgh Castle.
While I am greatly impressed by the very intricate and clever high quality furniture seen on my travels, I also really appreciate a lot of the more "primitive" furniture which was used by the common folk. There is a lot of talk about Joynt Stools in the US woodworking circles at the moment, and I saw lots of those in my travels.
English 16th century oak Joynt Stool, Burrell Collection, Glasgow. 
 Chairs, small cabinets, and tables have been such fundamental furniture items for so many centuries in Europe, and those surviving pieces tell us so much about the people who made and used them.
English 15th century simple oak stool, Burrell Collection, Glasgow. 
 There is something very honest and down to earth about this common use practical furniture. Every mark and dent speaks volumes about the centuries of use they had until they found themselves preserved more recently in these wonderful collections.

Street seller's stool, Grand Bazaar, Istanbul.
Ornate hinges on storage cabinet, Notre Dame Cathedral, Paris.

Ornately carved storage cabinet or wardrobe, Cilipi, Croatia. 
 However I am also drawn to the incredible craftsmanship that is displayed in some of the very ornate pieces. I was in the Fitzwilliam Museum when I was struck by the sheer beauty and precision of the work in a side cabinet which stopped me in my tracks. The design is attributed to Owen Jones (1809 - 1874) and manufacture attributed to Jackson & Graham, of London, c 1871-1874. Made from Macassar Ebony, with marquetry in many different timbers and ivory stringing. Breathtaking!
Amazingly ornate side cabinet, c1870's, the Fitzwilliam Museum, Cambridge.
A closer view of the amazing marquetry and veneer work in this cabinet.
 There is a funny side to these pics. All over Europe, it is OK to take photos in most museums - though sometimes flashes are not allowed. However in England it is a different story. Many museums and collections in the UK do not allow photography, and most are typically very low light environments. So taking photos even when allowed is not easy with my phone camera. (While I like my iPhone, it's camera does not like either low light conditions or movement. Hence too many of my inside pics are a bit grainy.)
Now I hadn't realised it, but the Fitzwilliam was another "no photos" place - until I got a tap on the shoulder from a very nice room attendant. After I had already taken a few shots of this stunning cabinet. Henceforth I wandered through the rest of the building both excited and disappointed. I wouldn't be capturing images of the wonders I was beholding. Damn.

Another view of some detail... delicious!
 So it was just a stroke of luck that I had scored some pics of the most exquisite cabinet on display there - before getting that tap on the shoulder...

I have been so fortunate to have enjoyed such a feast of wonderful woodwork over the centuries. It is nice to every now and then scroll through the hundereds of photos I took to remind myself of the amazing scope and variety of this legacy left to us through the centuries.

I hope that in some small way the pieces I craft for my customers might also contribute to that legacy of craftsmanship too. ...Back to the workshop I go!

Monday, January 9, 2012

The wonderful campaign chair.

Well known US woodworking identity Christopher Schwarz has recently been researching the Campaign Chair. Reading his recent blog post brought back warm memories of my own experiences with this interesting chair.
Way back in 1988, a customer approached me with a chair he said had been in his family for about a hundred years. He wanted another to match. It was a campaign chair, made of 10 wooden components: 4 legs, 4 rails, and 2 pivoting backrest supports. A slung canvas seat, leather straps with buckles and a couple of bolts with wing nuts completed the chair. This clever chair works on tapered mortise and tenon joints giving it amazing flexibility, and the ability to sit with four feet on the ground on any terrain. Perfect for the Empire's military officers as they expanded and enforced the Empire across the globe. Campaign Furniture was created to enable these travellers to take the comforts of their English homes with them. It was portable furniture, which could be folded or broken down - robust and readily assembled at the next camp. The quality of the furniture usually reflected the station of the officer. Practical symbols of status and of home. This furniture also became useful for hunting safaris in Africa, as wealthy people from Europe and North America took to the plains of Africa with this early version of "adventure tourism". None of the home comforts were spared, even when living under canvas. Safari outfitters did a roaring trade in campaign furniture.

When I made that first chair for my customer, I fell in love with it. So I made a few more. Over the next decade I made many more and it evolved as we went - usually driven by customer requests.

Early examples of the first campaign chairs I'd made, copying the original. Circa 1989.
I put some of these early chairs in a couple of furniture galleries in the forested South West of Western Australia near where I was living and trading, and they proved popular. Being for sale in tourist destinations, these chairs went all over Australia and the world with their new owners. I offered a range of colours in the canvas, and most of the woodwork was made from Jarrah (Eucalyptus Marginata).   With growing exposure to the public, I was soon made aware that these chairs or versions of them had an interesting Western Australian connection. The Perth based furniture manufacturing company Joyce had once made a very similar chair before WWII.

An advertisement, from around 1937, for the Trojan Roorkie chair made by Joyce in Perth.
Having seen a copy of the Joyce advert for the chair around 1937, I was now intrigued. The style of the turnings was almost identical to the chairs I had been making based on the one brought to me by my original customer. So was that chair I copied actually a Trojan Roorkie chair, or was it really 100 years old? To this day I do not know, but this unresolved question did not change my love of this wonderful chair, which continued to evolve in both design and production techniques.

In about 1989, a new customer told me that they had some campaign chairs made for them in the 1970's which were leather rather than canvas. They offered me the opportunity to have a look, which I keenly took up. The leather was just about dripping off the chairs, had moulded to the shape of the bodies which regularly sat in them - and they were sooo luxuriously comfortable. I was hooked! I had to make some...

Having been a leather worker in the mid to late 70's, the leather working side of the new design didn't phase me at all. I had dug out my old tools from storage to do the arms of the canvas chairs, so all I needed was the hides. The leather used was double shoulders of cow hide, about 3.2 - 4.0mm thick. In those days the only remaining tannery in Western Australia was WA Tanners and Fellmongers, in Russell Street Fremantle. I was soon buying lots of hides and making the leather components. The early versions of the leather campaign chairs I made were sewn. Not having a heavy duty sewing machine with a walking foot, I paid someone else to do that work. These days we call it "outsourcing". Seeking to have more control over the quality and aiming to reduce the production and freight costs, I decided to fix the leather myself using rivets rather than sewing. From that point on, and for the next 10 years, all the chairs were riveted. A very smart move. It also provided pocketmoney for 3 of my kids who, like me, all pounded thousands of rivets. All part of their rich teenage experience, eh?

The leather campaign chairs were now the ones which were selling, despite being more than twice the price of the canvas model. So I stopped making the canvas version. It was leather or nothing from here on. Meanwhile we had added another component to the chair. The conventional campaign chair has a rail between the front legs which tends to put pressure under the thighs. In order to make the leather chairs even more comfortable, we found that a wide leather strap running under the seat behind the front rail made a huge difference to the comfort. It also helped stop the user from sliding forward on the leather. It was a winner of a design modification. All the leather chairs we made had these wide under-straps as standard, as can be seen in the picture below.
A marketing brochure picture of our leather version chair, around 1990.
 It's been about 12-15 years since I last made a campaign chair.  Life had moved on. I had stepped out of the woodworking industry for a while, and we had moved from the country to the city. Although again working as a professional woodworker for the last few years, I don't play the gallery /exhibition circuit any more.
However, the chair was never forgotten. I still have the jigs and gadgetry created for making the chairs in small production runs. We also have in our lounge room one of the very first leather versions that we made, a stitched model.
I like to sit on it. The leather squeaks and talks to you. Small kids like to play with the chair when they discover that they can play aeroplanes as they lie on the backrest and try to find the balance point with their aims outstretched. It's a nice drinking chair. My drink sits nicely on the floor beside me as I lean back in the chair, with the drink in easy reach at all times. It is also a living reminder of a significant time in our lives when we had the pleasure of bringing up our kids in a country town - in a community, living in a wonderful forested coastal environment.

Stained, stretched, used, abused and very comfy. Our early model leather campaign chair.
Yes, it 's also good chair for chewing the fat and being thankful for life's journey, too - made all the richer by great pieces of furniture with a great story behind them, and the interweaving of many people along the way.

Monday, December 26, 2011

Confessions of a woodworker...

As I visited several countries in Europe recently, this included a fair bit of wandering through historical sights and tourist places. A first time for us, my wife and I were taking it all in and observing such a deep level of history, with all its complexities. You have to remember that for someone from Australia, there is a fascination about walking into a building which is a more than two hundred years old! Other than caves and natural features which give evidence of human occupation going back 60,000 years, there are no buildings in Australia which are over 220 years old. So these huge old structures across Europe so many centuries old hold a particular fascination for us.

Due to the religio/political shaping of European history, there are a great many very old cathedrals and churches remaining, many of which are key features on the tourist trails throughout much of Europe. Hence we visited many of these huge old buildings. As so many of these are made from carved marble and stone, the visible woodwork mostly consists of doors, sometimes panelling and furnishings.Don't get me wrong... I am very impressed at the extraordinary level of craftsmanship which has been applied to amazing marble creations and embellishments in these buildings. However, |I confess that my heart particularly responds to the warm glow of ancient beautifully crafted timber furnishings in these cathedrals and churches. So with this confession in mind, it is appropriate that at this point we look at a common wooden furniture item found in these places of worship - the Confessional.
Beautiful woodwork in this confessional. Zagreb Cathedral.
Nice carved detail in the face frames around the doors.
Confessionals were commonly made as booths, offering privacy in an enclosed space where a person makes their confessions in the presence of a priest,  who sits on the other side of a divider which provides a degree of anonymity for both parties.  These very old pieces of furniture in the cathedrals and churches were made by skilled people in the days when quality and attention to detail where normal expectations, and remain as inspiring examples of craftsmanship. A feast for a woodworker's eyes, it's a shame these confessionals are mostly housed in very dark or poorly lit places!

 
A little more rudimentary in style. Notre Dame, Paris.
 The variations in the styles of the confessionals is fascinating. The contexts in which these big pieces of furniture sit is often amazing. The grand buildings around them tend to dwarf them as they often sit in dark corners surrounded around and above by incredible carved marble and painted frescoes.

It's dark, and no flash allowed. A different style of confessional, Chiesa del Gesu, Rome.
  

Amazing marble context:  Confessional dwarfed in bottom right of picture. Chiesa del Gesu, Rome.
Some confessionals have amazing carved pediments and panels. Others have complex joinery with layers of mitred mouldings and detail. Others are more plain, but have the most wonderful veneered panels instead. This one in the Basilica Santa Maria Maggiore is just one of those. It lets the wood do the talking.

Confessional set into an alcove. Basilica di Santa Maria Maggiore, Rome.

Something which struck me about the confessionals in Saint Peter's Basilica at the Vatican was the way in which the back of these substantial pieces of furniture were shaped to follow the complex marble wall details behind them. They also had amazing carved pediments and layering of mouldings creating grand columns on bases. Very nice veneered panels, too!

Wonderful detail in this confessional. Saint Peter's Basilica, Vatican City.

A closer look at the external square columns.

A closer look at the centre round columns on square bases.

Side view. I love the way the backs are scribed to fit the complex wall profile!
Spectacular pieces of furniture in the old cathedrals and churches are not limited to the confessionals. There are often amazing carved choir stalls, seating, other sanctuary furniture and pine organ facades.  The level of workmanship is sublime, the timber used is often so very beautiful, and the tell-tale signs of so many decades or even centuries of use are fascinating in themselves. Confessionals hold their own secrets. Ah, if these furniture walls could speak...

Yes, I confess I am a lover of fine furniture, rough furniture, practical furniture - wooden furniture. It is the stuff which has been made by the skilled hands of craftsmen long departed which particularly casts its spell on me, as with these old confessionals. A close look at the detail usually reveals to me the tell-tale marks of hand made furniture - the small mistakes, the over-cut, the scribe line, the planing tear-out, etc. Rather than detract from the piece, these marks are both reassuring and exciting. They bring me closer to the person who toiled over these creations to earn their daily bread, and a recognition of the methodology and tool use which both he and I would often share.

The process of making things with our hands is so satisfying. Woodworkers throughout the ages have found deep joy and meaning in the creative process and the application of their skills. 
Yes, I confess I am smitten.

Friday, November 4, 2011

A few Joinery Doors in Croatia.

A recent visit to Croatia was fascinating. Amongst the wonderful sights and smells of this ancient and very much alive land with its layers of history, my eye was of course often drawn to joinery and furniture. Not the modern stuff, but the older stuff which oozes history and story.

Zagreb. So many amazing doors. Never mind the wheelie bin...
The thing about these fantastic wooden doors is that they do not exist on their own. The context is important, and that context is usually the doorway, which is almost always made of carved stone, which was the building material of choice for centuries before concrete took over in the modern era. With so much marbleine limestone around the place throughout the country, it makes sense that so much of this stone was used. Being so hard, it also has weathered really well. Hence you find buildings that are well over a thousand years old and still standing. This, for an Australian, is a certain fascination and cause of much wonder!

This door pictured in Zagreb isn't really that stunning, but it was the first one that I saw. I included it here as it marks the start of my journey of fascination with the joinery doors...
As we travelled from Zagreb down through Istria and the Dalmatian Coast and on to Dubrovnik, I found many interesting joinery doors which took my fancy.
Buccari. Not grandiose, needing maintenance, but oozing stories.

Buccari. Nice metalwork to compliment the beautiful wooden doors.
Buccari. Different door style, housed in a once-grand doorway with pediment.
Zadar. Interesting door panels. Fantastic stone surround! 
Oh yeah. Great door panels in the doors pictured above.
A closer view again ... to check out the methodology in the raised panel.
The technique known as "frame and panel construction" has been around for centuries, and continues to this day to be one of the most reliable and durable ways to construct doors, furniture, panelling, and a wide array of other joinery. Panels housed within a fixed frame are able to move independently as they respond to changing moisture content of the air. Very effective and very smart, offering structural stability and durability. In the closeup above, you can see that the whole raised panel is carved from one piece - with the exception of the beads in the small triangles, which are "planted". ie. fixed on. The different grain direction is the giveaway when it comes to investigating the construction methodology. The horizontal pieces of planted bead in the small triangles are not able to shrink in length as the width of the panel decreases in drying out. This has most likely lead to the splitting of the big panel which is visible down the centre right side of the panel. Interesting...
Zadar. Less fussy in design, and obviously being maintained.
Trogir. Beautifully detailed and ornate doors. Delicious. Nice surround, too!
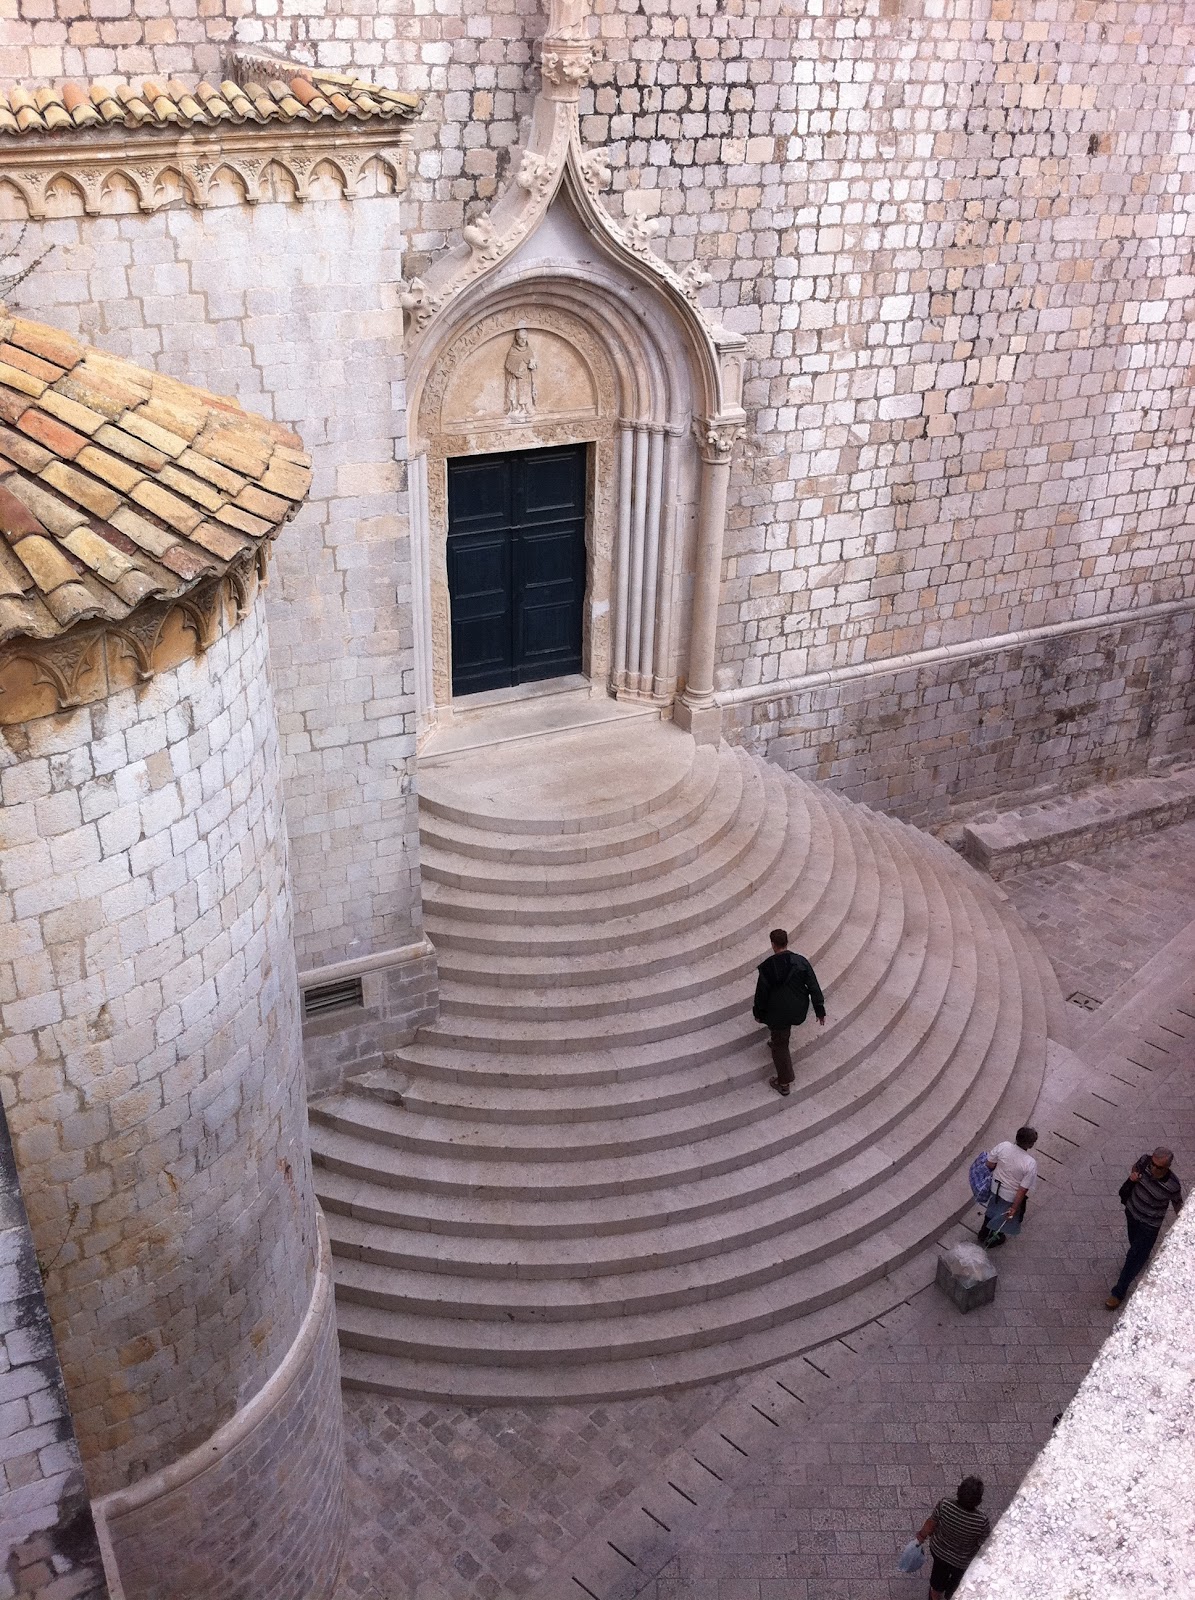
Dubrovnik. Never mind the doors, check out the approach stairs!
Dubrovnik. Four big carved panels. Nice job.
Dubrovnik. The fan-like overhead panel is wonderful.
Dubrovnik. Nicely different decorative door panels.
Dubrovnik. Diminished glory, showing a recent minimal repair job. Please fix me up!
Another pair of doors screaming for maintenance. Bottom rails needing replacement!


While some door scream out for maintenance, others speak of modifications that have taken place to them. These are not always beautiful or good for the doors, but do speak of a need for practical or creative solutions required by the householder.  Looking closely at the door tells us a lot...

Dubrovnik. Mis-modified? Bottom of the doors chopped off to make them fit into the doorway

Dubrovnik. Also modified. Bottom sections have been added on to the  original doors.
Dubrovnik. Another pair of doors modified at top and bottom rails.
Note how the doors have been scribed around the doorway. Unusual modification to make the doors fit doorway.
Dubrovnik. Nice detail, metal grill, and detailed planted stop down the centre.
Detail showing the top of that planted stop. Lovely scroll, eh?
Dubrovnik. This pair more modern and unusual in that the stiles do not go full length.
Yes, I have many more pictures of doors and doorways. Just a few are shown here.

What is it about doors and doorways? Each is an entry statement in itself, and speaks of the many owners and occupants of those buildings over the centuries or decades. As the principle point of entry and exit to a building, they take a lot of wear and tear. This activity produces scars which tell stories. The modifications also speak volumes. Many of the doors around Dubrovnik would have been damaged during the relentless shelling of the city in 1991-95 during the conflict, so it is not surprising that there were so many modified doors, from the rebuilding of the city in the aftermath. 

Ultimately, a good pair of doors will last almost indefinitely, so long as the construction is sound, they are out of the weather, and the maintenance is carried out. |Long live the beautiful doors and doorways in Croatia!