Friday, October 14, 2011

Inspired woodworking.

While travelling, I can't help but notice wonderful woodwork everywhere. Here's some examples of some found in two different locations, inspired by the spiritual and created by talented craftsmen a very long time ago.

The Blue Mosque, Istanbul.
This beautiful building was built for the Sultan Ahmed, and was completed in 1616. Inside this very impressive building are 200 stained glass windows the inner surfaces of the domes and walls are covered with over 22,000 ceramic tiles.

In this place of worship the architecture, colours and details are fantastic. Of course, my eye is always drawn to any woodwork around the place. With so much carved stone and tiles, there was not a huge amount of joinery visible in the area that the thousands of tourists like myself can get to. However there were two pairs of beautiful doors at the back of the rear area that I was able to get near. Identical pairs, I managed to capture some pics of them with my trusty iphone4, despite the low light conditions.

Apparently the tiles have faded significantly over the last 400 years. It must have been totally stunning when it was first built.


One of the two identical pairs of doors at the rear of the mosque.
Closer view of the beautiful carved and inlaid panels in the doors.
Construction details : pegged mortice and tenon joints. Note the border stringing in the frame. Nice.
Frame and panel construction has been around for centuries as a very successful way of building joinery that happily accommodates the movement of timber.  I really wanted to open the doors to check out the panels from the rear to see how they were done... but of course that would have been a no-no...
Exit door hardware.
 On my way out the exit door to the mosque, I noticed the hardware on the massive timber doors. I couldn't get a pic of the doors, but I did snap a shot of the hardware. Love these old handles, locks and fittings. They all tell stories of the life of the doors and the millions of people who have passed through them over the centuries.
While I did not find a lot of woodwork that I could get near in the Blue Mosque, those two pairs of doors were very beautiful and oozed of very serious craftsmanship. They were definitely worth a mention.


The Cathedral, Zagreb.
Like a lot of these ancient European buildings, this huge building has a long history of re-builds and renovations, due to destruction by invading hordes, earthquakes, warfare, and periods of repair. The original cathedral was built in the 11th century. Wrecked by the Tartars in 1242, it was re-built and later had fortified walls built around it to protect it from the Ottoman Empire attacks. In 1880, a huge earthquake significantly damaged sections of it, so it had another major re-build. It is currently undergoing significant repairs on the two spires, as the carved stone is very corroded. The implication of this interesting history is that buildings like these are an interesting mix of styles and artwork. Unless you are an expert in such things, it means that the age of the woodwork inside will vary considerably and that knowledge is sadly not something I possess. However, it sure is fascinating!

A view of the inside of one part of the cathedral
The detail in the carved stonework is fantastic! One part of the entrance way.
Inside the huge pair of outer doors are these four oak inner entry doors.
The carved oak panels in the lower sections of the inner entry doors are wonderful.
These booths were exquisitely made, with linenfold panels, carvings and complex finials. Stunning.
More carved oak panels in furniture with complex inlaid details in both the panels and the frames.
Seriously solid pews throughout, heavily carved - each with the essential huge radiator underneath!
This pic's for my Dad, who has done a lot of organ building. Beautiful woodwork hiding way up there!
One of the things I love about well made functional wooden furniture is the patina and wear from use. The tops of the pew ends had serious wear from countless hands holding them as people went in and out of the pews over so many years. You run your hand on those places and join with those people in a sense of connectedness.  The pew seats are worn from thousands of people sliding their bodies off and on the kneelers in front. I love all that wear and the stories that it tells!

Over the years I have been commissioned to make and repair a range of furniture for places of worship. While I always seek to create the best level of craftsmanship in all that I make, when making these commissions I feel a heightened sense of responsability to do it right.

I am sure that all the craftsmen over the centuries who have participated in the creation of these amazing buildings and their furnishings have also felt the same...
... I reckon there's something in there about giving back to the One who gave us the trees, the beautiful woods that are derrived from them, and the joy of making things of great beauty and function with our hands.   
 

Monday, September 19, 2011

The mystery No 7 Stanley Plane.

What a beautiful plane!

I had been looking for another No7 Jointing plane for my group participants to use. I came across one at my local markets recently, which I snapped up for AUD $50. A good price for a "user"- but there was something about this plane which seemed odd, and I just couldn't put my finger on it at the time. There were several indicators which told me this was an old plane.

Stanley bought the patents for the adjustable metal plane from Leonard Bailey in the 1860s. The name Bailey was later cast into the plane bases in front of the knob in honour of Mr Bailey. The name Stanley does not appear anywhere on the plane, except for on the plane iron. The iron (blade) lettering says it was made in Australia by Stanley. The Stanley Works in Australia was located in the southern state, Tasmania.

DATING THE PLANE.
By digging around on the internet across a range of sites, I was able to put together a few clues as to the age of the plane. While I can't claim to be 100% accurate, I reckon the following information is pretty close to the mark.  It may be of interest to you. I am always fascinated with old tools and the stories behind them. Of course, there is no way of knowing that all the parts are the original! Hence it is worth checking out a range of attributes of this mystery plane. Let's have a close look at it...
There are three patent dates on the plane base:
March-25-02; August-18-02; April-19-10.


The frog design and the frog receiver cast and machined on the plane base was Stanleys third design, and was patented in 1902. This type was made between 1902 and the end of WWII. The first two dates relate to this improved design patent.
The third patent date was added to plane bases made between 1910 and 1918.

There is a low profile front knob.

Stanley started making the tall knob we are most familiar with about 1920, so this plane dates sometime before that.

The blade is laminated.
The laminated blades were made for decades right up to WWII. That piece of steel laminated onto the cutting end of the blade is incredibly hard! Re-grinding the bevel on my wet stone grinder took forever. Stanley called these "composite" blades. This one is of the version where the entire end of the blade was of the hard steel, rather than a thin layer bonded to the lower end of the normal steel of the plane iron.

The lever cap has a key-hole shaped hole.
During the 1930s, the lever cap was re-designed and patented, from the key-hole shape to the kidney shape.
That dates this lever cap before then.

So what is the verdict? The plane was made between 1910 and 1918. Is the iron the original one? Not sure - but I reckon everything else is original.

SOLVING THE MYSTERY.
While I knew it was old when I spotted it at the markets, there was something odd about this plane. When I got it home, I worked it out - when I put it next to my No7 (which was given to my Dad by his Father in 1945 when Dad started his Carpentry/Joinery apprenticeship.) Bingo!


The US made Stanley No7 in the background, and the "sawn off" No7 in the foreground.

The mystery No7 was over 3 inches shorter than the other No7! I can only assume the plane was dropped on its tail at some stage, and the cast iron base has snapped across the tail. The owner did a fantastic job of re-shaping the end, just behind the "No 7" cast on the base. Such a good job that I didn't pick it. It's a bit short! That's why there was something odd about it... but it is still an absolute beauty to use!
Henceforth it shall be known as the "Sawn-off Seven".

Sunday, September 11, 2011

Another Fantastic Earthcarer's Program.

A recent Saturday was a big day but a great day. I had been lined up to run two workshops with a whole bunch of Earthcarers, in the big shed at Perth City Farm. There were 20 places in the morning session, making Kitchen Chopping Boards, and 20 places in the afternoon session, Carving Wooden Spoons - and all 40 places had been filled ahead of the event. I don't usually work with groups that big, and pulling together the extra benches, tools and materials was a huge job. Aah, but we created some wonderful stuff!

Peg warms up the morning group as they gather with anticipation.
Earthcarers are keen recyclers, and the purpose of the program was four fold:
  1. To help the participants learn about trees, understand about wood, and appreciate the importance of wood as a low-energy renewable recyclable sustainable carbon-sequestering material.
  2. To help the participants understand the potential of "waste" wood and its usability.
  3. To empower the participants with some basic skills to be able to utilise some "waste" wood.  
  4. To discover the joy of wood and woodworking, while being creative and having fun.  
Morning Workshop:  Kitchen Chopping Boards from "Waste" Wood.

The proud makers of two chopping boards - One of highly figured jarrah (formerly a piece of hanger beam) and the other of european oak (formerly a piece of pallet).

Nice wood! A lovely board made from Silky Oak - once part of a discarded bookcase.

Delicious board made from european oak - another piece of that pallet. 

Once a piece of pine crate from New Zealand - the mechanically imprinted APSM 15 Mark here cleverly utilised.

Unknown tropical hardwood from a packing crate - now a very nice board.

A beautiful jarrah board taking shape - previously a piece of pergola timber.

Another good lookin' piece of recycled jarrah.
That was just a sample ... so many great chopping boards created from "waste" wood. For many it was the  first time they'd used saws and planes. That was the whole idea - to learn about wood, learn how to utilise it with some basic tool use, and to get excited about the possibilities each piece of wood offers. 

Afternoon Workshop: Wooden Spoons from "Waste" Wood.

There's something wonderful about hand making wooden spoons. Each person needs to establish a working relationship between themselves, the tools and the piece of timber. As you are shaping the wood from so many directions in relation to the grain, with a range of different tools, it is a great way to learn to work with the grain rather than against it. For each person it is an individual journey. For first time woodworkers, it is rare that the finished spoon is just as the maker envisaged or planned at the beginning of the process. Lots of things happen along the way which bring about design changes on the run!  However, the resulting spoons are fantastic expressions of their creator and their journey with the tools and their chosen piece of timber. The makers are normally very very proud of their spoons.

WA Blackbutt makes such beautiful spoons. This piece once lined the ceiling of a bathroom!
Each wonderful spoon is designed and crafted by it's creator. There's plenty to smile about!

A spokeshave is used to shape the back of the spoon bowl. Using all hand tools, you can feel, hear, and smell the wood responding to the tools. It's talking to you all the time. Listen and engage...
A great number of beautiful spoons were made that afternoon. I didn't get many pictures of the finished products, but the beaming smiles on the faces of the participants remain etched on my mind.

There are a few more EarthCarers out there now who have had a small taste of the joy of wood. 

...Yeah, I just love doing this stuff!

Tuesday, August 30, 2011

Recycled timber - a trip to the mother lode.

The other day I took a drive across the city to the Henderson Waste Recovery Park. (Affectionately known as the Henderson Tip.) The purpose was to gather up a ute load of timber from the awesome woodpile there.
One view of part of the pile. That's all plywood in the foreground.
In the past, "Rubbish Tips" were big holes in the ground into which all waste was dumped and buried. Those days are over now, increasingly replaced by Waste Recovery Centres, which aim to reduce the amount of material going into land fill by a variety of interventions. Much of the waste is sorted, and recycling takes place when there is a market for those materials or there is a use on site. Hence there is a huge pile of timber, in pile of its own in one part of the enormous Henderson Waste Recovery Park. This timber is currently used on site for mostly low value uses, where it is chipped up to create roadbase material across the enormous facility. It is hoped to one day have a higher value way of recycling this timber.  To a guy like me who is committed to recycling timber, who is forever pulling apart old furniture and shipping crates to extract the timber, a visit to this huge pile is like coming across the motherlode. With the Henderson Facility in close proximity to the Port of Fremantle and several  industrial areas, there is a large proportion of packaging material in this timber, from all over the world. Amongst it all is some amazing and wonderful timber, with the  the ISPM-15 marks telling what part of the planet the packaging has come from.  
I scored a nice heap of pine boards from a big pallet which originated from Mexico
Out of interest, the global standard ISPM-15, is currently being enforced in almost every major importing country in the world. After treatment, ISPM-15 requires that the heat treated pallets and timber packaging are marked in a visible location with a legible and permanent mark approved by the International Plant Protection Convention.
Compliance with ISPM-15 for wood packaging materials allows for two treatment options:
Heat Treatment (HT): Wood packaging material is heated in a schedule that achieves a minimum core temperature of 56ºC for a minimum of 30 minutes.
Methyl Bromide (MB) Fumigation: The wood packaging material is fumigated with methyl bromide.
ISPM-15 requirements apply to all species of coniferous (softwood) and non-coniferous (hardwood)
packaging materials.

"There's treasure in that there pile!"
I have several woodworking programs coming up specifically involving the use of recycled timber, so I went to the Henderson Tip with a bit of a "shopping list" in my head. I had some wins, a few bonuses, did not get all that I had hoped to find, but came away with a wonderful heap of timber. You have to be lucky. There is daily stream of trucks coming to to dump timber at the pile, and a zealous loader driver who periodically pushes the new deposits up into the huge pile which can be up to 10 metres tall. The menu is different on an almost daily basis, depending on what has come in. I came back with more plywood than I had expected, and less material suitable for kitchen chopping boards than I had hoped. However I was very happy!  
 So what did I come away with? A significant amount of plywood: 18mm, 16mm, 12.5mm, 9.5mm, and 4mm thick. Much of it Australian made, as wide rips off sheets 8 feet long. Much of this will be cut up into smaller pieces for the woodworking activities I do with kids. There was a huge pallet from Mexico, of 8 inch wide boards, which I pulled apart and brought home. This will be cleaned up and re-machined for the projects I have coming up with lots of kids in schools, making cheeseboards. I also obtained a heap of wide pine boards from Holland, Finland, New Zealand, and China. Some of these will be very useful for the programs I have coming up teaching woodworking hand skills to adults. They will saw, plane and shape these into a range of kitchen chopping boards.
However the material I mostly like for chopping boards are hardwoods. Sadly, other than a few nice boards from Indonesia, there was not much I could access on the day. Some I could see under tons of other timber, but was unable to remove them from the pile. Others I could see up on the top of the pile, but it was too unsafe to climb up there! All I could do was to gaze up and salivate.
Surprisingly, I did get some nice chopping aboard material from a pallet of unknown origin - but was clearly made from European Oak. Nice! Incredibly heavy, I was only just able to pull turn it over to be able to attempt to remove the boards.
That's my trusty Disston panel saw. Gives you an idea of the size. All that oak! 
Sadly, I was unable to remove the rusted heavy nails or lever up the boards, even using my big pinch bar, so I had to settle for cutting out a bunch of the boards between the gluts. It smelt like wine barrels as I cut it. A tragedy to leave so much of it behind, which I especially felt the next day after I had stuck one of the pieces through the thicknesser!
The trusty ute very much loaded up with treasure.
It's a lot of work to denail this stuff, much of which I did on site, and the remainder I did in my front yard at home on sawstools that evening. However, I am happy to be spreading the important message about improving our stewardship of timber which is being wasted every day. Along the way, I get to discover and use some amazing timber from all over the planet. I also get to introduce a lot of people to the joy of working with wood. Fabulous.  

Wednesday, August 10, 2011

The Big Bookcase Comes Together.

Installation day finally came around.

Installation complete. Job done.
I'd been working on the big Art Deco Style Breakfront Bookcase for some weeks. It was a big job, with many steps in the process of constructing it, so I had up to now written a series of five posts to tell the story along the way:
Several steps to create a nice curved edge.
Getting started on a break fronted art deco style bookcase.
Ten steps to making your own vee-jointed lining boards.
Making a plinth which is up to the task.
Developing the crowning glory for the bookcase.

My son Ben kindly gave me a hand for the day. Way too big for me to manage on my own! The bookcase cabinet was made in 3 sections. In addition to those there was the plinth, the crown mould in 3 sections, and 16 shelves. The day before, I had pre-delivered the shelves, plinth, and crown mould sections - as well as all the hand tools we would need for the installation. That just left the three big cabinet sections to deliver to start the installation.
Ben untying the load. The big lift about to take place.
Not that easy, as they were heavy - especially the middle section! Fortunately a week and a half of rain gave way to a nice sunny day. Phew, that made it a bit less challenging. We loaded up the ute, with a lot of grunting, and drove to my client's home. It wasn't any easier to lug the three sections into the house, but with aching muscles I breathed a sigh of relief. It was all now in the room where it was to be assembled.

1. Fitting the plinth and fixing it in position.
It took some time to get the plinth fixed in place. At nearly 3.3m long (10 ' 10"), we were bound to find variations in the wooden floor - both in the length and in the depth of the plinth. With the narrow cabinets nice feet tall, making sure the plinth on which it sits is level to the planet (regardless of the floor) is critical. Fortunately the wall behind was quite flat and plumb, so that would make life easier.
Protective covers over jarrah floor pulled back. Time to start levelling.
We carefully packed the plinth up on packers in critical support points until the straightedges and spirit levels showed that the plinth was beautifully level in all directions. Working from the point where the gap between the suspended plinth and the floor was the smallest, I used my marking knife on a sliding block of the correct height to scribe a line all the way around the face of the plinth parallel to the floor. Placing the plinth upside down on a pair of sawstools, Ben and I used block planes and a jack plane to shape the plinth down to the scribe line. 
Trusty No5 1/2 helped take down waste to the scribe line, to fit plinth to the floor contour.
The horns were cut from the back of the plinth, and with a bit of fine tuning on the sawstools a couple of times, we eventually had the plinth sitting nicely on the undulating floor with the top of it level to the planet in all directions. Nice. The plinth was screwed to the floor via the fixing points I'd built into the insides of it, and we were ready to stand up the three cabinets on it. All that took quite a while, but the plinth is like the foundations. It's gotta be right or errors multiply all the way up.  The methodology we used is the good old fashioned way of doing it, which my father had taught me many years ago. Thanks Dad. 

2. Putting the three cabinet sections together.
With the plinth now fixed in position and beautifully leveled, we lifted the big centre section into place, after first cutting the hole in the lining board to pull the power point through. The power point facsia would be screwed to the lining board, ready for the stereo to plug in. 
Centre section lifted into place on the plinth.
The other two sections were then lifted into their places on the plinth either side of the centre section, and cramped together, ensuring that the face of the centre section protruded exactly 100mm (4 inches) proud of the cabinets on either side of it. This proces was aided by the centre crown mould being cramped temporarily in position.  The three cabinet sections were then screwed together. To be consistent with the Era, all visible screws were slotted head countersunk steel screws. (1 1/2 Inch 12 Gauge) The best way to drive these is with a brace with screwdriver bit. So much easier on the wrist, and with heaps of power. 
The ratcheted brace. What a wonderful invention.
Fortunately the wall behind was pretty plumb, so no additional trim beads were required to cover unsightly gaps where the two cabinet ends met the wall. With the three sections fixed together, next we checked that the overhang of the  cabinet over the plinth was consistent and correct all round. After some very minor tweaking of the whole cabinet's position on the plinth (I confess I am a bit of a perfectionist), the cabinet was screwed to the plinth below it. For safety reasons, each of the 3 cabinet sections was then fixed to the wall at the very top via 2 small metal angle brackets per section. These were fixed into the brick wall and to the top of the cabinets. The bookcase was now fitted and fixed in position! Time to install the crown moulding.

Fixing the cabinet tops back to the wall.

3. Fitting the crown moulding.
The two far ends, the returns of the crown moulding, had been made "overlong" in order to be able to cut them to the correct size on installation. With the cabinets now fixed in position, we were ready to measure the returns and cut the crown mould ends to length. The crown mould had been made such that the three pieces housed into each other, and this came together well. Cramped in position, the crown moulding was then screwed into place it.

Fitting the crown mould to the top of the cabinets.
The cramps off, it was time to give the whole structure a birthday - a final treatment with a nice beeswax/orange oil finish, applied with 0000 steel wool and buffed up with a rag. Wow. She was lookin' good now!

4. Installing the shelving.
One third of the way up, each of the 3 sections had a fixed shelf, for structural integrity. A further 16 adjustable shelves were now to be fitted.

In goes the shelving.
Like the rest of the bookcase, these too were made from timber salvaged from the renovation of this house. Such nice colours in the jarrah! Holes at 3 inch centres had been previously drilled up the cabinet insides when they were constructed. Brass adjusters were inserted in position, and the shelves were placed in position. I took a punt for now on the spacing of the shelves, knowing that Norelle will change them to suit her requirements when she moves into the bookcase.
All smiles ... the job is almost completed.
With the shelves installed, it was time to pack up the tools. The job was done.


I really enjoy this kind of commission. It is always a pleasure to recycle structural timbers from a house, convert them into beautiful furniture, and put these back into the house  from which they had originated. There is something very poetic about that. The wood itself tells many stories which are there for the reading. No filler was used in the construction of this piece. All nail holes, bolt holes, flooring cramp marks, and other features sing of their past life as structural timbers. It is fun to try and "read" each stick in the lining board backing, as you can often tell what part of the building the stick came from, by the nail hole configuration pattern.


Re-using timber like this is also very environmentally sensible, and I reckon it honours the trees which were felled over 80 years ago when the original house was constructed. A good example of sustainable timber usage and responsible stewardship of a limited and valuable resource. Good move, Norelle. Thanks for the privilege of building your beautiful art-deco style breakfront bookcase.

Tuesday, July 26, 2011

Developing the Crowning Glory for the Bookcase.

The final piece to make for the big Art Deco Style Breakfront Bookcase I am building is the crown mould.
In the original concept drawing, the crown mould was going to incorporate a big scotia profile. This concaved moulding would reflect the curved ends on the top of the original door architraves in the house, which would give the profile a 60mm radius. However as I built the cabinets and lived with them, I was thinking about creating a more classic art deco feature as the crowning glory of what will be a stunning feature in the living room. So I emailed Norelle (my client) and suggested a change.

She agreed, so I proceeded with the construction of my idea. Being in total over 11 feet long, it would be made in 3 sections and fitted together on site once the three cabinets have been fixed together on top of their plinth.

The process for making the crown moulding.
1. The primary material was prepared. Lengths of jarrah machined to 70mm x 22mm in section.
2. The grooves were cut, ready to house the square beads. The waste was removed first over the table saw, and then cleaned out to accurate size with a slot cutter in the router.
3. Mitres were cut ready for making the curved corners, which will have an external radius of 62mm.

Extending the grooves to house the joining splines. The saw tangent is about 45 degrees.  
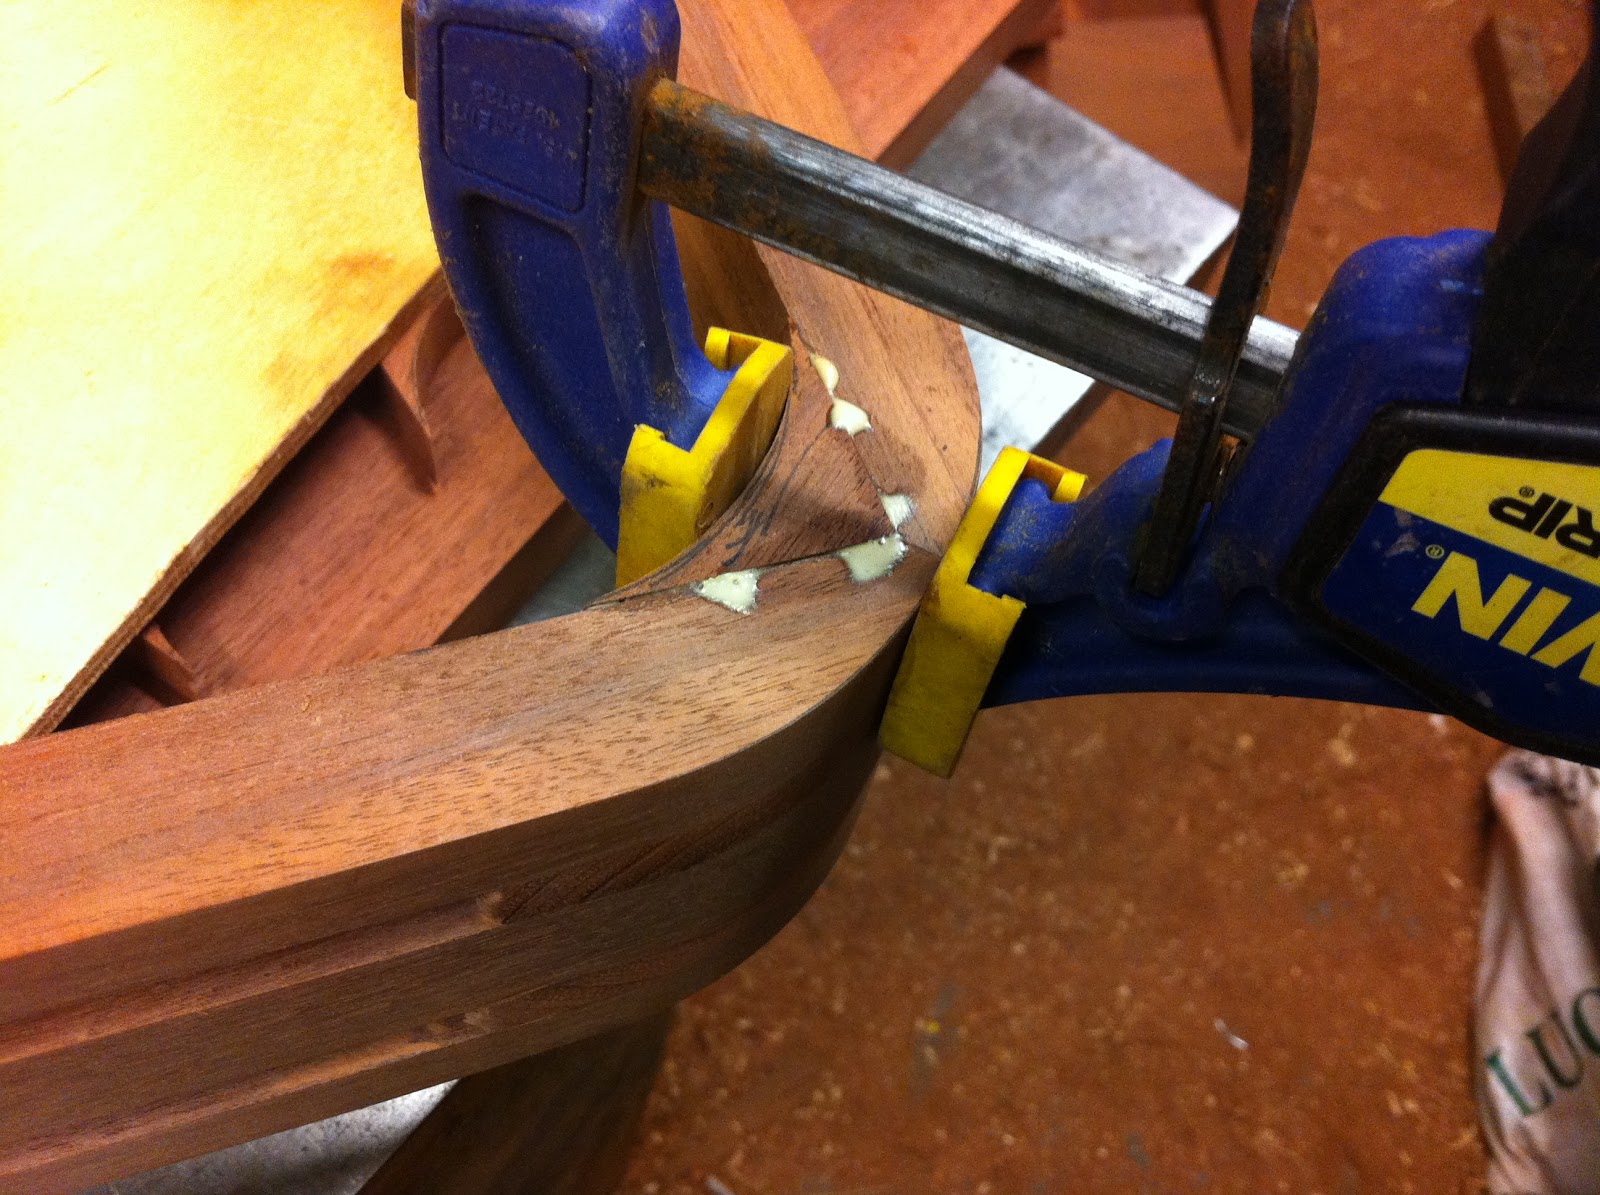
4. The extended grooves will be used to house splines to strengthen the corner joints, so first these had to be cut  ready to house the jarrah splines. Cut on the table saw, the saw was elevated so that the kerf was about 45 degrees on the tangent.
The seven pieces made ready for glueing up with their splines.
 5. The splines were put into position and glued in place when the mitres were assembled.

One of the joints glued up, with the splines a nice snug fit.
 6. When the corner joints were dry, the 62mm radius external curves were drawn onto the corners, and the curves cut using a bandsaw, then sanded to shape using a bobbin sander then a random orbital sander.
The outer curve has been shaped using bandsaw and bobbin sander.
 7. The inside curve on each of the four corners needs to be changed from 90 degrees to a 40mm radius curve. For this some infils were made and glued into position.
Making the infills for the lower corner curves.

Glueing an infill into place to create the inside curve.
8. The residual spline material then needs to be removed from the grooves in the outside face of the curves, using the router with the slot cutter on the same setting as used previously.
Grooves extended around the external curve by routing out the residual spline material.
9. The straight square beads were machined up, at 9.5mm (3/8") thick to match the width of the grooves, by 17mm (+5/8") wide, which will result in a 7mm projection once they are glued into the grooves.

10. The corner curved square section beads were made, with a 52mm inside radius and a 70mm outer radius. Eight of theses needed to be made, as there are 4 corners. 
Marking out and making the corner beads.

11. Firstly the corner curves were glued into position, then the long straight bead sections were cut to length and glued into position. With the glue dry, the corners beads were then cleaned up on the bobbin sander. The three crown mould sections will come together with the bead "fingers" on the sides inserting into the gaps on the centre sections. All done with careful planning, measuring and marking.

One end of the centre crown mould section.
12. After cleaning up any excess glue with scrapers, each section got the fine abrasive paper treatment.

13. The first coat of polish went on, with the second coat being applied the next day.

First coat drying. Lookin' good!
 With each of the three sections cleaned up and wearing their first coat, I was pretty happy.
 
Now there's a nice bunch of crown moulding. 
I am glad I suggested to my client that we change the profile of the crown mould from the original concept drawing. These certainly look more classic Art Deco. There was plenty that could have gone wrong in the making of the three pieces, but happily it was smooth sailing all the way. Nice.

As total completion of the job draws nearer, I am looking forward to putting it all together. I reckon this crown mould will really finish off the whole piece, and help establish the bookcase's sense of time and place in the living room of Norelle's home. 
Stay tuned for the next post on this extended saga... installation day!

Monday, July 25, 2011

Making a plinth which is up to the task.

Work on the Art Deco Style Breakfront Bookcase which I am building continues. The three cabinet carcasses are all completed now that the lining board backs have been fitted. They look awesome with the beautiful colours in the recycled jarrah panelling in the backs, and the amazing array of nail holes, bolt holes and other reminders of the former life of those timbers from which panelling and the whole of the structure is made. Nearly all of the adjustable shelving has been made, and last things remaining to make are the plinth and the crown mould.

Planning the plinth face dimensions.
The four front vertical corners of the bookcase each have a 40mm radius, reflecting the wonderful rounded curves that were common in art deco furniture. The three sections of the bookcase are each 1100mm (3' 7")wide, and will be screwed together on site. The middle section protrudes 100mm (4") forward of the sections on either side - hence the term "Breakfront". The plinth, on which the whole cabinet will sits, is 105mm high and will follow the shape of the bookcase front and ends, recessed back 20mm (3/4") all along. This means the four corner curves of the plinth are also set back 20mm, so they needed to be made with an external face radius of 20mm.
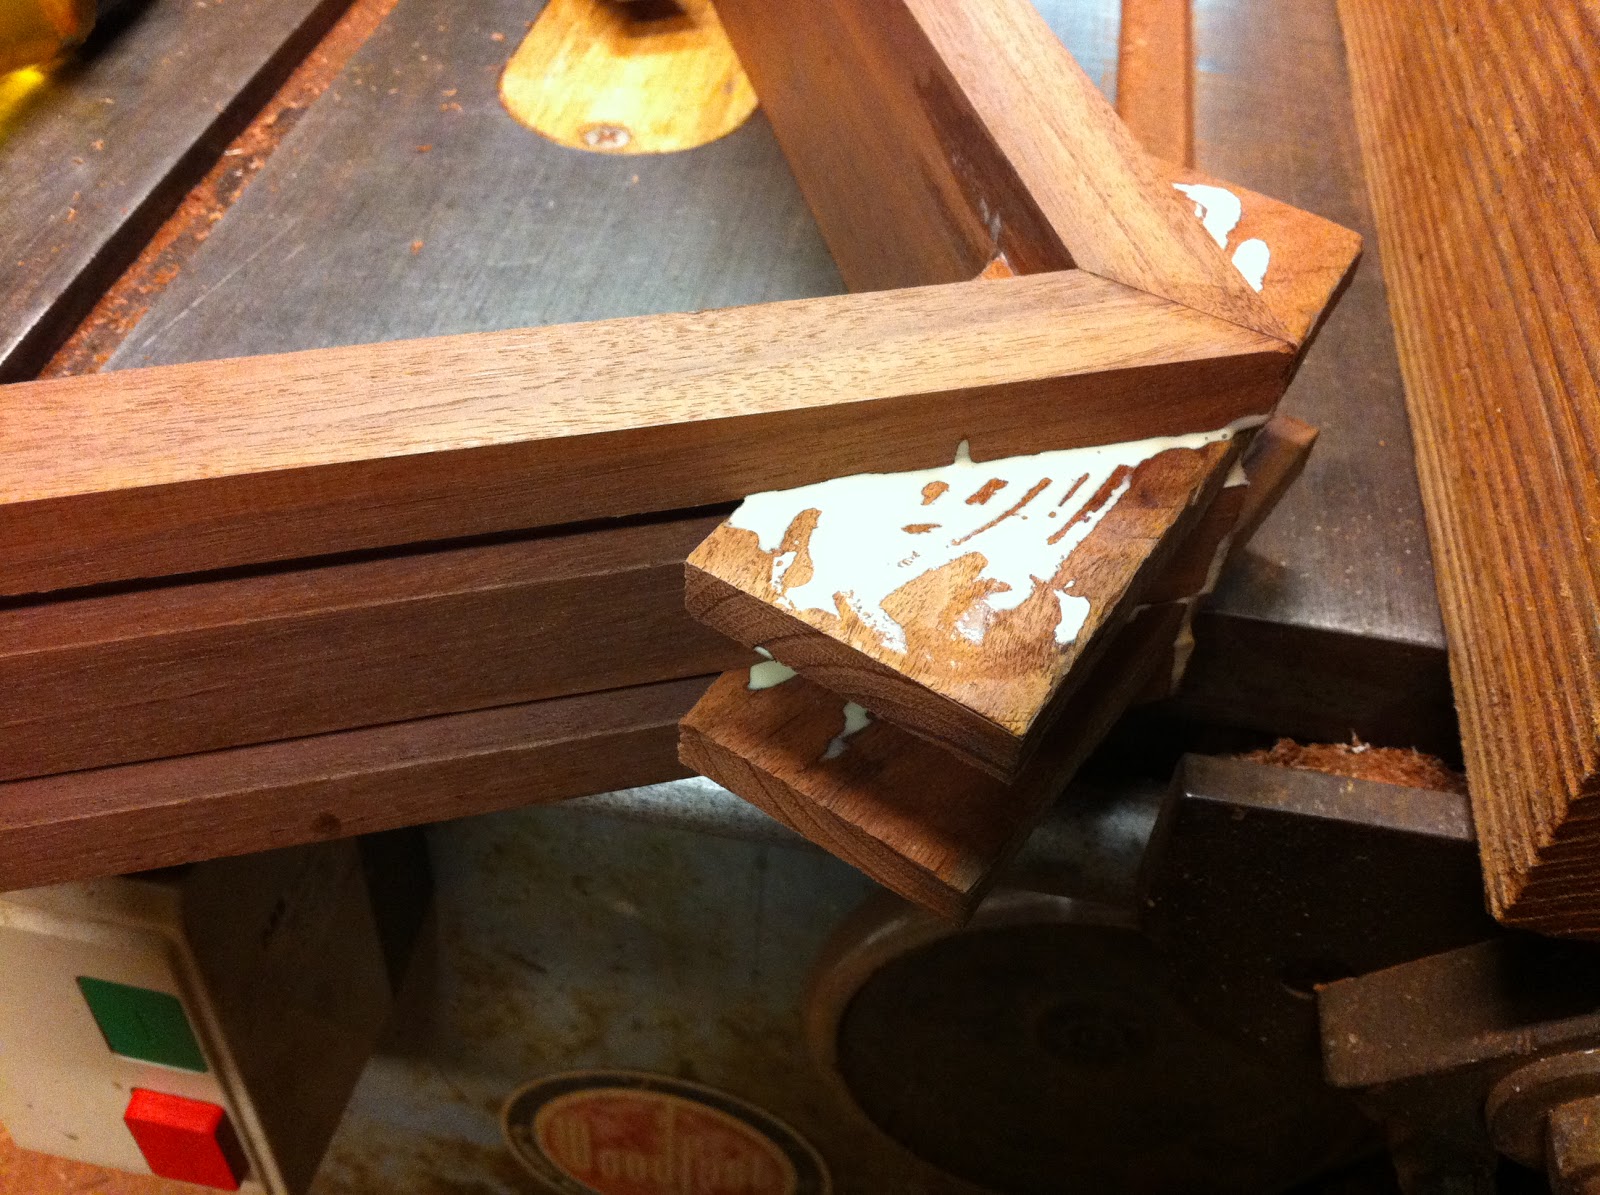
You can never have enough clamps. The plinth cramped up with glue drying - all 11 feet of it. 
 The foundational nature of plinths.
Plinths are as essential to the structure of a piece of built-in furniture as the foundations are to a building. Errors in the foundations transfer all the way up through the rest of the building. With built-in furniture, the essential thing is that the plinth is level both along its length and across its width. This cabinet is over 2700mm (9 feet) tall, so an error in the front-to-back level of the plinth will either have the cabinet leaning into the room or leaning into the wall behind. Fully loaded with books, the former is very dangerous and the latter puts stress onto the wall - which my client is concerned about. A high single brick wall, my client specified from day one that she did not want a lot of stress to be placed on this wall behind the bookcase. Hence the objective is to have the plinth correctly level, ensuring the bookcase is plumb when sitting on it. For safety reasons, the top of the bookcase will be attached to the wall, just to ensure the bookcase cannot fall into the room if someone was to climb up the front. A standard requirement. Of course, there are few walls (old or new) which are plumb and flat, and few floors which are perfectly level over a 3.3m (11 foot) length!
Glue dry, clamps off, then curved corners cut with 20mm radius router bit.
 Allowing for anomalies in the wall and floor.
So how do we ensure the top of the plinth is totally level, despite the floor? If the wall leans into the room, or has a bulge which keeps the plumb bookcase forward of the wall at floor level, how do we still ensure the front of the plinth is still 20mm behind the face of the bookcase? There lies the challenge!!

Well, it's all in the planning ... and allowing for a range of as yet unknown possibilities.
There is a 90mm skirting board around the wall, which will be left in place - just in case sometime in the future my client left the house and wanted to take the bookcase with her. So the ends of the plinth will be scribed to fit around and over the skirting. Hence the ends are made "overlong" to give plenty of room to do this scribing once the forward position of the plinth has been determined on site. The back of the plinth has been made to be set 10mm off the skirting, in the event that the wall is plumb or leaning backwards. It will be leveled, packed and fixed in place. The scribing of the base of the plinth to fit the floor is done by setting it up levelled on packers, in position. From the highest point above the floor, a line is then drawn parallel to the floor. Cutting the plinth along the scribed line will then ensure that, on removing the packers, the plinth sits beautifully on the floor (even if it is wildly undulating) while the top remains beautifully level. The plinth is then fixed to the floor and wall to make it rock solid, fixed through packers as required. It's a piece of cake, so long as careful preparation is made to fit this foundational plinth.

The plinth is made heavy duty, in order to be able to withstand considerable weight and transfer this weight to the floor. It is a solid piece of joinery in itself. A couple of coats of oil/varnish polish and its completed, ready for installation day.
Never mind the backdrop... it's the completed plinth we're looking at here!
 Of course, this is the old fashioned way of doing plinths. Very different to those nasty adjustable plastic risers behind plinth facades you see in modern laminate kitchens and built-in furniture these days. Oh well, I am in the heirloom business. There is a lot of wisdom in traditional techniques - and satisfaction too.

Now to get on with making the crown mould...