Tuesday, December 18, 2012

On the wood recycling imperative.

Unless it rots or is eaten by insects, wood can be recycled indefinitely for centuries.
Oooh yeah, what a wonderful natural, sustainable, re-newable, low energy (to produce), high value material wood is. However, it is mind boggling and disturbing how much wood goes into land fill every day.

How could anybody drive past this booty? Almost all from the USA.
Living close to the light industrial area of Belmont/Kewdale/Welshpool, I have the opportunity to readily obtain packaging materials - which come from all over the world. In fact, one company, an importer of big commercial washer/driers, even contacts me periodically when they have a pile of packaging material they think I might like. Most of their stuff comes from the USA, Italy or Belgium. Through them I get sheets of OSB board (which is not in common use in Western Australia), pieces of 1/2" plywood, heaps of cheesy soft pine from the USA, other bits of nice fine harder pines from Europe and North America, and the occasional bonus stuff like bits of American White Oak and other unknown(to me) US hardwoods.
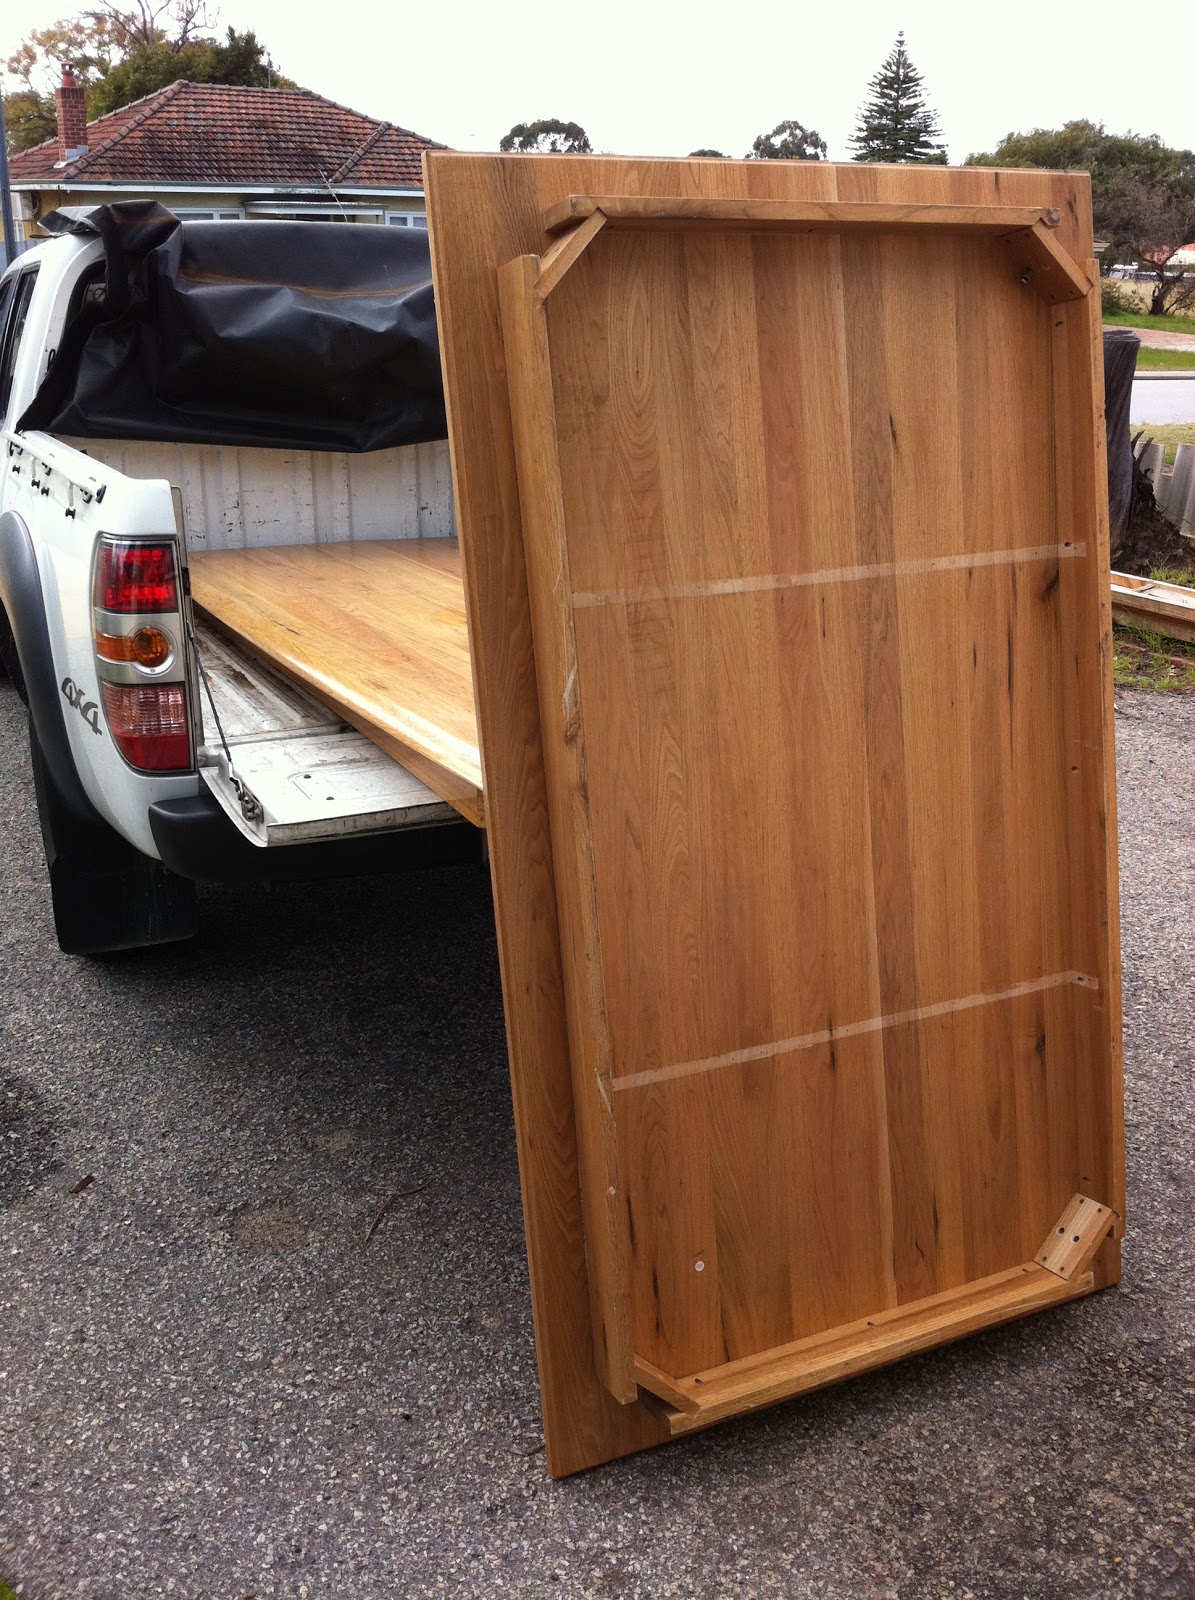
Not just a discarded damaged Chinese made table top... it's all wood waiting to be recycled.
In addition, there are several other places that I cruise past periodically, to see what wonders there are to behold in the packaging piles on the verge outside their warehouses. I keep saws, hammers, pincers and pinchbars in my ute all the time to aid my opportunistic urges.
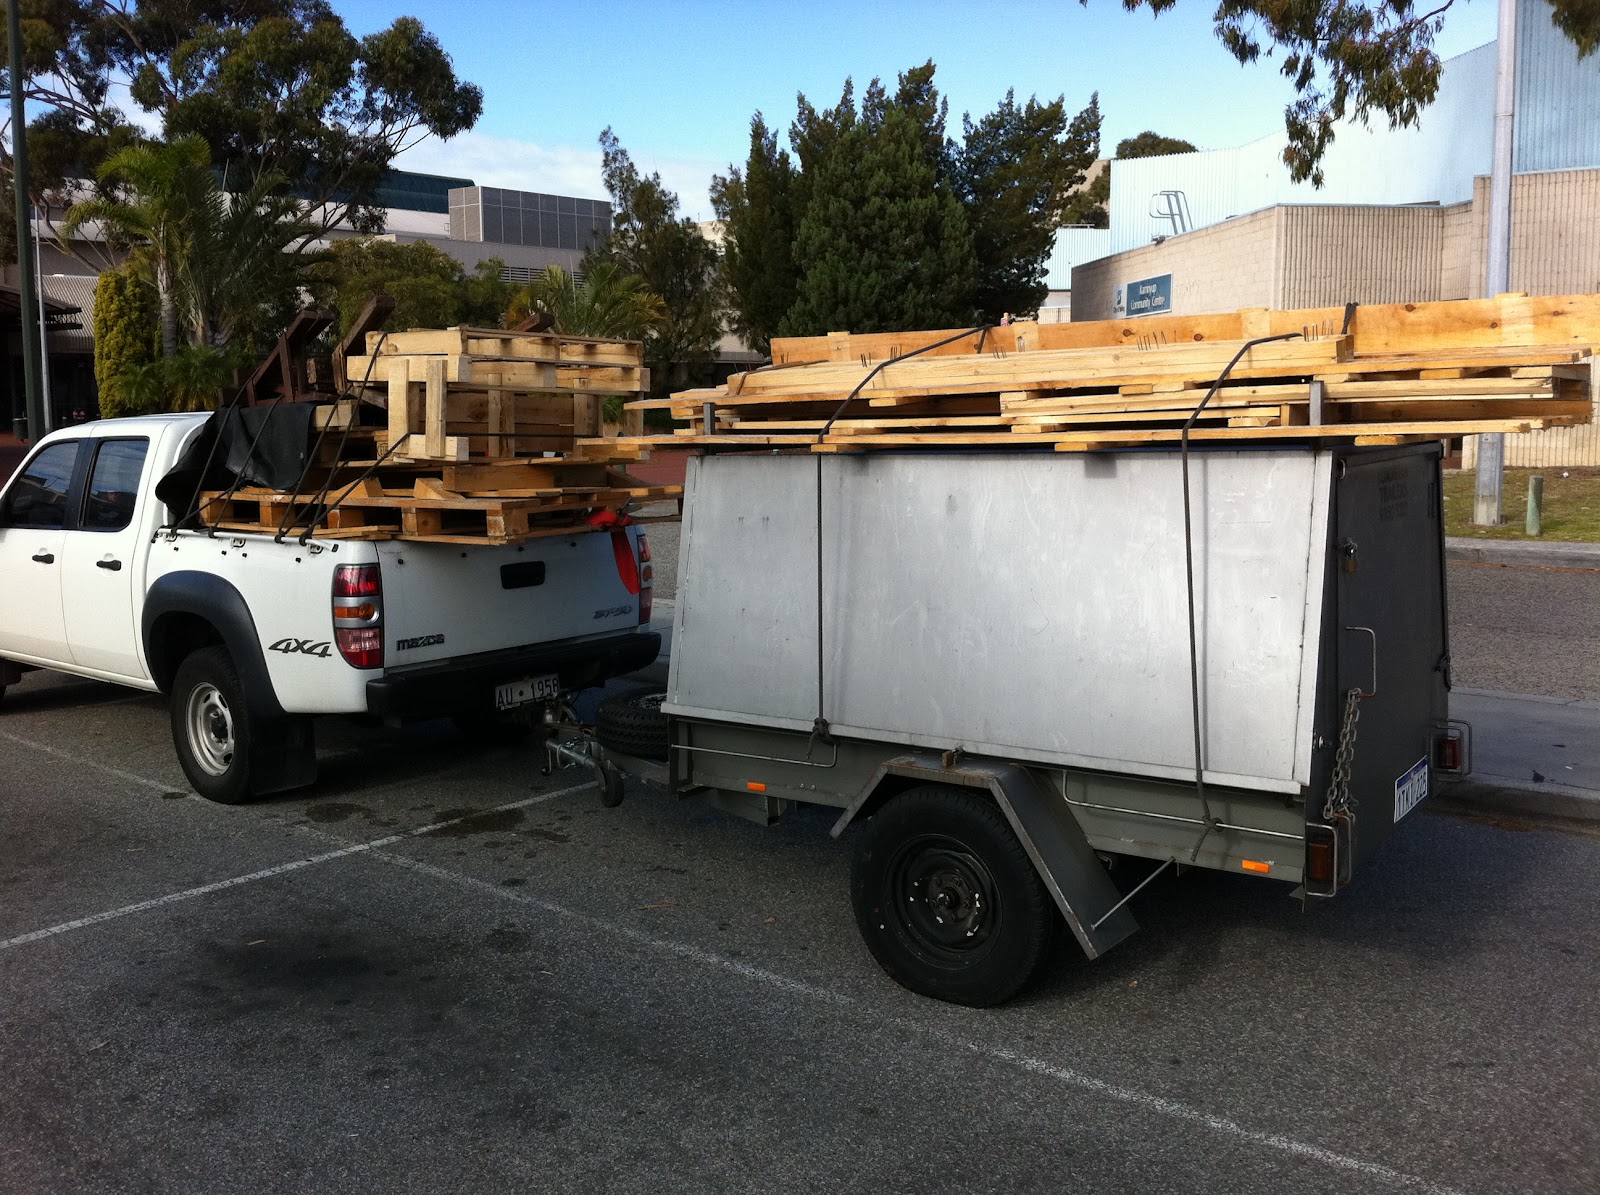
Hoarding discarded from a building site. 13 full sheets of 1/2" ply and over 100m of 90x45mm structural pine.
All that "northern hemispherical" softwood in the crate. It's over 8' long. Lucky me.
Then there are the verge cleanups, or "bring out your dead" events (apologies to Monty Python). A tragic reminder of our ever wasteful consumeristic lifestyles which are killing the planet, people on set periods in the year can dump all their unwanted stuff on the verge and the local council / waste management authority will come around with endless trucks to pick it all up, crush it into smaller volume in the trucks, and cart it of to be dumped in landfill. It is scary how much of this unwanted modern detritus is wood in various forms. For the wood recycling nuts like me, this is a bonanza. Furniture made from valuable and hard to find timbers, just waiting to be pulled apart and recycled. Offcuts from home renovations. Pieces of timber just needing to be loved. The array is amazing.
Timber extracted from a 1950's dressing table left on the verge.
 Mostly what was called "pacific maple" at the time, Dad tells me.
Sadly, there is also a huge amount of furniture made from nasty MDF and particle boards, which I leave behind. This needs special facilities in order to be recycled. Plywood is good for recycling by me. Many a drawer bottom has found new life as the face of a Cajun Drum, or has become wings on scores of aeroplanes made by kids at festivals.  Tragic as they are, verge cleanups offer a wonderful bounty to the wood scroungers the likes of me.

Treasures obtained from a verge cleanup: timber, drawers, an Oregon bed frame, Jarrah table, and more!
This verge cleanup mentality has created a new form of waste disposal/community recycling, for those with a bit of a conscience. Got a TV or, appliance which works but you no longer need? Stick it on the verge, and somebody might take it home. Good furniture is often redistributed in this way. Local councils hate it, but at least it mostly goes to new homes rather than into land fill. I have put good stuff on the verge myself only to find it next Sunday for sale on somebody's stall at the local flea market. Good luck to them, I say! Some good furniture put out there is best a recyclable resource to somebody like me, depending on what it is made of and how much of it is real wood or plywood...

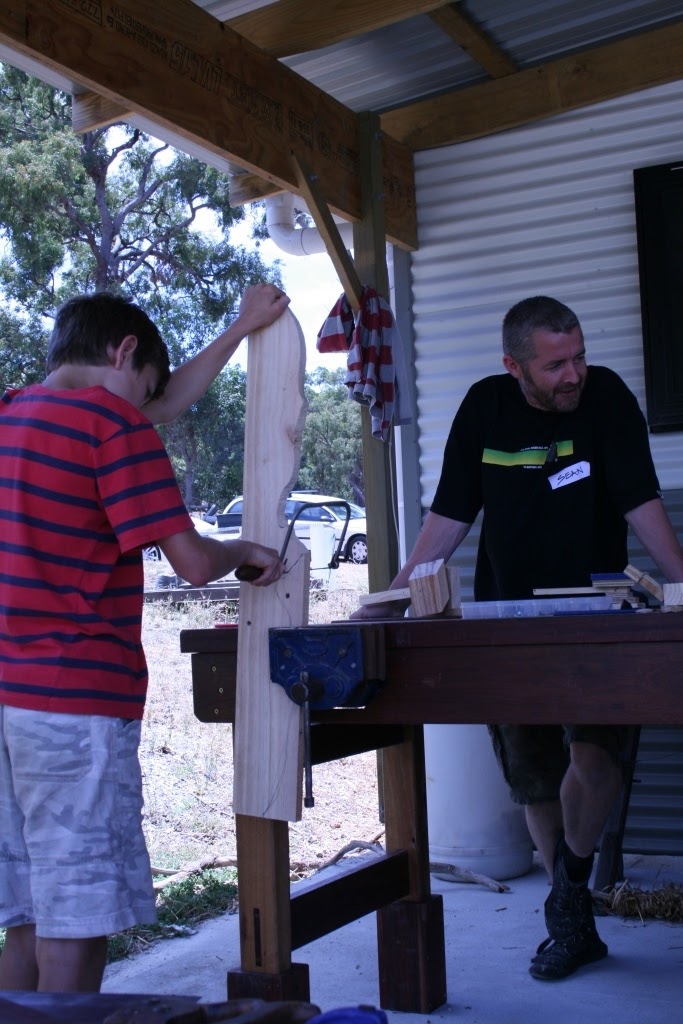
Pulling the crate carefully apart - the claw hammer and pinch bar at work.
Some nails won't come out - but the wood between is perfectly good.
The energy bound up in my waste is used by a family for cooking.
 
Where does this wood recycling mentality come from?
I'm a babyboomer. I can adapt to new technologies and I had a very good education before the educators lost the plot. I am also nostalgic. In contrast to stereotypical qualities of some other generations, I can think critically, problem solve, and am loyal and reliable as an employee. I also had my formative years in an era of massive social change, and remain committed to changing the world to being a greener, fairer, more just and egalitarian society. This has never left me. There is another great thing about being a babyboomer: my parents were shaped by growing up in the Great Depression and the austerity and hardship of "the War Years". Consequently, to this day they remain frugal, almost spartan, non-wasteful, and hate to chuck things out which may be of use someday or to somebody.  I grew up with those values drummed into me, of course, so I am pre-disposed to being a recycler from birth! My father has spent a lifetime as a highly skilled carpenter/joiner/cabinetmaker. The wood stuff rubbed off on me. He even used to pull apart old typewriters to get the nuts, bolts, washers and springs from them - and anything else which might come in handy one day.

80 year old jarrah, rescued from a renovation skip bin and used to make fine furniture.
My adult children invariably call me a bower bird, a tight arse, or an old hippy. My wife rolls her eyes and asks me Where are you going to put it?, when I bring home another treasure trove of timber. No problem. I know I will use it, or I know someone else who could use it. Besides, teaching woodwork and running woodworking activities all over the place, I use up a huge amount of wood, and need to have heaps on hand. Self talk can be a wonderful thing...

I do believe in human induced climate change in addition to the natural cycles of the planet over millions of years. I do endeavour to be part of an urgent movement for change, even it our politicians are reluctant to face the music. Affluence and ignorance can create very effective smoke-screens. I am blessed with a background which makes it very easy for me to embrace a more frugal, socially and environmentally responsible lifestyle. It's almost a natural position for me. I also know I need to do far more.  We all need, myself included, to tread much more lightly on the earth.
Who ever thought this was a smart idea?
A perfectly good 73 year old house, smashed up by an excavator and carted off to landfill to slowly break down generating greenhouse gasses. No opportunity to recycle the jarrah, bricks, roofing, etc. Replaced by an energy hungry McMansion.

Trees help provide some of the answer. We need more trees (the lungs of the world). We need more timber in use everywhere (it is a very effective way of sequestering carbon). We need to be throwing minimal timber into landfill, instead re-using and recycling it or at the very least burning it efficiently for its energy value - and planting yet more trees to take up the resulting CO2 released in combustion.

Trees give us food, shelter, and that marvelous building construction material, wood. Less steel, aluminium and glass, and more wood. It just takes a change in thinking and in priorities. We can help take the lead by recycling/upcycling packaging timbers and discarded furniture into value added products and uses. We can make furniture which lasts and stop buying cheap "disposable" furniture. No wood is disposable, but almost all of it is recyclable. We just need the will to do it.

This is the wood recycling imperative. I challenge you to join me!

Monday, December 17, 2012

The Silver Tree Bookcase.

In November I had the pleasure of spending a day at the Silver Tree Steiner School, in Parkerville, working with 10 kids and their fathers/grandfathers/uncles. The project was to make a bookcase together, which the kids could feel proud of as a legacy they would leave the school. It was a great day.

The Brief.
The teacher, Yvette, wanted the 10 boys of her class to "create a bookshelf... for our classroom, so they can see their contribution everyday... measuring 1900H X 920W X 330D (6'3" high x 3' wide x 13" deep) and ... to make something together that they can give to the school ... as a reminder to future Silver Tree School children of those who went before them...  It was to be made from recycled timber, as a matter of principle, and another very essential ingredient would be the participation of fathers/uncles/grandfathers in the activity with the kids. Doing it together as a shared experience was to be one of the key elements of the day.

Based on our discussion, I drew up the following plan:

My role would be to supply the tuition, equipment and materials, and to facilitate the day. 

The Preparation.
My tasks included creating the material for the bookcase sides and shelves. It all starts with a packing crate or two...


My trusty Disston panel saw gives a clue to the size of this crate floor.
The sides of another packing crate, cut down to bring home. Now to pull it all apart....
There is as fair bit of work to carefully pull apart a crate and denail the material. I then square dressed it to to slightly oversize, about 22mm thick. It all takes time and effort - and a bit of know-how!
The ISPM 15 Mark on the undressed piece in the foreground says this packaging was Heat Treated in the UK (GB).
However, the net result is a stack of very nice "Northern Hemispherical Softwood" awaiting recycling/upcycling into a nice piece of furniture by an enthusiastic bunch of people! There is one more step though - with just one day to make the bookcase together, I would need to glue up the material for the sides and the shelves prior to the day.

Table Saw cuts make the grooves to house the plywood splines.
The aim was to create sections which were 350mm (14") wide. Rather than use just butt joints to glue together the sticks in order to create this width, I opted to use full length plywood splines. As well as offering greater strength by more than doubling the gluing area, this method also provides accurate registration of the components during the glueup.

One of the shelves glued and cramped up.
In this way the material for the two sides and seven shelves were glued up, overlong and overwidth. The group would do the final dimensioning.

End view of a splined joint still drying under cramps. Nice.

Once the cramps were off, the glued up sections were put through the thicknesser and taken down to 21mm. This is the  easiest way to clean up the material whilst also removing any anomalies in registration, etc. I then shot the front edge (face edge) over the buzzer. They were now ready to go.

 The back of the bookcase would be panelled with Vee-Joint Lining Board. The material for this came from more packaging, which I square dressed to 75mm x 12mm (3" x1/2"). We would be shooting the tongues and grooves by hand on the day. I machined up a few other sticks for the pediment and toe rail, and the preparation was done... other than loading up the ute and trailer on the day.

Getting warmed up with a bit of Free Creative Play.
I always like to start these activities with a bit of what I call "free creative play". There's hammers and nails, saws and a pile of wood pieces, and kids get to make what they want - after I have done a bit of front-loading about tool use. How to hold and use the hammers, nail selection, how to use the tenon saws and how to secure the wood for cutting, etc. All this is beneficial for both kids and the adults, and gives people a chance to get warmed up to the tool use. After about 45 minutes, it was time to get serious about our project...
Free creative play offers a good chance to get the sawing techniques honed.
Many tasks, many people, One Project.
With 20 people present, the important thing was to make sure all the different aspects of the job would be done so that it would all come together for the assembly within the time available.
These tasks included:
  • Ripping the shelves and backs to width,
  • Cutting the shelves and sides to length and square.
  • Rebating the back edge of the sides, to house the lining board backing.
  • Cutting the pediment board to shape and length.
  • Cutting the housings for the shelves into the sides.
  • Shooting the tongues and grooves on the lining boards with moulding planes.
  • Give a quick hand sand to the components.
Once this work was done, the next tasks would be to:
  • Glue and cramp up the shelves into their housings in the cabinet sides.
  • Fix the toe rail and pediment board
  • Fix the lining board into the back of the cabinet. 
  • Stand back and admire our masterpiece!

Here is the story of it's construction told in pictures:
Young and old alike got stuck in. Here ripping the shelves to width.
Cutting tongues in the lining board with a moulding (match) plane.


Docking the shelves to length.
It was a hive of activity.
Making the saw cuts for the through housings for the shelves, across the sides. 
Removing the waste from the housings defined by the saw cuts, with a chisel.
Cleaning out the housings with a No71 Router plane.
So much to share and learn together. Cutting the grooves with a plough plane.
It's not all fun - hand sanding the lining boards prior to fitting.

Such a great chance to learn some new skills!


One of the kids designed and shaped the pediment board.
All hands to the glueup. Cramping up the cabinet.
Nailing the shelves to the sides while under cramps.
Hammers galore as we nail it together.
Fixing down the lining board on the back. A great team effort.

Job successfully completed.
So that's the story of the Silver Tree Bookcase. Not a power tool in sight on the day, all done with our own sweat and effort, a great chance to create something by hand using traditional hand skills.

Most of the gang around our completed bookcase. It was a great day.
It was a long day for the kids, but they did pretty well. The whole idea was that the kids could create something they could feel proud of, and leave behind at the school as a legacy of their time there. Having kids together with some significant men in their lives, Dads/Uncles/Grandads, was an important part of the whole idea, so that it was a shared experience too. It was delightful seeing through the day the way kids and adults were mentored, encouraged, and taught new skills.

I'd like to extend special thinks to all involved - to the kids and adults for their enthusiastic participation, even when it was hard work (they shot a lot of tongues and grooves on those lining boards!), to the adults with trade skills who helped provide some leadership and great mentoring on the day, and to Yvette the teacher (who was not with us on the day) for having such a great vision behind the activity.  The Silver Tree Steiner School is such a wonderful school community.

Me with most of the primary beneficiaries.... the kids.

All the kids and adults involved on the day can feel very  proud of the job they did. Once again, it was a pleasure to recycle/upcycle some packaging material, which was previously destined for the waste stream, into a nice piece of furniture which will last indefinitely. We need more of it!

It was a great effort, a wonderful shared experience, which left many different positive legacies...

Tuesday, November 6, 2012

Using a Story Stick (Rod Measure) for accurate component cutting. (Recycled Jarrah Cabinet, Part 5)

The big jarrah cabinet I am making has been progressing slowly. Embarrassingly slowly. Interestingly, I have had an unprecedented number of group activities this year: across the Festivals, workshops, and school programs that I do. It's taken me be surprise, really, though it is what I have always intended, to transition from custom furniture to more group activities and teaching. My customers awaiting their beautiful jarrah cabinet have been incredibly patient. For that I am extremely grateful - but ultimately it will have been worth the wait. No question.

I am pleased to say a big step forward has taken place. The other day a friend came over to help me with the big glue-up of the top section. Phil's assistance was most appreciated, as it was a big job I couldn't do on my own. There was a huge amount of preparation before this event, with all the panels and fixed shelves having to be prepared and glued up, accurately cut to size, and every joint cut and test fitted, before the glue up could be undertaken.
That's most of the top sections assembled, minus one zig-zag shelf, the backing, crown mould, etc.
This top section is sizeable, and made up of two main sections. The big top section is 2.2m long, 1.7m high and 300mm deep. The smaller section is 1.8m long, 1.7m high, and 200mm deep. It's all recycled jarrah, 22mm thick. It sits on the lower cabinet's top, in the housings cut into the top. Plenty of planning and sequencing was needed to bring all this together.
... So how can all these components and joints be cut accurately beforehand?

The importance of the "Story Stick".
Long before there were rules and tape measures, there was the Rod measure. It has been used for thousands of years. It still remains the most accurate way to transfer measurements. Three rods were created to build this cabinet, and all the information on them tranforms them into what we'd call a "Story Stick". The first rod records the position of the stiles in the big bottom cabinet and the relative positions of the top section verticals.
This rod/story stick is a piece of plywood 4 inches wide and just over 8 feet long.
 The second rod records the smaller bottom cabinet stile positions, and the relative positions of the verticals in the smaller top section. The third rod records the vertical shelf locations in the whole of the two top sections. All markings in the story stick are made with the sharp point of a marking knife, to aid accuracy. No fat pencil lines here!
The Storey Stick is placed on edge and the scribed lines transferred directly onto the components. 
It was these 3 story sticks which were used to mark out and cut all of the housings, lengths, and other dimensions. This was no job for a tape measure. This was a job for the most accurate way of transferring measurements - the story stick/rod measure. That's how come the glue-up went together well... Measurements were taken off the story stick also with the point of a marking knife, not the inaccuracy of a pencil. Otherwise, it is scary how much small errors can multiply across the width of a cabinet over a heap of joints.
Even the depth of the housings were marked. These provided the fixed shelf cut lengths.
The upper right hand part of the big top section will have two "zig-zag" shelves. The Story Sticks once again are critical for getting these right. Jointed with half-blind dovetails at each bend, the component lengths were taken from the story sticks.
A zig-zag shelf cramped up and aligned on the set-out board.
Again using the Story Sticks, a set-out board was made, with the upper right hand section being marked out and drawn exactly to full scale on a big piece of scrap MDF. The half-blind dovetails were cut (by hand of course) and then glued and cramped up. This was placed on the set-out board, and small scraps of wood were nailed to the board such as to ensure that the zig-zag was exactly in the right position as marked on the set-out board. Once the glue is dry and the joints cleaned up, the zig-zag shelf will fit beautifully into the two housings which are awaiting it.
Howzat? A half-blind dovetail with mitred corner on the face edge. Just cramped up. Nice.
You can see from some of the close-up pictures that the edges profiled with a Scratch Stock have worked well. An earlier post told about these. This is to match an existing antique which will share the same room as this cabinet
The stopped housing joints have come up well - thanks to the ever reliable Story Sticks.
The set-out board is really a two dimensional version of a Story Stick. They are a very effective tool for measuring and making components - especially when making furniture I find. I also use them for setting out stringers when building staircases.

The rod measure is just as relevant and reliable today as it was for the ancient Egyptians. Write all over it and add more details, and the rod measure is transformed into a Story Stick.

When building any big piece of furniture or joinery, the Story Stick is one of your best friends.

Saturday, November 3, 2012

Earthcarers recycling pallets.

Today I was involved in a fun Earthcarers activity at the Karrinyup Community Centre. All around the idea of making Christmas presents, there were a range of workshops to chose from, with people making soap, dukkah, dream catchers,  tea-light holders, and more. I was running the workshop on recycling pallets and wooden crates. It was a hoot.
With ute and trailer loaded up with pallets and crate material, I arrived on site.
My demo piece : A "folded pallet" garden seat.
The seat pictured above was a demo that I had made a couple of days beforehand, just to help convey some the wonderful potential of pallets for making stuff. This pallet was from the Czech republic. A folded pallet, as I call the method, required one pallet and just  couple of other pieces of timber pulled from another pallet.

Making a pair of Stilts.
Wheel chocks from a pallet which once shipped a ride-on mower. What better use for them?
Those wheel chocks nailed to the sticks just screamed of stilts. They just needed longer handles. I pulled a longer stick off another crate, drew a diagonal line down the middle, and ripped it down the line.
Cleaning up the cut edges with a block plane.
Nailing the handles on to the wedges (chocks).
One pair of stilts, ready for action.
Testing out the completed stilts.

The Stilts being put through their paces again!
 
Making a garden seat.
A couple made a folded pallet garden seat together, with some guidance from me. They'd never done anything like is before, and were very proud of their creation.
Very quick to catch on to using a saw! 
The finished seat... it's a beauty!!

Test drive! It's definitely a good one. And it fitted in the car ... just.
Making an occasional table/stool.
It all starts with an idea. The timber was found in the pallet pile, there's a discussion about technical stuff, like construction methods, and away we go!
Mum and daughter together, making the occasional table/stool.
The odd bit of input from me, but the project was all her idea...
Another nice job. A great little occasional table/stool.
One proud maker with her completed project. A gift destined for her grandparents.

It was a great day. A couple of kids shaped skateboard tops from some wider crate material, using panel saws, coping saws, block planes and spokeshaves. They did a really good job. Shame I didn't get any photos. Amid the making of stuff from the pile of material, there was also lots of  talk about wood recycling, tool selection and use, talk about the ISPM 15 Mark, and how to pull apart pallets and crates with minimal damage to the timber. The day just wasn't long enough...

There is so much recycling potential in pallets and crates. A bunch of Earthcarers had a good taste of that today.