The big recycled jarrah cabinet continues to take shape. The top sections of the cabinet will primarily be used for the housing and displaying of ceramic art pieces. The bottom sections of the cabinet will house some serious HIFI and media gear, plus as many LPs, CDs & amps; DVDs and as muchother technology as we can creatively fit within the space available.
I am currently working on the lower section of the cabinet. The longer section is quite deep, and the return is very shallow in depth. In this shallow section, behind the pair of doors, will be two storage bins for good old-fashioned vinyls - LP Records. In an effort to maximise the space available, I have been making another pair of bins to hold as many audio CDs as possible. The space left over will be divided into small shelves to hold more CDs. The bins will be hinged to fold outward in order to access their contents, and these bins will be held together by dovetail joints, with Half-blind Dovetails at the front and Through Dovetails at the back.
Marking out and cutting the dovetail joints.
With the sides, ends and faces of the boxes a consistent thickness, marking out the Through dovetail joints requires the use of only one marking gauge setting - approx 1.0mm wider than the thickness of the material. This leaves a tiny bit to clean off after the glue has dried. I am one of those "tails first" woodworkers.
Marking out the Half-blind dovetail joints, two marking gauge settings are required. One will be as above, about 1.0mm wider than the thickness of the material. The other will be the length of the tails - in this case 3.0mm less than the material thickness of 14mm. These tails will be 11mm long.
The tails are always cut in the sides of drawers and containers. With use of marking gauge, sliding bevel, rule and marking knife, the tails are marked out. In this case, there is a difference in the marking out on each side piece, as the front joints will be half-blind dovetails and the back joints will be through dovetails. Regardless, all the tails are cut first. When doing the marking out, the only pencil lines needed are on the ends and one one face. Note on the pic below that the pencil lines off the sliding bevel are marking the tails deliberately longer than required, extending well below the scribe line which marks the base line of the tails. These long pencil lines make it easier to make sure the saw follows the correct angle. No lines re needed on the other side of the piece. The bevel was set at 1:6.
 |
| A side piece held in the vice ready to do the first set of cuts. |
It is always easier for the hand to make cuts vertically than on on an odd angle, so the piece is held in the vice for sawing such that one line of pencil lines is vertical. Once these are cut, the piece is turned in the vice so that next set of lines are vertical, enabling more accurate and consistent cuts to be made.
 |
| A nice little dovetail saw makes the cuts with ease and makes a very tiny kerf. |
A note for the tool junkies amongst you - that beautiful little saw is English, a Marples dovetail saw. Accurate sawing involves carefully cutting down the waste side of the sharp line, to the base line. It is better to over-shoot this line than to come up short of the line. These are hand cut dovetails, and a good look at old furniture/drawers shows that it was common for these lines to go a little beyond the base line. I have no problem with the odd overshoot with this stage of the joint cutting!
 |
| Main cuts for the tails completed, down to the scribed base line. |
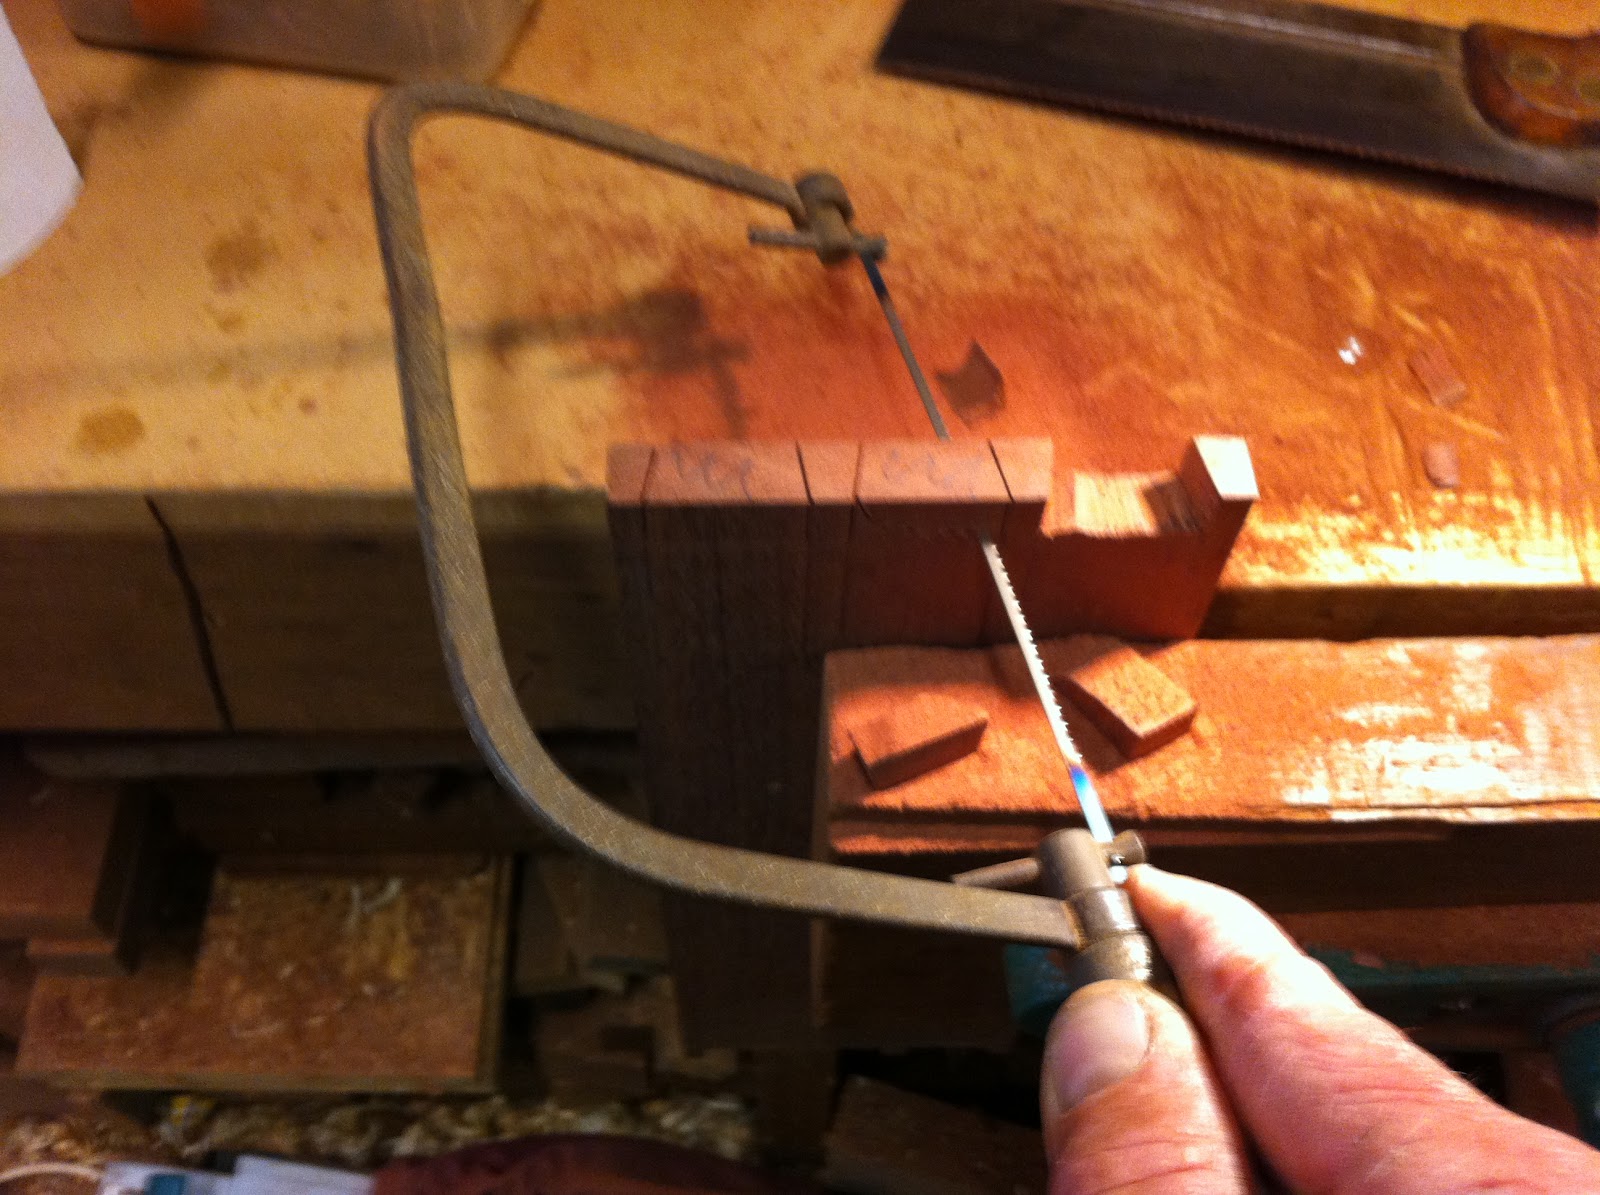
Once these cuts are made, the waste on the corners is cut off as the piece is turned in the vice. Then the waste between the tails is then cut out using a coping saw.
 |
| Use a coping saw to remove the waste down close to the scribed base line. |
Once the waste has been removed from between the tails, it's time to chop down accurately towards the base line.
 |
| Sneak up to the base line with the chisel. The last vertical cut is done with the chisel sitting right in the scribe line. |
I tend to chop out a bit of waste from each gap between the tails on one side, then turn the piece over and do the same from the other side. This reduces the chance of a blow-out on the bottom side to where you are working. It is important to sneak up on the scribed base line, with the last vertical cuts done with the chisel sitting right in the scribe line. If you don't sneak up on it, and you chop into the base line with too much waste still there, the chisel's bevel pushing against the waste will force the chisel back against the base line. The result will be a base deeper in than the base line you can still see across the tails. We are looking for a beautifully straight line for the housings and the base of the tails, defined by the scribed base line. You also need to make sure that there is no high-spot between the two opposite sides. Ideally, we want it to be dead flat - though slightly hollow is OK too. When you do this enough, you develop an eye for it. Meanwhile, if you need to, lay a straightedge or the edge of your chisel across the bottom of the cut-out, to check there is no high spot between the opposing base lines.
 |
| All tails cut and ready for the next stage - to transfer the lines over to mark and cut the pins. |
You may notice that the tails are a different length in the pic above. This is because we are cutting Through dovetails at the back of the box and Half-blind dovetails at the front of the box.
 |
| Transferring the tails to mark the pin positions - half blind dovetails. |
By cramping the side piece to the bench front, or putting it in a vice, I line up the base line with the inside edge of the box front. This should also mean that the scribed base of the housing for the tails, between the pins, are lined up as well. It's easy if I have accurately used the two marking gauge setting in the preparation and marking out of the stock. Like most joinery, it's all in the marking out!
 |
| Extending the pin marking lines downwards to assist accurate cutting. |
Once again, by extending the scribed pin lines down the adjacent face with pencil lines, this enables accurate sawing of the pin sides. This a helpful technique for both Through dovetails and Half-blind dovetails.
 |
| Cutting the pins for the half-blind dovetails means cutting down to the two base lines. |
Remember to always cut on the waste side of the line with these joints. With careful marking out, accurate cutting with a nice fine saw with minimal set and narrow kerf, and good waste removal with sharp chisels, the joints should be able to come together firmly without having to do any paring or modification. That's the aim, anyway!
 |
| First stage of the waste removal, sneaking up until you can chop right on the scribed base line. |
 |
| Second stage: Waste between the pins best removed with the piece held vertically with support behind. |
Half-blind dovetails are much trickier to cut than Through dovetails - but are more satisfying when they come together nicely! You do have to be careful not to split the timber around the pins when chopping out the waste between the pins.
 |
| Sneaking up on the other scribe line of the half-blind dovetail joints. |
 |
| Job done. Waste removed between the pins for the Half-blind dovetail joints. |
 |
| The moment of truth! Hammering the two components together for the first time. |
 |
| Not bad. You can see where a small amount of paring to the top shoulder, to the tail base line, will bring a tight fit on the end of the adjacent tail end. |
With all of the half-blind dovetail joints cut, fitted and pulled apart again, it was then time to cut the tails for the Through dovetail joints.
 |
| Line up the tail base line with the inner face of the other piece, and mark the pin positions with a marking knife. |
 |
| Marking knife marks show pin positions for the Through dovetail joints. |
 |
| Extend the lines down and cut the pins, on the waste side of the lines. |
 |
| Using a coping saw to remove most of the waste between the pins. |
 |
| Most of the waste removed, ready for the chisels to do their work. |
 |
| Waste chopped out. Torn out fibres are not unusual where the chopping meets from each side. |
 |
| Another moment of truth. Hammering the joint together for the test fit. |
 |
| Nice fit! No paring or trimming required. Tight, clean and accurate. Yippee! |
 |
| Prepare purpose built clamping blocks will help pull up the joint during gluing. |
 |
| There's nothing like a bit of squeeze-out from nice tight-fitting joints. Beaudy. |
Only one of the four half-blind joints (pictured earlier) required any paring to improve the fit. All four of the through cut joints required no paring. It is very satisfying when the joints come together firmly first time straight off the saw and chisel.
With vertical space within the cabinet at a premium, I opted to fit the bases in a way that took up the least amount of space. I rebated the base of each box after assembly, with a router, cleaning out and squaring the corners with a sharp chisel. Ply bottoms 1/4" thick were glued and screwed into the bottoms of the 4 boxes.
Fitting the storage bins into the cabinet.
The storage bins for vinyl LP records, the storage bins for CDs and the little CD shelves taking up the remaining space, will all be housed behind a pair of doors.
The two LP bins I have opted to hinge from the front, using "Florentine Bronze" flavoured piano hinge. I only needed just under 900mm (3 ft) of it, but had to buy in in a 3.6m (12 ft) length. The other option was to buy it in a 35m (115 ft ) roll!! ...I settled for a 12 foot length. To prevent the bins from emptying their contents onto the floor, a stop was fitted for each bin.
Fitting the CD bins above these was tricky, due to the limited space. After some planning and experimentation, I have fitted sliding pins which I made specifically for the purpose.
 |
| LP bins and CD Bins will be behind doors. The plinth is sitting on top of the cabinet. |
When the bins are slid forward, they pivot downwards on the pins, giving access to the CDs while cleaning the LPs below. A bit of creative thinking gave me some stops which bring the bins to a final open position. Lifting the bin enables it to be slid back on its pins to the closed and elevated position. A good solution, and worth losing sleep over it, this remedy came to me in the wee hours of one morning as I cogitated over the dilemma.
 |
| One of the two CD bins in the dropped-down open position. |
The pins I made from an M10 threaded bolt, cut 4 into pieces each about 25mm long. Grinding the thread off half of each section, I then cut a screwdriver slot in the end of the threaded part. Having calculated the right location for the pivot point in the CD bins, I drilled a hole and tapped an M10 thread inside the hole with a conventional metal tap. The ground down pin end is just small enough to insert through the threaded hole, and then the pin is turned from inside with a screwdriver, winding the threaded end into the box side until it protrudes into the sliding track the appropriate distance. This method enables the CD bins to be fitted on installation/delivery and be removed at any time as required. It is also the hinging/pivoting method which takes up the least amount of room.
 |
| One of the four pins I made from a piece of M10 threaded rod. |
 |
| One of the two LP bins in open position. It's hinged on piano hinge at the bottom. |
The plinth.
The whole cabinet will be sitting on a 4" (100mm) plinth. When making up the plinth, I opted to do half-blind dovetails on the two external corners. Not what I would normally do, it looks pretty good I reckon. I have seen it before in some antiques furniture, and given this cabinet is being made to fit in alongside other antiques, it is a small detail which will work well - if anybody notices!
 |
| Gluing up the plinth. You can never have too many cramps - or straightedges... |
 |
| One of two dovetailed corners on the plinth. |
More on dovetail joints.
There is a lot written and said about dovetail joints. These days we give them an importance and mystique which would have seemed very strange in days gone by. In the past these joints were just a practical way of creating a strong joint between two pieces of wood at right angles to each other, without the use of metal fixings. That's just what I did for the joints in the plinth, really. It is also a good way to build strong corners in the 4 bins/boxes referred to in this post.
Sure, you can make pretty flash dovetail joints with screaming routers, fancy jigs, and all that. For me, though, the real satisfaction comes from confidently making these joints by hand - and using no filler. It's just good honest old-fashioned hand tool woodworking. Sensual and satisfying.
The other thing I really enjoy is feeling a sense of connection to past generations of craftspeople who have come before me. In fact, that beautiful little dovetail saw I used has the name of a previous owner stamped in the handle. His perspiration and mine mingle in the patina of the handle. I wonder what he made all those years ago as he toiled at his bench with that saw. I share in the legacy of those who came before me. I am but a custodian, of both tools and knowledge - but also of the simple joy to be found working wood by hand. As a custodian, I also have a responsability to pass all this richness to the coming generations of woodworkers. My hope is that you found the info in this story helpful.