Showing posts with label recycle. Show all posts

Tuesday, December 18, 2012

On the wood recycling imperative.

Unless it rots or is eaten by insects, wood can be recycled indefinitely for centuries.
Oooh yeah, what a wonderful natural, sustainable, re-newable, low energy (to produce), high value material wood is. However, it is mind boggling and disturbing how much wood goes into land fill every day.

How could anybody drive past this booty? Almost all from the USA.
Living close to the light industrial area of Belmont/Kewdale/Welshpool, I have the opportunity to readily obtain packaging materials - which come from all over the world. In fact, one company, an importer of big commercial washer/driers, even contacts me periodically when they have a pile of packaging material they think I might like. Most of their stuff comes from the USA, Italy or Belgium. Through them I get sheets of OSB board (which is not in common use in Western Australia), pieces of 1/2" plywood, heaps of cheesy soft pine from the USA, other bits of nice fine harder pines from Europe and North America, and the occasional bonus stuff like bits of American White Oak and other unknown(to me) US hardwoods.
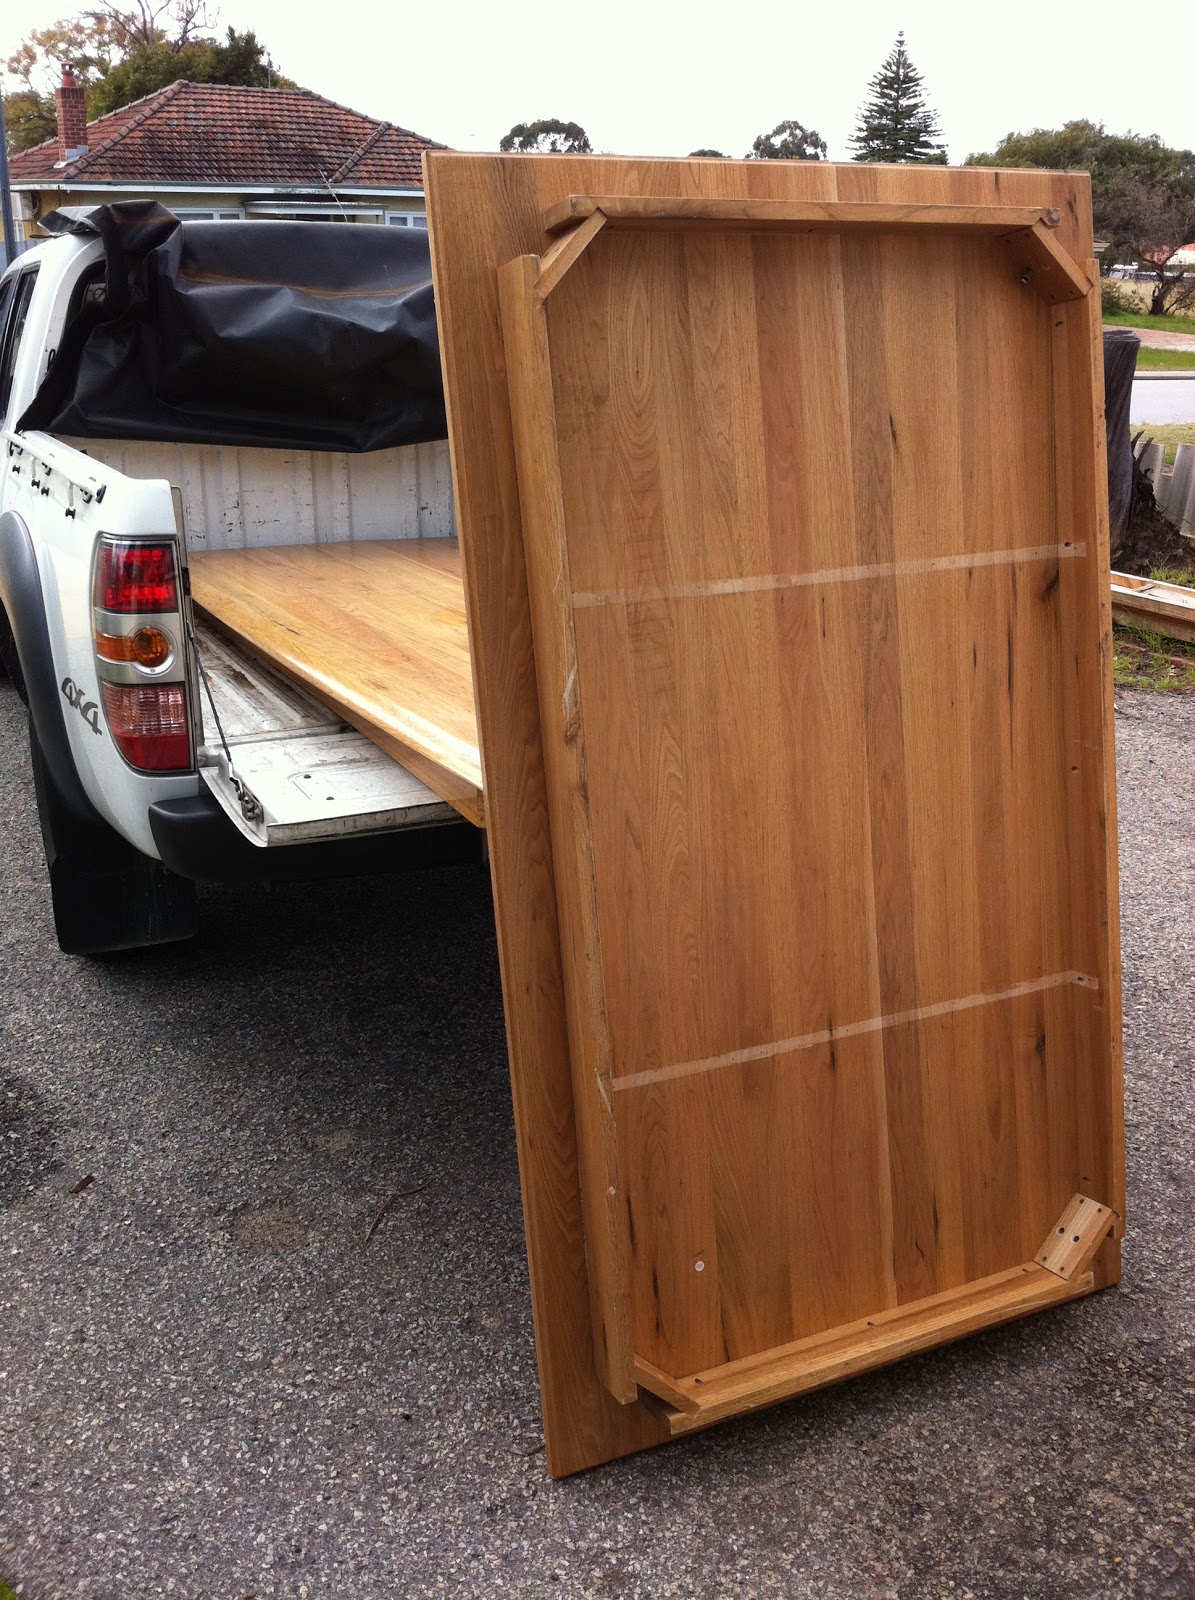
Not just a discarded damaged Chinese made table top... it's all wood waiting to be recycled.
In addition, there are several other places that I cruise past periodically, to see what wonders there are to behold in the packaging piles on the verge outside their warehouses. I keep saws, hammers, pincers and pinchbars in my ute all the time to aid my opportunistic urges.
Hoarding discarded from a building site. 13 full sheets of 1/2" ply and over 100m of 90x45mm structural pine.
All that "northern hemispherical" softwood in the crate. It's over 8' long. Lucky me.
Then there are the verge cleanups, or "bring out your dead" events (apologies to Monty Python). A tragic reminder of our ever wasteful consumeristic lifestyles which are killing the planet, people on set periods in the year can dump all their unwanted stuff on the verge and the local council / waste management authority will come around with endless trucks to pick it all up, crush it into smaller volume in the trucks, and cart it of to be dumped in landfill. It is scary how much of this unwanted modern detritus is wood in various forms. For the wood recycling nuts like me, this is a bonanza. Furniture made from valuable and hard to find timbers, just waiting to be pulled apart and recycled. Offcuts from home renovations. Pieces of timber just needing to be loved. The array is amazing.
Timber extracted from a 1950's dressing table left on the verge.
 Mostly what was called "pacific maple" at the time, Dad tells me.
Sadly, there is also a huge amount of furniture made from nasty MDF and particle boards, which I leave behind. This needs special facilities in order to be recycled. Plywood is good for recycling by me. Many a drawer bottom has found new life as the face of a Cajun Drum, or has become wings on scores of aeroplanes made by kids at festivals.  Tragic as they are, verge cleanups offer a wonderful bounty to the wood scroungers the likes of me.

Treasures obtained from a verge cleanup: timber, drawers, an Oregon bed frame, Jarrah table, and more!
This verge cleanup mentality has created a new form of waste disposal/community recycling, for those with a bit of a conscience. Got a TV or, appliance which works but you no longer need? Stick it on the verge, and somebody might take it home. Good furniture is often redistributed in this way. Local councils hate it, but at least it mostly goes to new homes rather than into land fill. I have put good stuff on the verge myself only to find it next Sunday for sale on somebody's stall at the local flea market. Good luck to them, I say! Some good furniture put out there is best a recyclable resource to somebody like me, depending on what it is made of and how much of it is real wood or plywood...

Pulling the crate carefully apart - the claw hammer and pinch bar at work.
Some nails won't come out - but the wood between is perfectly good.
The energy bound up in my waste is used by a family for cooking.
 
Where does this wood recycling mentality come from?
I'm a babyboomer. I can adapt to new technologies and I had a very good education before the educators lost the plot. I am also nostalgic. In contrast to stereotypical qualities of some other generations, I can think critically, problem solve, and am loyal and reliable as an employee. I also had my formative years in an era of massive social change, and remain committed to changing the world to being a greener, fairer, more just and egalitarian society. This has never left me. There is another great thing about being a babyboomer: my parents were shaped by growing up in the Great Depression and the austerity and hardship of "the War Years". Consequently, to this day they remain frugal, almost spartan, non-wasteful, and hate to chuck things out which may be of use someday or to somebody.  I grew up with those values drummed into me, of course, so I am pre-disposed to being a recycler from birth! My father has spent a lifetime as a highly skilled carpenter/joiner/cabinetmaker. The wood stuff rubbed off on me. He even used to pull apart old typewriters to get the nuts, bolts, washers and springs from them - and anything else which might come in handy one day.

80 year old jarrah, rescued from a renovation skip bin and used to make fine furniture.
My adult children invariably call me a bower bird, a tight arse, or an old hippy. My wife rolls her eyes and asks me Where are you going to put it?, when I bring home another treasure trove of timber. No problem. I know I will use it, or I know someone else who could use it. Besides, teaching woodwork and running woodworking activities all over the place, I use up a huge amount of wood, and need to have heaps on hand. Self talk can be a wonderful thing...

I do believe in human induced climate change in addition to the natural cycles of the planet over millions of years. I do endeavour to be part of an urgent movement for change, even it our politicians are reluctant to face the music. Affluence and ignorance can create very effective smoke-screens. I am blessed with a background which makes it very easy for me to embrace a more frugal, socially and environmentally responsible lifestyle. It's almost a natural position for me. I also know I need to do far more.  We all need, myself included, to tread much more lightly on the earth.
Who ever thought this was a smart idea?
A perfectly good 73 year old house, smashed up by an excavator and carted off to landfill to slowly break down generating greenhouse gasses. No opportunity to recycle the jarrah, bricks, roofing, etc. Replaced by an energy hungry McMansion.

Trees help provide some of the answer. We need more trees (the lungs of the world). We need more timber in use everywhere (it is a very effective way of sequestering carbon). We need to be throwing minimal timber into landfill, instead re-using and recycling it or at the very least burning it efficiently for its energy value - and planting yet more trees to take up the resulting CO2 released in combustion.

Trees give us food, shelter, and that marvelous building construction material, wood. Less steel, aluminium and glass, and more wood. It just takes a change in thinking and in priorities. We can help take the lead by recycling/upcycling packaging timbers and discarded furniture into value added products and uses. We can make furniture which lasts and stop buying cheap "disposable" furniture. No wood is disposable, but almost all of it is recyclable. We just need the will to do it.

This is the wood recycling imperative. I challenge you to join me!

Friday, May 6, 2011

External Stairs from Recycled Timber.

Aahh!... another set of stairs...   Amid all the different types of woodwork I do, what I enjoy about building stairs is the brain challenge they provide - particularly in the planning and setting out phase. One of my latest jobs has been to build a set of external stairs for a client. The task was to plan and build a set of stairs which would fit into a particular space on an existing building which was undergoing significant renovations. The stairs would comply with the Building Code of Australia, and made primarily from recycled jarrah.
That's the space available to build the stairs ... in front of the red brick wall.
View from the top looking down. The structure would have to keep 1.5m off the fence line.

Planning the job.
Having taken measurements on site, it was then down to the planning stage - which always involves doing scale drawings on my trusty drawing board. I have never got into CAD drawing on the computer. I still like the old "Technical Drawing" techniques using a T-Square and pencils on a drawing board.
The first place to start with planning a set of stairs is to know the total Rise - the distance from the top floor level to the bottom ground level. In this case, allowing for the new ground level which will be built up to the same height of the underside of the back door sill, the total rise will be 2.5m. This divides readily into 15 steps, each with a rise of 166.67 mm. That rise fits within ergonomic convention. The next thing to determine is the "Going" - the horizontal depth of each step from nosing to nosing. The accepted rule is: (2 x Rise) + Going = 585 (or up to 625mm.)   I decided to have a Going of 260mm, which fits within the range OK.
With the Total Rise, the number of steps, the Rise and Going all established, the length of the flights can be determined. Drawing this to scale would give me the angle of the stringers and help me to visualise how it will fit within the space. A landing will need to be included, as this divides and separates it into two flights going in opposite directions. There also had to be the required minimum standard headroom where the lower flight approached the ground while coming under the top balcony.
After a lot of drawing, calculating, brain-waves coming in the dead of night, meetings with the client and 3 drawing versions later, I believed we had hit on the answer of how to make it fit in the space available and my client was happy too.

Gathering the timber and starting the construction. 
The treads would be easy. Three sticks of timber dressed to 90 x 45 (and nearly 900 long), with gaps of 8mm between, would give a stair tread of  286. With a 260mm Going, there would be a 26mm overhang of the nosing over the back of the tread below. Nice. These sticks would be ex 4"x2" jarrah. In domestic buildings these were normally used for floor joists, rafters and often ceiling joists. Much of the 4"x2"s I had in my stocks came from a house built in 1930. After seasoning for 80 years, this stuff is dry!

4" x2" material cleaned up and ready to be machined to size.
  As much as possible, gum veins were avoided in the selection process, the timber docked just overlength, de-nailed, scanned with a metal detector, scrubbed down with a wire brush, straightened and squared over the buzzer, and machined to the required 90 x 45 through the thicknesser. Three of these per stair tread.

The stringers were a problem. After searching round the salvage yards, I would be unable to find the jarrah suitable to make the stringers. (Stringers have the treads housed into them and make up the sides of the stairs). So I had to buy the material new. The required 10" x 2" jarrah I purchased was pre-dressed and what they call prime grade. Scary stuff really, as I had to pay over $650 for the 4 sticks I would need in order to make the 2 pairs of stringers! Ouch!

The decking would be easy. By ripping 4"x2" jarrah sticks down the middle, the two halves are each machined to 90 x 20mm.  A number of these I was able to make at 3.2m long, enough to go the full length of the decking. The arrisses were shot off with a block plane, and the decking boards pre-coated with oil.

A 4"x2" piece of jarrah ripped down the middle and opened out. Fantastic colours and interesting nail holes coming in from the edges. It will be machined into beautiful recycled jarrah decking. 
  The top plate or apron of the landing would be ex 8"x2" jarrah, dressed to about 45 x 190mm, and the landing floor joists were ex 6"x2" jarrah from salvage. The landing would be supported by 6 galvanised steel legs set in concrete, and the jarrah posts above would be machined to 100x100mm. These took a lot of hunting down - from salvage yards and other sources. I was fortunate to get 4 posts from an old 6"x6" jarrah power pole! The 120 x45mm handrails would also be obtained from the 6"x2"s.
All nails and other fixings used would be Hot Dipped Galvanised. The finish to be applied to the finished timber would be Cabot's Natural Decking Oil.

The construction process started with making a set-out board of the stringers, giving me the angles and dimensions of the tricky ends of the stringers. This info was then transfered on to the stringer material and the two pairs of stringers were then made at my workshop and pre-finished with a couple of coats of oil.
The Stringers were laid out in pairs, marked out, and the tread housings cut.
The treads were then all made and cut to size ready. The two flights would be too heavy to lift if assembled, so I decided to do the assembly on site. With the flight components made and the landing materials organised, I moved to the site to build the landing. When the setting out on site was completed, the holes were dug for the steel posts. Using lots of big cramps and big sticks of timber, all the prepared posts were suspended in their holes, plumbed and held in the right positions. My son Ben was giving me a hand that day, and it was a big day! Ben operated the electric cement mixer and we did the concreting job. Six posts, rock solid. The following day I would do the concreting of the final two, supporting the base of the lower flight.

One of the steel posts suspended and cramped in position in its hole, awaiting the concrete.

The top stringers were also suspended/supported  in place to ensure the landing position was correct. While working from the drawings, sometimes it is good to check "in the flesh". 

The lower flight stringers fixed in place, with metal spiggots at the base set in concrete. The concrete will later all be buried under sand and brick paving.
 Completing the landing.
With the steel posts set in concrete and the landing apron or top plate being bolted to the steel as the jarrah posts were inserted into them, the floor joists were then added. These in place, the decking was then nailed down.

Decking nailed down and completed. That's a cake of soap on the stair tread - to lubricate the 4" galvanised nails used in landing construction.

Top flight treads fitted in place. Handrails and balustrading still to be added.

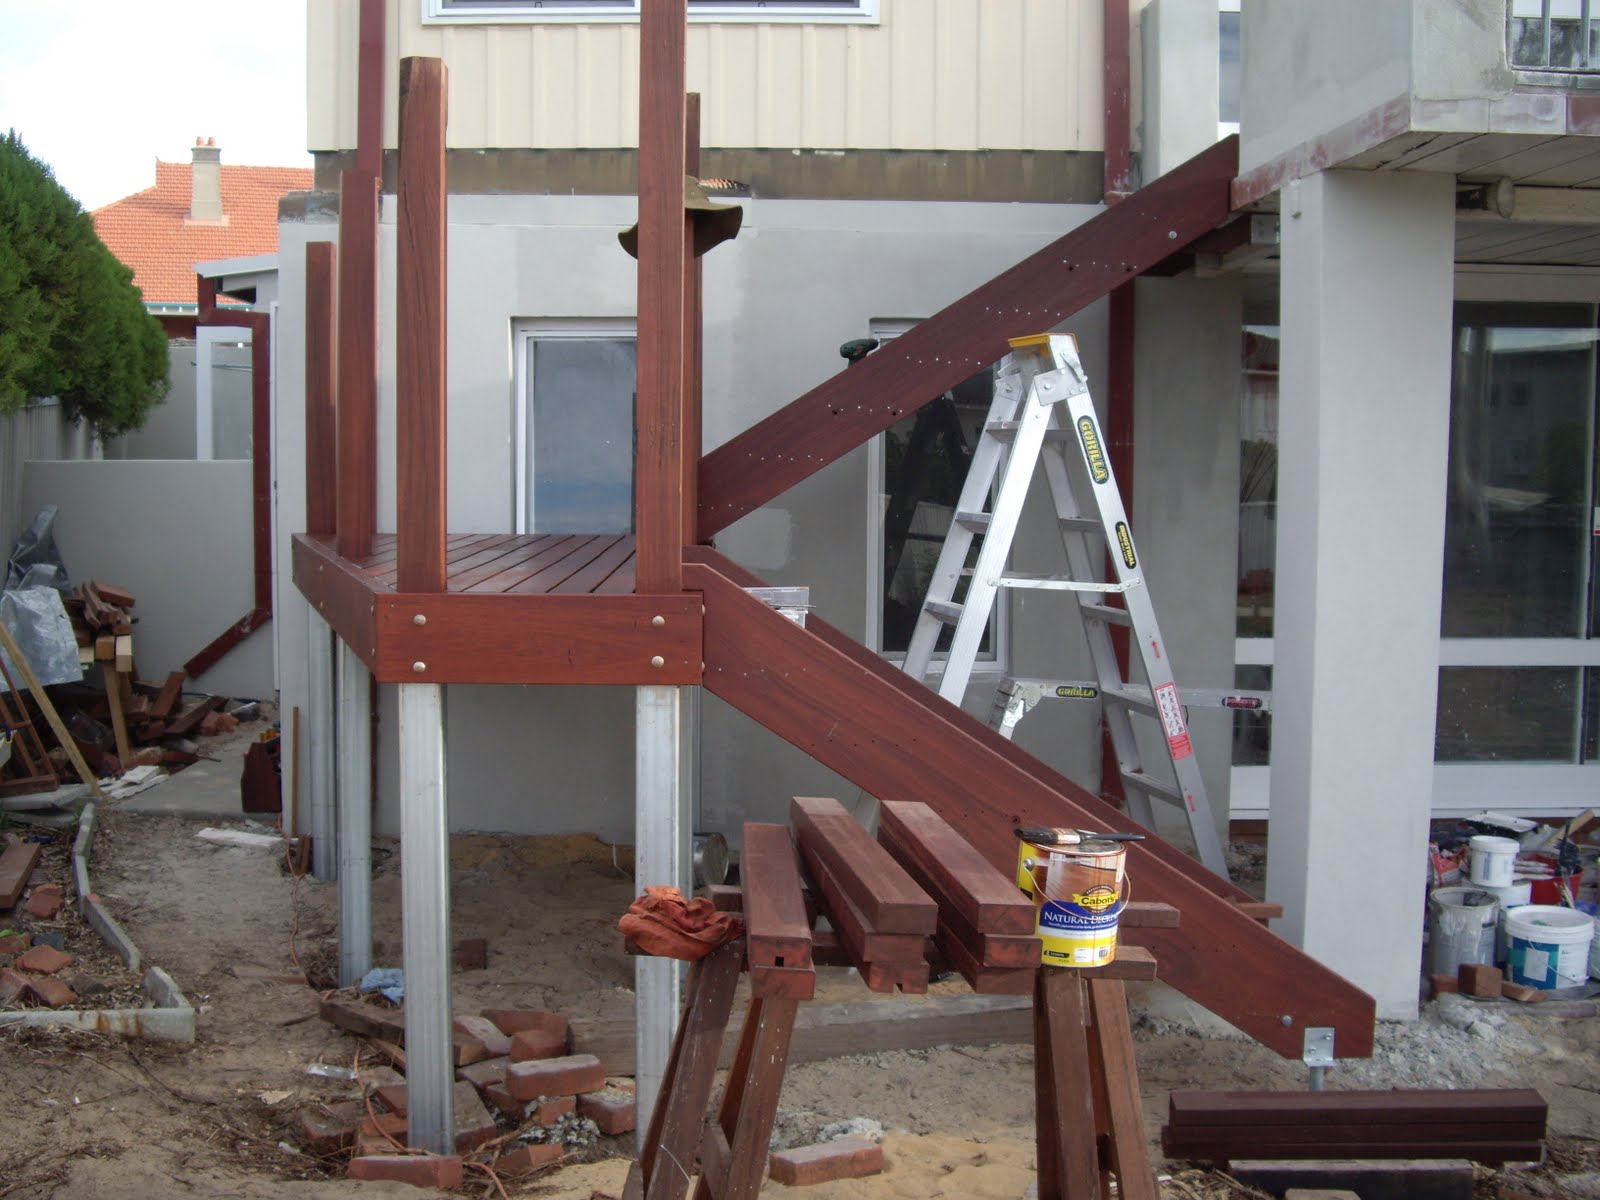
Landing done. Stringers in place, most treads installed. Time to cut posts to height and add balustrading. 
The jarrah posts were installed "over-long", so that they could be cut to a finish height after the transitions had been worked out - ie. where the flight handrails meet the landing handrails at the newel posts. These transitions would be calculated and modified ensuring a smooth transition as well as compliance with the minimum requirements under the Building Code of Australia (except for the lack of infill under the balastrading, which someone else would be doing.) While the scale drawings would give a good indication, the measuring and marking of the real thing in place would be most accurate. 

Making and Fitting the Handrails.
With the landing decking completed, it was time to get on with the handrails. The customer hadn't quite decided what balustrading to have - but will probably have stainless steel horizontal wires. That's someone else's job. Other than the posts below, I don't do steel. Out of interest, to comply with the BCA, balustrading must not be able to have a 125mm (5") sphere pass through any part of it. Horizontal handraisl must be a minimum of 1000mm high, etc. At the commencement of the job we had agreed I would only to install the newel posts and handrails, so that was what I was doing. I had made the handrails from ex 6"x2" jarrah ceiling joists. Nice straight sticks too, which I had machined into 120 x45mm. This gives a 10mm overhang on each side of the 100mm posts.
One of the newel posts at the transition from landing to top flight. That's the tenon on top awaiting the handrail which will be housed onto it.
The posts were cut to length with tenons on top, and the corresponding housings cut in the underside of the the hand rails. The interesting part was the angled corners of the landing handrails. In one of these brainwaves I have in the dead of night, I resolved how to do the joint... a beautiful mortice and tenon joint. In fact, a stub tenon with a haunched tenon either side of it. And it worked a treat!. All this was done on site. My trusty tenon saw cut the tenons on top of the all the posts, and the tenons on the ends of the handrail returns on the landing. Good to see a saw live up to it's name. I was going to take photos of the joint components before I glued it up and fitted it to the posts ... but once again I was so hooked into what I was doing that I forgot and just assembled and glued the joint. Sorry about that...  Love that glue - Titebond III.

Nice mortice and tenon joint! 27 degrees off 90. There's a long haunch and a stub tenon in there.

That's the other corner. Another very tidy joint, the same as the other end.
Anyway, I was very pleased. The haunch mortice was cut with a slot cutter in the router, and the deeper mortice for the stub tenon was chopped by hand. The tenons were all cut by hand. It was a winner.

Job completed.
When I had completed construction, I brushed the whole structure down and gave it one more final coat of the oil finish. It looked like a million dollars. I then gathered up my tools, cleaned up the site, took a few pics, and drove away. Satisfaction is such a nice warm feeling. Here's a few pics:


View from the top looking down and across.

View down the top flight.

View of the bottom flight from above.

The ground level is yet to be built up and brick paved. The height of the bottom step allows for this. 

This pic puts the stairway in context. Soon there will be a swimming pool in the foreground!

View from the ground level back door.The galvanised steel legs will be painted a colour similar to the jarrah. 
On the joys of jarrah.
Jarrah is such a beautiful timber, and I am lucky that I have been working with it all my life. Jarrah (Eucalyptus marginata) is only found naturally in the southwest of western Australia. I understand there is only about 6% of the original forest remaining. Such a significant timber since European colonisation began here 1829. Until a couple of decades ago, in Western Australia just about every part of a timber framed house from the stumps to the ridge piece were all made from jarrah. It is a is very strong structural timber, very durable in the weather and in the ground, and a very high quality furniture material. Beautiful grain and rich reddish brown colours. The all round dream timber. Yep, I love the stuff.

Much of this stairway was made from recycled jarrah. This material had come from an assortment of buildings and other uses, much of it from a house which was built 80 years ago. All over it, there are the echoes of the former lives of this timber. Rows of nail holes along a tread nosing, testifying to a past life as a floor joist, with the nail holes even showing the width of the old floorboards which were once nailed to it. A couple of old checks in the side of a newel post, speaking of a former life as a verandah post on a building. The residual jaw marks from an old pair of floor cramps, telling of the time that piece of stair tread was once a floor joist. Other pieces were once rafters or ceiling joists, and the spacing of nail holes can often speak of these former lives. It is the echoes of the former lives of this timber which is so fascinating in something made from recycled timber. It is also why I don't fill the old nail holes. Let them speak.

Working with pre-worked timber also gets me thinking about the tradesmen who worked this timber when it was green. That's how these building were always constructed. Green jarrah, while heavier, is easier to work with - and easier to nail. No need to pre-drill the nail holes like I had to! These guys built the houses only with hand tools. There were no power tools. Most of the saw mills were steam driven, and life was different. Simpler times, moving at a slower pace, when tradesmen took pride in their tools and their work. It wasn't just about money and having a job - it was a vocation. An identity. A way of life.

I tip my hat to those guys, and hope I did them proud in the way I re-used the timber they first worked.

Monday, September 20, 2010

Earth Carers Woodworking Program a Great Success!

A mob of Earth Carers came together in July at Perth City Farm for a 4 day wood working program with a focus on the recycling of timber which was previously destined for land fill.  I normally run these kinds of workshops with a maximum of 12 people, but this time I had around 20 people in each session! This took a fair bit of extra organisation, but Perth City Farm was a great venue where there was plenty of room for  group sizes that big.

The Workshop Program looked like this:

Thursday 22nd July 2010: 5.30-9pm    Make a Kitchen Chopping Board.
A great opportunity to learn and use some basic woodworking skills, particularly using saws, planes and scrapers. Turn some recycled/re-used timber into a beautiful and functional kitchen heirloom!
Friday 23rd July 2010: 5.30-9pm    Design and Make a Wooden Spoon.
Take some recycled/re-used timber, imagine a beautiful and unique spoon, and then create it using a range of traditional woodworking hand tools!
Saturday 24th July: 10am-4pm    Bring new life to old tools.
Here is a chance to bring along some old tools, and learn how to restore them to good condition. Do you have some old tools that belonged to an old family member? Got a bargain from a garage sale? Do the planet a favour - Don’t buy a new cheap tool when a better quality old tool can be brought back to life! We will repair, sharpen and rejuvenate a range of tools including planes, chisels and saws – and then we will use those tools to create some nice stuff out of recycled/re-used timber. Note: This workshop will involve learning the safe use of bench grinders and other electric sharpening equipment.
Sunday 25th July: 10 am- 4pm     Create something beautiful from timber once destined for landfill.
Let your head go! From the array of recycled/re-used timber available (and any you bring with you), create something beautiful, lasting, decorative and/or functional. You will learn to use some of the wide range of traditional woodworking tools which are provided, and take home your wonderful creation. If you are stuck for ideas, Greg will have plenty of suggestions, tips and techniques. Ah… you can hear, feel, and smell the wood as you work it…

Gathering the resource.
The morning of Day One, I drove around in the City of Joondalup filling my ute with a vast array of timber gathered from a vergeside rubbish collection. These "bring out your dead" events are both a bower bird and recyclers' paradise and a terrible reflection of our wasteful consumerism. 

I had also obtained from a furniture importer several cartons of furniture which had falled from a great height from a forklift.While the cabinets inside were damaged, there was plenty of useful timber and fittings in there.
This was further supplimented with some packaging materials which had been picked up from the verge of  the light industrial area near my home, and some other materials I had collected from a renovation site.  Did someone mention bower birds earlier? A treasure trove of timber viewed as waste and previously destined for land fill - now to be put to new uses...

A few pics from the workshops.
The following gallery shows some of the participants in action as they learned to use some basic hand tools and used those tools create their projects. We weren't too fussy about sticking to the script. If you just had another idea in your head of what you wanted to make, then you could just do it!

It was a fun environment to be in, with lots of people busily putting their energy and enthusiasm into their projects. Some found a few muscles they'd forgotten about (hand planing and sawing are good for that), some brushed up on skills they hadn't used for many years, and many gained some new skills and understandings they had never had the opportunity to develop before...  

Thanks to the three Regional Councils (Waste Management Authorities) who jointly funded the event, to the amazingly wonderful Peg Davies for arranging it, to Perth City Farm for providing the great venue, to Tracey and John for assisting me over the weekend, and of course to the Earthcarers who participated with such enthusiasm and passion for a more sustainable and less wasteful world.

Friday, May 28, 2010

Eco-Woodworking at "the Great Re-Skilling".

I recently spent a whole Sunday doing woodwork with both kids and adults concurrently at "The Great Re-skilling" which was held at CityFarm in Perth Western Australia. It was a big day, and heaps of fun.
Organised jointly by Permaculture WA, Transition Towns WA and Perth City Farm, the Great Re-Skilling was a day dedicated to reclaiming sustainable lifestyles, creating resourcefulness for a low carbon future, building community and shared vision and celebrating 30-plus years of Permaculture in WA.

Why “Eco-woodwork”? (not my term, but it fitted pretty well.) I guess it relates to the fact that all of the timber we used was waste – recycled and pre-used, offcuts from building sites (the pine), plywood from old drawer bottoms and packing boxes, jarrah from old pergolas and wall framing, etc. Also most of my benches are made from recycled materials (mostly jarrah), and all of the work at the event was done using hand tools and good old fashioned hand skills. No electricity, just muscle combined with a few tool techniques I passed on to the participants. It was a real hit. I had all my benches there and one volunteer helper. Thanks Liam!We were flat out, with 12 kids vices and 12 adult vices, but often more than 12 kids on the go at any one time. A very popular corner of the gathering...


Most adults made wooden spoons, while learning to use a range of traditional hand tools including gouges, spokeshaves, rasps, english bowsaws, coping saws, scrapers, mallet, panel saws and saw stools. The kids mostly used hammers and nails, though many also used tenon saws, and some even  used hand drills and a brace and bit.

I love these pics of a couple of kids using tenon saws with bench hooks. Great technique!
While the adults made wooden spoons at their benches, and the kids made whatever took their fancy from the pieces of wood available to them. I had a mountain of bits of timber for them to chose from... Pieces of pine, pieces of ply, bits of broom handles, etc. Fortunately I managed to take a few pics with my mobile phone amid the chaos.
There were so many wonderful parent/children moments throughout the day. It was delightful. Some parents held stuff for their kids, others succumbed to the temptation to take over!
It was the first time my new small kids benches have been road tested (other than by my grandkids Ronnie and Katana), and these proved to be a real winner from my perspective. It was also the first time I had used my short legs on my normal benches. They went very well too. It was a good opportunity to learn a few more things about doing this stuff with young kids - which is something I am hoping to do a lot more.


There seemed to be a theme of airplanes and spaceships amongst the creations made my the kids.


The smile tells it all...