.jpg)
The bookcase is being made in three sections, each 1100mm (34 inches) wide and just under 2700mm (9 feet) high, and the rear of the whole bookcase will be panelled with Vee-Joint Lining Board, running vertically. All I have to do is make the stuff, polish it, and fix it in the backs! Here's how it is done...
Step 1: Start with suitable timber.
To create lining boards with a 75mm (3 inch) cover, I'll first be making sticks which are 80mm x 12mm. These will be rough cut to 2.7m (9 feet) long. I'll need about 45 of these to panel the whole back of the bookcase. The starting timber needs to be able to produce these 80 x 12mm sticks 2.7m in length.
 |
| Don't be fooled by the old paint and grime - it's all quality jarrah under there. |
When cutting up jarrah logs, the sawmills used the standard dimensions as nominal measurements. There was always some variation, and further variations later in the shrinkage during drying and the grain orientation in each stick. Hence salvaged 4"x2"s can vary in actual width from 3.5 inches to 4.5 inches, and in thickness from 1.5 inches to 2.3 inches. These actual dimensions - particularly thickness - will impact on the recovery rate, as will the straightness or otherwise of each stick! Ideally we want to start out with straight sticks which are also a "fat" 2 inch. These will give the highest recovery rate.
Step 2: Select and dock the sticks to length.
A fat 2" will enable me to rip three boards out of each stick if it is straight enough. That's ideal. Each stick was de-nailed, checked with a metal detector, and scrubbed down with a wire brush. Then the best 2.7m length possible was docked out of each piece of timber. Too much bow, spring or wind, and it would be rejected for the purpose at hand. Likewise for unacceptable defects like big shakes, shattering, and other bad damage. Nail and bolt holes are OK. They'll add to the character.
Step 3: Machine a flat face on one side of each stick.
Using my trusty old Woodfast buzzer ("Buzzer" is the old Australian term for "planer"), I machined a flat broad face on each stick. Flat means no wind (twist), bow (bend in the face), or spring (bend in the edge). This flat face would later be placed against the fence of the table saw.
Step 4: Rip the boards from each stick.
Ideally, if starting with a fat stick, and not having to remove too much material in order to flatten the initial face, the aim would be to get 3 boards from each stick. That's maximum recovery. The table saw was set to cut 15mm rips from each stick. Some would give me 3 boards, others would only give me 2.
 |
| The pile of 15mm thick boards growing... |
Step 5: Machine the boards to the required 12mm thickness.
With the pile of sawn sticks machined up, it was then time to dress the sticks to the desired 12mm thickness.
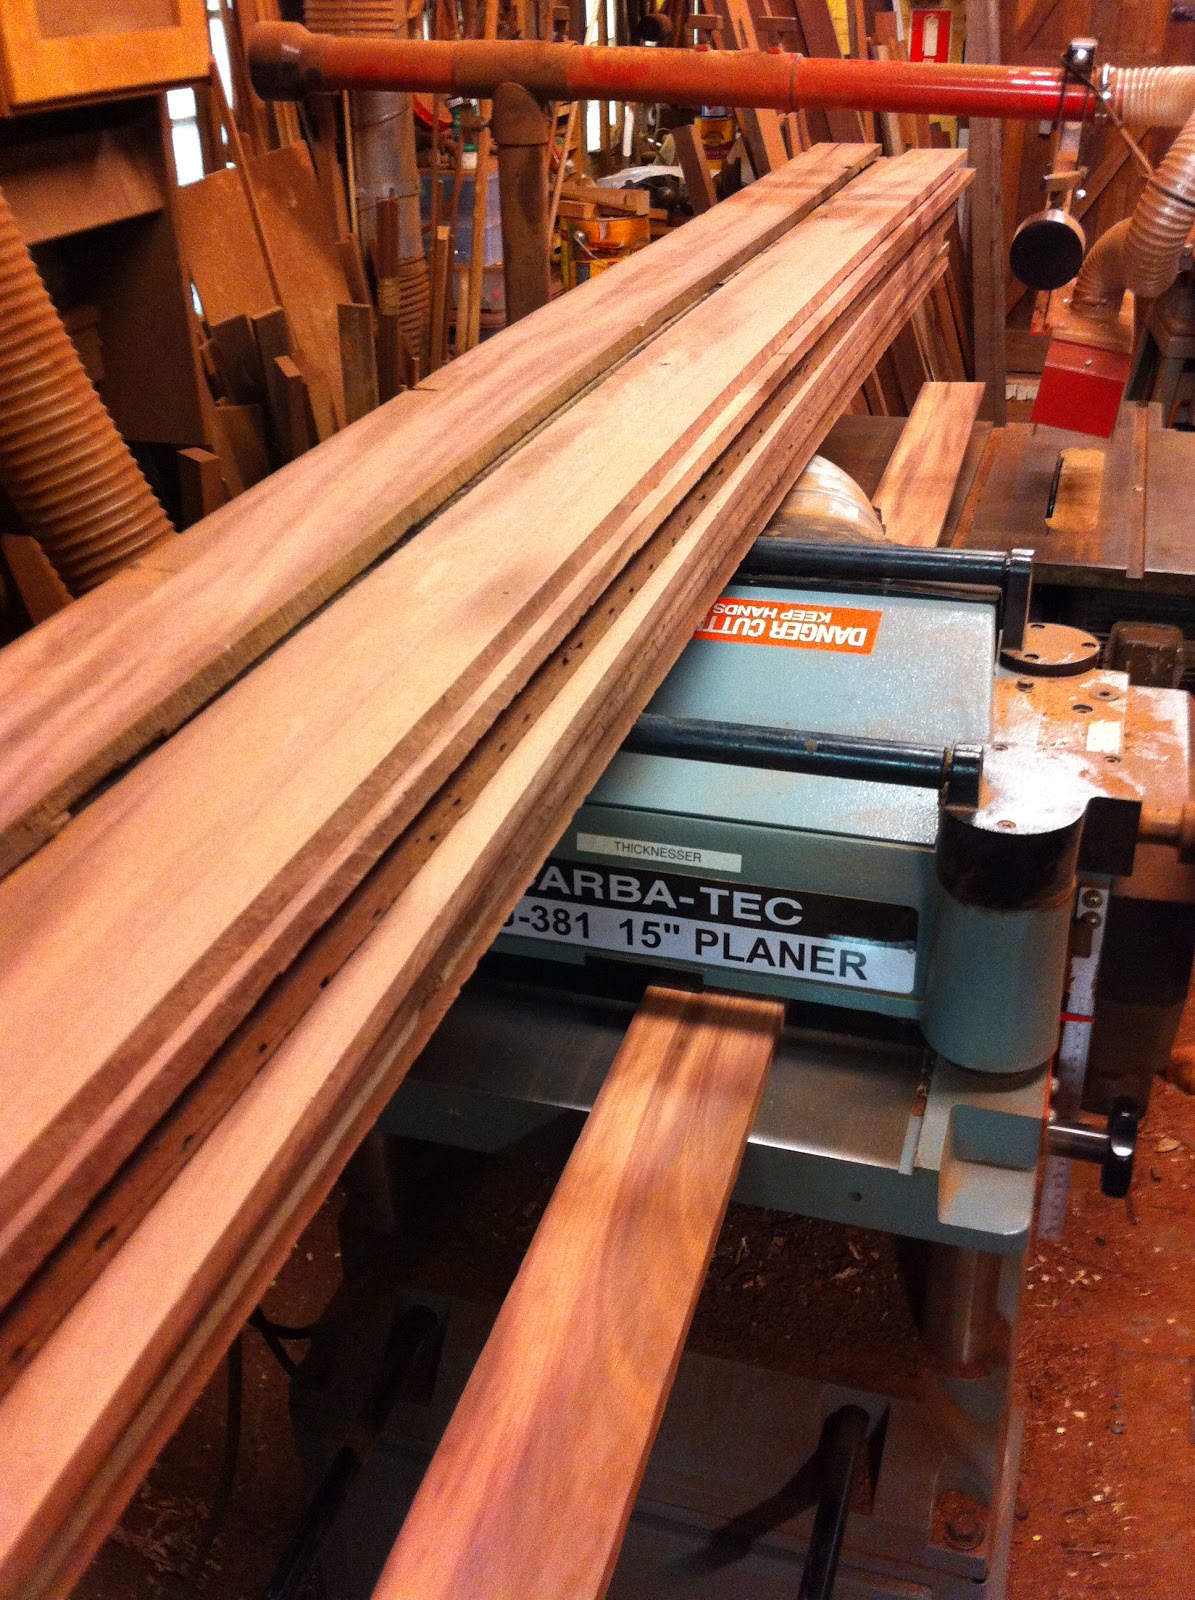 |
| Running the sticks through the thicknesser. |
Step 6: Straighten one edge and rip to width.
With the sticks run to the finish 12mm thickness, it was now time to run them to width. An edge was straightened over the buzzer, and then this straight and square edge used against the fence of the table saw to rip the sticks to the required 80mm width. The result was a nice pile of straight sticks ready to get the tongues and grooves machined on the edges.
Step 7: Cutting the grooves.
The fence of the table saw was set up to create a saw cut down the centre of the buzzed edge. A piece of MDF was cramped onto the table up against the fence, and the rotating saw blade wound up through the MDF, to the required height. In this way a zero clearance was throat was created. Additional pieces of timber were cramped in place to create a temporary jig, which would ensure the sticks remained vertical and hard up against the fence.
 |
| The jig set up on the table saw for accurate cutting of the grooves. |
 |
| One of the sticks having the groove machined. |
Step 8: Cutting the Tongues.
Cutting the tongues is a two stage process. In order to get a nice clean shoulder, firstly a shallow cut is first made square from the faces, to define the base of each tongue.
 |
| Set up for machining the base of the tongues. |
With these base cuts made, the second stage is to define the thickness of the tongue, by machining in from the sawn edge. We are effectively machining two mini-rebates from each side!
 |
| Second stage in machining the tongues, cutting from the edge. |
Step 9: Creating the Vee Joints.
Vee Joints are a wonderful visual tool. The Vee joint visually hides any variations in the facial planes of adjoining boards, visually hides gaps between the edges of adjoining boards (eg. in shrinkage) and creates a nice tidy look. It is a winner, and has the added advantage of allowing for the expansion and contraction of timber panelling over big (and small) areas with changing moisture content in the environment.
The tool for the job is the rusty block plane. I used two block planes, one set fairly course, to remove material quickly, and the other set fine to do a nice clean finishing cut. It's pretty straight forward. Holding the plane at 45 degrees, you cut a chamfer. In order to make the chamfer consistent, work consistently. I did two full length cuts with the course plane, and one full length cut with the fine set plane. Three runs for each champfer. As the back of the panelling will be against a wall, I only did the face of each board - one on the groove edge of the face and one on the tongue edge of the face.
 |
| You get a good system going with the plane swapping. A nice pair of No.110 Block Planes. |
 |
| There it is... a pair of lining boards freshly made. |
Using a belt sander with a P120 belt is the quickest way to sand 45 sticks 2.6m long! After I belt sanded each face side, I then finished the process by hand sanding each board with 180 grit paper. These boards will be in the back of the bookcase, so there is no need to go finer to P320 or P400 in this case. With the finish sanding done, it was time to polish the boards.
The importance of pre-polishing each stick is to seal it (it is winter here at the moment) and to ensure there will be no strips of light coloured un-polished timber visible if there is shrinkage during summer. Seeking a nice a low sheen finish, I used Cabot's Danish Oil, brushed on and wiped off - two coats, one day apart. The back must be coated as well to ensure the boards are sealed properly.
 |
| A few of the lining boards drying after polishing. |

Following these ten steps is a great way to readily create beautiful Vee-Joint Lining Board from any timber on hand. Starting with that ugly looking pile of floor joists and rafters, you would never know such a thing was possible ... unless you've done it many times before as I have.